
Desserts
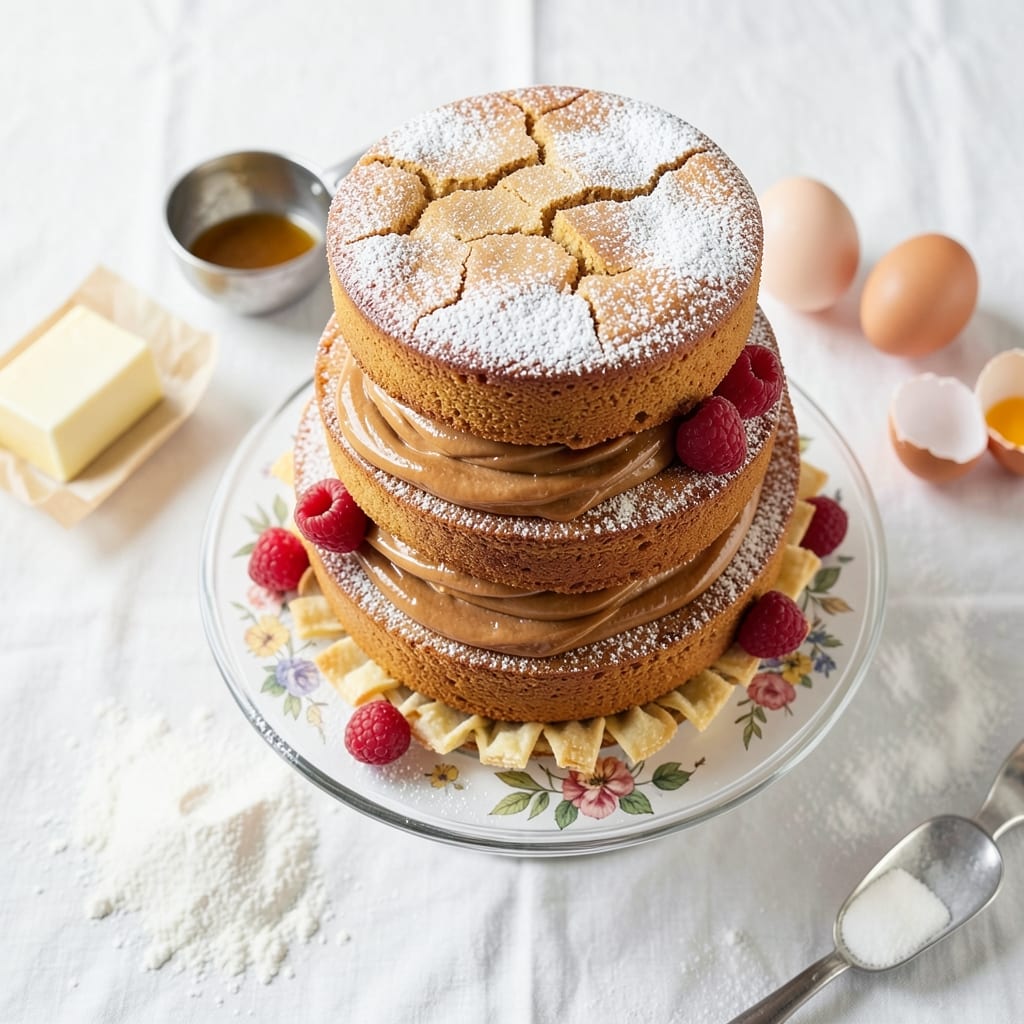
This 3-tier cake recipe from scratch transforms your kitchen into a bakery with layers of buttery sponge and velvety frosting that stack like a professional's. The secret lies in precise baking—even layers that cool perfectly flat, and a foolproof assembly method using dowels for stability. I've baked enough cakes to know that patience in the cooling process prevents cracks, and a crumb coat ensures that final buttercream finish stays flawless.
What sets this recipe apart is the balance between simplicity and elegance—no fondant required, just rich vanilla buttercream that pipes beautifully and holds its shape. Each tier builds on the last, starting with a light-as-air sponge cake baked in rounds, then filled with layers of jam or cream before the final buttercream crown. The tools you'll need—a turntable, cake boards, and piping bags—make the process smoother than you'd expect.
By the time you're done, you'll have a showstopping cake that's sturdy enough to slice without collapsing, with smooth sides and a professional-looking finish. The buttercream flowers or simple piped rosettes add that final touch of sophistication without the complexity. This is the kind of cake that makes guests ask, "Did you bake this yourself?"—and the answer will be a confident yes.
Perfect for weddings, anniversaries, or just because, this recipe scales to any size while keeping the technique manageable. Let's get started on creating a cake that looks like it came from a patisserie—but with the satisfaction of making it entirely from scratch.
Ingredients for 3 tier cake recipe from scratch
Twelve ingredients transform your kitchen into a bakery with professional-tier elegance.
| Ingredient | Amount | Notes |
|---|---|---|
| All-Purpose Flour 🌾 | 4 ½ cups | Sifted for light texture |
| Unsalted Butter 🧈 | 2 ¼ cups | Room temperature, European preferred |
| Granulated Sugar 🍚 | 2 ½ cups | Superfine for smoother texture |
| Large Eggs 🥚 | 12 whole | Room temperature, separated |
| Vanilla Extract 🌿 | 2 tbsp | Pure Madagascar bourbon preferred |
| Baking Powder 🍞 | 1 ½ tsp | Aluminum-free for stability |
| Salt 🧂 | ½ tsp | Fine sea salt preferred |
| Whole Milk 🥛 | 1 ½ cups | Room temperature |
| Powdered Sugar 🍚 | 8 cups | For buttercream, sifted |
| Heavy Whipping Cream 🥛 | 2 cups | Cold, heavy cream preferred |
| Vanilla Bean Paste 🌿 | 2 tbsp | For deeper vanilla flavor |
| Jam or Preserves 🍓 | 1 ½ cups | Raspberry or apricot preferred |
| Cake Dowels 🪵 | 12 pieces | 4-inch length for stability |
| Parchment Paper 📄 | 1 sheet | For cake boards |
| Food Coloring (optional) 🎨 | 1 tsp | Gel-based for vibrant color |
The butter and flour are non-negotiable here—European-style unsalted butter from Plugrá or Kerrygold gives that rich, velvety texture, while sifting the flour ensures a light-as-air crumb. If you're feeling fancy, King Arthur or Gold Medal flour is your best bet for that perfect rise. Room temperature eggs are critical; they whip up fluffier and prevent dense cakes. For the vanilla, Madagascar bourbon extract adds depth, but if you're splurging, a scraped vanilla bean makes all the difference. The powdered sugar? Domino or C&H brands stay fine when sifted—no clumps in your buttercream.
No powdered sugar? Granulated sugar sifted with 1 tsp cornstarch works in a pinch, but trust me on the real deal for that silky finish. Jam options are endless—raspberry or apricot preserves add that fruity contrast, but even store-bought strawberry jam does the trick. For the cake dowels, Amazon or baking supply stores sell them in bulk, but you can also use wooden skewers in a bind. The heavy cream must be cold for the buttercream; Store-brand or Land O'Lakes heavy cream works just fine, but don’t use whipping cream. And if you’re feeling artistic, gel-based food coloring keeps your buttercream vibrant without altering the texture.
Store your butter and eggs on the counter for 1-2 hours before baking—room temperature is key. The cake layers keep beautifully in an airtight container for 3 days at room temperature or 1 week refrigerated. Buttercream? It’s best made fresh but can be refrigerated for 5 days—just whip it back to fluffiness before using. For assembly, work in a cool room to prevent the buttercream from melting. I always make a test cake first to practice piping and stacking—lessons learned save time later.
Why You'll Love This Recipe
- Let’s talk about the real MVP: the second day. Sliced cake stays moist, and the buttercream? Even better cold. I’ve sent pieces to work in Tupperware, and no one’s ever complained. Plus, you’re using pantry staples—flour, sugar, eggs—so it’s budget-friendly without sacrificing wow factor.
- Buttercream Bliss: I’ll be real—this cake’s secret weapon is the classic buttercream. Creaming that unsalted butter with sugar until it’s light and fluffy? Pure magic. The vanilla extract ties it all together, giving every bite that warm, nostalgic taste that makes people sigh.
- Tier-Turning Simplicity: No fancy equipment needed. I’ve built this with basic pans and a stand mixer (or even hand-whisked batter). The layers come together like puzzle pieces—no stress, no last-minute scrambling. Even if your hands are sticky from frosting, the process stays smooth.
- Birthday to Brunch: Between us, this cake works everywhere. Cake for a 5th birthday? Check. Dessert after a holiday brunch? Done. Need to impress at a potluck? It’s your go-to. The neutral base lets you customize—add citrus zest, chocolate ganache, or even a boozy filling. Flexibility like this is rare.
Step-by-step instructions for stacked elegance with buttery layers
Here's how to create three perfect tiers that rise beautifully and hold their shape.
Prepare the Cake Batter for Light, Airy Layers
In a stand mixer fitted with the paddle attachment, cream together the 2.25 cups unsalted butter and 2.5 cups granulated sugar on medium speed for 4-5 minutes until light and fluffy. Scrape down the sides of the bowl to ensure even mixing. This step is crucial—you're incorporating air that will help your cake rise beautifully.
Add the 12 whole large eggs, one at a time, mixing well after each addition. Then stir in the 2 tbsp vanilla extract and 1.5 cups whole milk. In a separate bowl, whisk together the 4.5 cups all-purpose flour, 1.5 tsp baking powder, and 0.5 tsp salt. Gradually add the dry ingredients to the wet mixture, mixing on low speed just until combined—overmixing develops gluten and can make your cake dense.
Bake Three Perfect Cake Tiers
Preheat your oven to 350°F. Divide the batter evenly among three 8-inch round cake pans lined with parchment paper. Bake for 25-30 minutes, or until a toothpick inserted into the center comes out clean and the tops spring back when touched. Rotate the pans halfway through baking for even browning.
Here's the thing—don't open the oven door during the first 20 minutes of baking. The sudden temperature change can cause the cakes to sink. Let them bake undisturbed until they're golden brown and fully set. Once done, remove from the oven and let cool in the pans for 10 minutes before transferring to a wire rack to cool completely.
Create Silky Vanilla Buttercream
In a large mixing bowl, beat the 2 cups heavy whipping cream and 2 tbsp vanilla bean paste together until soft peaks form. Gradually add the 8 cups powdered sugar, mixing on low speed until combined. Increase the speed to medium and beat for 3-5 minutes until smooth and fluffy. This buttercream should be thick enough to hold its shape but still pipeable—if it's too stiff, add a splash of milk to loosen it.
For extra flavor, you can tint the buttercream with 1 tsp food coloring if desired. I like to divide the buttercream into portions and tint them differently for a marbled effect when layering. Keep the buttercream chilled until ready to use—this helps maintain its structure.
Assemble the Three-Tier Cake with Stability
Level the tops of each cake tier with a serrated knife if needed. Place the 12 cake dowels vertically into the bottom tier, spacing them evenly around the edges. Spread a layer of buttercream on the top of the bottom tier, then place the middle tier on top, pressing down gently to secure. Repeat with the top tier, making sure each layer is perfectly centered.
Spread a thin layer of buttercream on the sides of each tier to create a smooth base for decorating. Use the remaining buttercream to cover the entire cake, creating a smooth surface. For extra stability, you can also insert additional dowels between the tiers if needed. Chill the cake in the refrigerator for 30 minutes before decorating to help it hold its shape.
Fill and Decorate with Jam or Preserves
Once the cake is fully chilled, use a serrated knife to create a thin layer of buttercream around the edges of each tier. Spread 1.5 cups jam or preserves evenly between the layers, pressing down gently to ensure even distribution. This step adds a beautiful pop of color and a delicious fruity contrast to the rich buttercream.
To finish, you can add decorative elements like fresh berries, chocolate shavings, or piped buttercream flowers. The key is to work quickly—once you start decorating, the cake will begin to warm up and soften. Serve immediately for the best texture and presentation.
Pro Tips For Making 3 Tier Cake Recipe From Scratch
- Weigh Your Butter: Butter volume changes when scooped—use a kitchen scale for 227g (1 cup) per recipe. I learned this the hard way when my cakes turned out dense and greasy; precise measurement makes all the difference for that light, airy crumb.
- Room Eggs First: Take eggs out of the fridge 30 minutes before using—room temperature eggs blend smoother and whip up faster. Cold eggs? They’ll fight you, and your batter will be lumpy. Trust me, this small step saves time and frustration.
- Don’t Overmix Batter: Mix just until combined—overworking the flour develops gluten, which turns your cake into a chewy brick. Stop when there’s no dry flour left, even if it looks uneven. Your cake will thank you with a tender crumb.
- Test for Doneness: Insert a toothpick into the center of each tier—it should come out clean (or with a few crumbs). Relying on time alone? You’ll either underbake (gummy center) or overbake (dry crumb). A quick test guarantees perfect results every time.
Serving suggestions for leftovers
Plating for Impact
Serve your three-tier cake on a marble slab or wooden cake stand to elevate its presentation. I love using a clear acrylic cake board for a modern look—it keeps the cake stable while showing off the layers. For a classic touch, add a lace doily underneath or a satin ribbon tied around the base. 🌟
Portioning Perfection
Use a serrated knife to slice clean wedges, starting from the center of the top tier. For a restaurant-style cut, make vertical slices through all three tiers at once. Serve each slice on a small dessert plate with a gold-rimmed charger for extra elegance. I always include a mini cake stand for each slice when serving at parties.
Garnish Game-Changers
Fresh raspberries or edible flowers add a pop of color and freshness. For a luxurious touch, sprinkle gold leaf flakes or drizzle chocolate ganache in delicate swirls. I like to add crushed pistachios or toasted coconut flakes for texture contrast. Keep garnishes minimal—let the cake's beauty shine through.
Serving Temperature
Serve your cake at room temperature for the best texture and flavor. If it's been refrigerated, let it sit for 30 minutes before slicing. For a warm-weather event, place it in the fridge for 1 hour beforehand to prevent melting. I always serve mine with chilled vanilla ice cream on the side for a creamy contrast. ❄️
Cake Stand Alternatives
No fancy stand? No problem! Use a large cake plate or even a wooden cutting board lined with parchment paper. For a rustic look, stack the tiers directly on a slab of wood or a metal tray. The key is stability—always place the heaviest tier at the bottom. I’ve even used a decorative cake drum for a vintage vibe.
Presentation for Special Occasions
For weddings or anniversaries, add a personalized topper like a monogrammed cake topper or a miniature figurine. Drape the cake with tulle or lace for a romantic touch. I once wrapped the base of a cake in sheer fabric and tied it with silk ribbons—it looked like something from a fairytale. The details make all the difference! ✨
Nutrition facts
Frequently asked questions
Can I make this 3-tier cake in smaller pans?
Yes! For a more manageable size, bake your tiers in 6-inch round pans instead of 8-inch. This creates a miniature version that's perfect for small gatherings. Just reduce the batter proportionally—use about 1/3 of the total batter per pan. The assembly technique remains the same, but you'll need fewer dowels (6-8 total) for stability.
Why does my cake crack between tiers?
Cracking usually happens when the cake isn't fully cooled before assembly or the buttercream is too warm. Always let tiers cool completely (at least 2 hours) before stacking, and chill the cake in the fridge for 30 minutes before decorating. Also, use a crumb coat of buttercream to seal the layers before the final frosting.
How do I make this cake gluten-free?
Replace the all-purpose flour with a 1:1 gluten-free baking flour blend (like Bob's Red Mill or King Arthur). Add 1/2 tsp xanthan gum to the dry ingredients to improve structure. For the buttercream, use a gluten-free powdered sugar substitute. Note that gluten-free cakes may be slightly denser, so bake 2-3 minutes longer than specified.
Can I substitute the jam filling?
Try whipped cream, pastry cream, or even chocolate ganache for variety. For a lighter option, use lemon curd or mango puree. Just ensure your filling is at room temperature when assembling to prevent melting the buttercream layers.
What's the best way to transport a finished 3-tier cake?
Place the cake on a sturdy cake board and cover it with a large cake dome or wrap it tightly in plastic wrap. For extra protection, secure it with a wide belt or strap to prevent shifting. Transport in a car trunk (not the passenger area) to avoid temperature fluctuations. If traveling long distances, keep it refrigerated until serving.