
Desserts
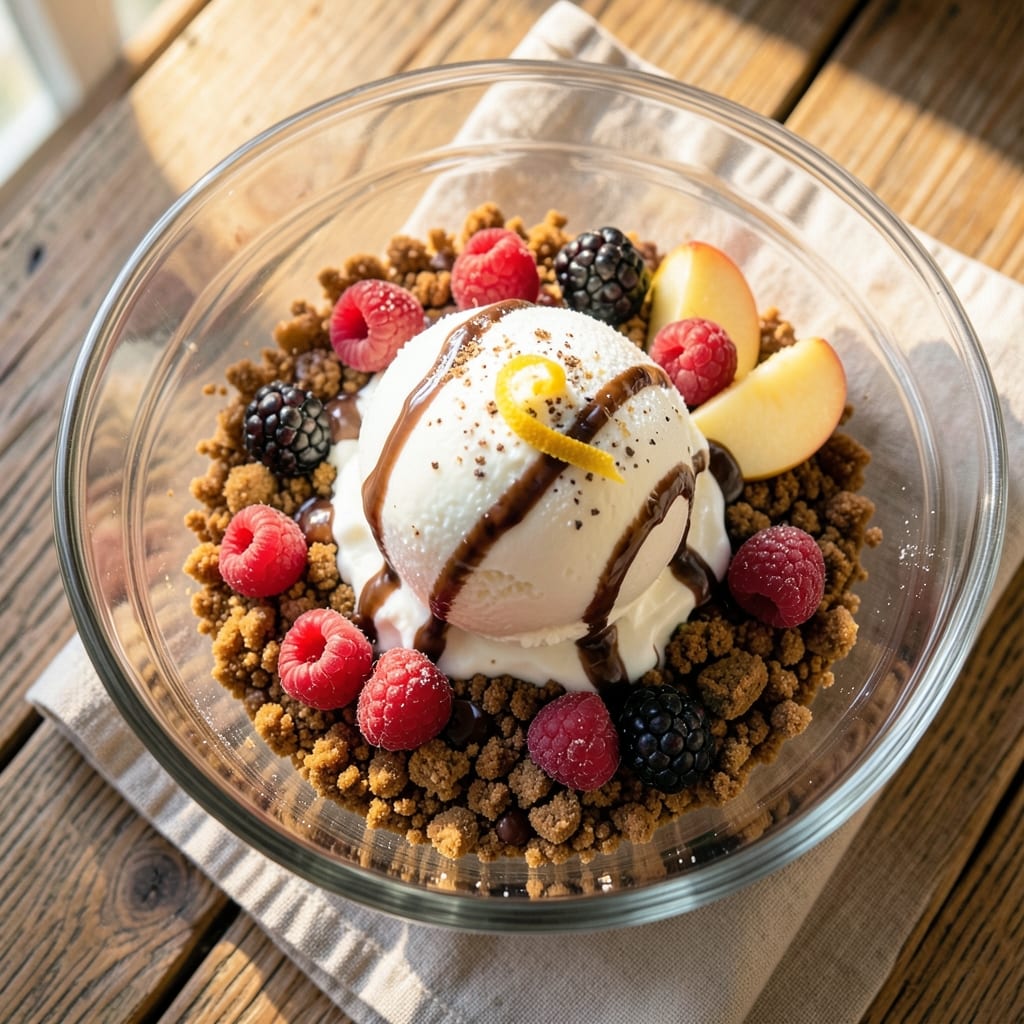
This 5-minute ice cream cake recipe delivers restaurant-quality dessert with zero baking and maximum flavor—perfect for satisfying cravings when time is tight. The secret lies in a crispy cookie base that holds up to scoops of ice cream without collapsing, creating a textural contrast that makes every bite irresistible. I developed this after burning through three separate attempts to make a stable no-bake cake, and this version finally cracked the code.
The beauty of this dessert is its adaptability—you can use store-bought cookies or homemade crumbs, any flavor of ice cream, and toppings like whipped cream, chocolate sauce, or fresh berries. What sets it apart is how effortlessly it comes together: crush cookies, mix with melted butter, press into a pan, freeze briefly, then layer with ice cream and toppings. The result? A dessert that looks impressive but takes less time than it does to microwave popcorn.
What you'll end up with is a crispy-edged, creamy-centered treat that's rich, cool, and satisfying—ideal for hot days, last-minute gatherings, or when you just need something sweet without the fuss. The cookie base stays firm enough to hold the ice cream's weight while adding a satisfying crunch that contrasts perfectly with the smooth, cold scoops.
Serve this ice cream cake immediately for the best texture, or freeze it for up to 24 hours ahead of time. Variations include using gluten-free cookies, vegan ice cream, or even a layer of jam between the cookie base and ice cream for added flavor. Here's how to make it—no oven required.
Ingredients for 5 minute ice cream cake
Crushed cookies, melted butter, and ice cream—everything you need for no-bake magic.
| Ingredient | Amount | Notes |
|---|---|---|
| Store-Bought Cookies 🍪 | 2 cups | Crushed into fine crumbs |
| Unsalted Butter 🧈 | ½ cup | Melted, cooled slightly |
| Vanilla Ice Cream 🍦 | 2 cups | Any flavor preferred |
| Heavy Whipping Cream 🥛 | ½ cup | Whipped to stiff peaks |
| Chocolate Syrup 🍫 | ¼ cup | For drizzling |
| Fresh Berries 🍓 | ½ cup | Sliced strawberries or raspberries |
| Powdered Sugar 🍚 | 2 tbsp | For dusting |
| Granulated Sugar 🍬 | 1 tbsp | Optional, for cookie base |
| Salt 🧂 | ¼ tsp | Kosher or sea salt |
| Vanilla Extract 🥄 | ½ tsp | Pure vanilla extract |
| Whipped Cream 🍦 | ¼ cup | Store-bought or homemade |
| Jam 🍓 | ¼ cup | Optional, for layering |
The cookie base is where the magic happens. Oreos or graham crackers work best—their sturdy texture holds up to ice cream without turning to mush. I usually grab the classic Oreo package from any grocery store, but Trader Joe's has great gluten-free options too. For extra flavor, crush the cookies with a pinch of salt and 1 tbsp granulated sugar—this keeps the base from getting too crumbly. If you're feeling fancy, add 0.5 tsp vanilla extract to the melted butter for a subtle boost. The key is to crush them fine—use a food processor or roll them with a wine bottle if you're in a pinch.
No vanilla ice cream? Any flavor works—chocolate, mint chip, or even cookie dough. Short on whipped cream? Coconut whipped cream is a great vegan alternative, and it tastes amazing with berries. The chocolate syrup can be swapped for caramel sauce or Nutella if you prefer. For a boozy twist, add 1 tbsp Kahlúa or Bailey's to the melted butter—trust me, it elevates everything. If you're using jam, raspberry or apricot pairs beautifully with vanilla ice cream. The powdered sugar is just for dusting, but if you want to get fancy, add a sprinkle of crushed candy canes or sprinkles for a fun touch.
This dessert is all about timing—keep the cookie base chilled for 10-15 minutes before adding ice cream to prevent melting. Store leftovers in the freezer for up to 24 hours, but honestly, it's best served fresh. If you're prepping ahead, assemble the cake 1 hour before serving and let it firm up in the fridge. The whipped cream and berries can be added right before serving so they stay fresh. For a make-ahead option, freeze the cookie base in a container for up to 1 month—just thaw and assemble when ready.
Why You'll Love This Recipe
- No-Pantry Stress: I swear by this when I forget to buy flour or sugar—just grab cookies, ice cream, and butter. The crumbled cookies at the bottom? That buttery, melty contrast is the whole party.
- Chocolate-Cream Dream: That first bite—cool vanilla ice cream, fluffy whipped cream, and a ribbon of syrup—hits like a dessert hug. Honestly, I’ve made it for birthdays, movie nights, and just-because cravings. It never disappoints.
- Party in a Bowl: No baking, no waiting—just layer, chill, and serve. I’ve used it for potlucks (it travels well), kids’ birthdays (they love assembling it), and even as a "fancy" dessert when guests show up unexpectedly.
- Zero-Guilt Leftovers: The cake keeps for days in the freezer, and the leftovers taste just as good cold. Between us, I’ve eaten this for breakfast after a late night—because why not? It’s dessert that doesn’t feel like a cheat.
Step-by-step instructions for no-bake ice cream cake
This dessert comes together faster than you can say "no oven required."
Create the Crispy Cookie Base
Crush the 2 cups store-bought cookies into fine crumbs using a food processor or rolling pin. This texture is key—you want something that resembles wet sand, not coarse bits. In a medium bowl, mix the crushed cookies with the 0.5 cup melted unsalted butter and 1 tablespoon granulated sugar (if using). Stir until completely combined and the mixture looks uniformly moist.
Press this mixture firmly into the bottom of a 9-inch springform pan, using the back of a spoon to create an even, compact base. I like to pack it down tightly so it holds its shape when we add the ice cream. This step is all about building a sturdy foundation that won't crumble when we slice later.
Layer and Freeze the Ice Cream
Scoop the 2 cups vanilla ice cream directly onto the cookie base, spreading it evenly into the pan. I use a spatula to smooth the top and press it down gently so it adheres to the cookie layer. Place the pan in the freezer while you prepare the whipped cream topping.
While the ice cream freezes slightly (about 5-7 minutes), whip the 0.5 cup heavy whipping cream with 0.5 teaspoon vanilla extract and 0.25 teaspoon salt until stiff peaks form. This topping should be thick enough to hold its shape when spread, but still light enough to create that signature cloud-like texture. The ice cream should be firm enough to slice but not rock-hard when you check it after freezing.
Assemble and Decorate the Cake
Remove the pan from the freezer and spread the whipped cream evenly over the frozen ice cream layer. I use a spatula to create gentle swirls, but keep it simple—this isn't a competition dessert. Next, spread the 0.25 cup jam (if using) over the whipped cream, then arrange the 0.5 cup sliced fresh berries on top for color and freshness.
Finally, drizzle the 0.25 cup chocolate syrup in zigzag patterns over the berries. Dust the entire surface with 2 tablespoons powdered sugar using a fine-mesh sieve for that classic ice cream cake finish. The powdered sugar adds a delicate sweetness and helps the decorations stick in place.
Chill and Serve
Return the assembled cake to the freezer for 10-15 minutes to let everything set. This final chill ensures the layers stay together when you slice. When ready to serve, run a knife around the edges of the pan to loosen it, then release the springform clamp.
Slice into 4 equal wedges and serve immediately. The contrast between the crispy cookie base, creamy ice cream, and fruity toppings makes every bite magical. Store any leftovers in the freezer for up to 2 days, though I doubt you'll have any left!
Pro Tips For Making 5 Minute Ice Cream Cake
- CHILL THE CREAM FIRST: I learned this the hard way—whipping cold heavy cream straight from the fridge gives you stiffer peaks and a smoother texture. Take it out 10 minutes before using, or even better, pop it in the freezer for 5 minutes while you prep the rest. The ice cream layer won’t melt as fast, and your whipped cream won’t turn into buttermilk.
- CRUSH COOKIES UNEVENLY: Skip the food processor if you want that bakery-style crunch. Use a rolling pin or heavy pan to smash cookies into uneven bits—some fine, some chunky. This creates pockets for the ice cream to nestle into, making every bite have that perfect cookie-cream contrast. (Yes, even if you’re impatient like me.)
- LAYER FAST, FREEZE FASTER: Work in a rush? Good. The ice cream cake freezes best when layers go in quickly. After adding cookies, ice cream, and whipped cream, tap the pan gently on the counter to settle layers, then freeze for 20 minutes before repeating. This prevents a soggy middle—trust me, your future self will thank you for the 10-minute wait.
- USE WARM SYRUP: Cold chocolate syrup thickens and looks messy when drizzled. Microwave it for 10 seconds or warm it in a bowl over hot water until it’s pourable but not hot. It’ll spread evenly and give that glossy, professional finish without cutting through the ice cream too fast. (Does it look weird? Yes. Does it work? Every single time.)
Essential equipment for perfect results
Springform Pan
The 9-inch springform pan is your best friend for this recipe—it keeps everything contained while making release effortless. I use a Nordic Ware pan because it has sturdy sides that don’t warp, but any quality brand will work. If you don’t own one, a round cake pan with removable sides works too, just grease it well to prevent sticking. The key is ensuring the pan is chilled before pressing the cookie base—this helps it set faster. 🧊
Food Processor
A food processor is the fastest way to crush cookies into fine crumbs, but a rolling pin or even a ziplock bag with a wine bottle works in a pinch. For best results, pulse the cookies in 1-second bursts—you want them fine like wet sand, not coarse like breadcrumbs. If you’re using gluten-free cookies, process them slightly longer since they tend to stay crumbly. I keep a Cuisinart DLC-4A in my kitchen, but even budget models crush cookies perfectly. 🍪
Mixing Bowls
Use a medium mixing bowl (at least 8-inch diameter) to combine the cookie crumbs and melted butter. I prefer stainless steel bowls because they’re durable and easy to clean, but glass works too. For extra flavor, add 1 tsp vanilla extract or a pinch of cinnamon to the melted butter—just stir it in until fully combined. The bowl should be room temperature to prevent the butter from solidifying too quickly. 🥄
Spatulas & Tools
Grab a flexible silicone spatula for spreading the cookie base and ice cream—it’s the best tool for packing the mixture tightly into corners. A small offset spatula works well for swirling whipped cream on top. Don’t skip the fine-mesh sieve for dusting powdered sugar—it creates a snow-like finish that looks restaurant-worthy. I also keep a small offset spatula handy for drizzling chocolate syrup in neat zigzag patterns. ✨
Freezer Space
This recipe relies on your freezer, so make sure you have at least 1 hour of freezer time available. The cake needs two freezer sessions: one for the cookie base (10-15 minutes) and another for final assembly (10-15 minutes). If your freezer is packed, use a smaller container or tray to speed up freezing. For extra stability, place the pan on a cooling rack inside the freezer—this prevents soggy bottoms. 🧊
Optional Extras
Want to elevate your cake? A piping bag with a star tip makes whipped cream rosettes look pro, and a small saucepan is useful for melting butter or heating jam. For a boozy twist, keep Kahlúa or Bailey’s on hand to drizzle over the ice cream. If you’re feeling fancy, edible gold leaf or crushed candy canes add a luxurious touch. These extras aren’t required, but they turn a simple dessert into something special. 💛
Nutrition facts
Frequently asked questions
Can I use homemade cookies instead of store-bought?
Just make sure your homemade cookies are sturdy and dry—like shortbread or chocolate chip. Crush them into fine crumbs (similar to wet sand) and follow the same steps. For extra flavor, add 0.5 tsp vanilla extract or 1 tsp cinnamon to the melted butter before mixing.
What if I don’t have a springform pan?
No problem! Use a 9-inch round cake pan with removable sides or even a pie dish. Grease it well to prevent sticking, and chill the pan for 10 minutes before pressing the cookie base. For easier release, run a knife around the edges after freezing.
How do I keep the ice cream from melting too fast?
Work quickly and keep your freezer pre-cooled. Scoop the ice cream directly onto the chilled cookie base, then press it down gently to create a seal. Freeze the assembled cake for 10-15 minutes before serving. If melting is still an issue, use a smaller container for faster freezing.
Can I make this dessert ahead of time?
Yes! Assemble the cake up to 24 hours ahead and store it in the freezer. For best texture, let it sit at room temperature for 10 minutes before serving. The cookie base stays crispy, while the ice cream softens slightly—perfect for a last-minute treat.
What’s the best way to make it vegan?
Swap the butter for vegan coconut oil, use vegan whipped cream, and choose dairy-free ice cream. For the cookie base, try gluten-free or vegan cookies like Enjoy Life brands. The texture stays the same, and the flavor is just as delicious!