
Desserts
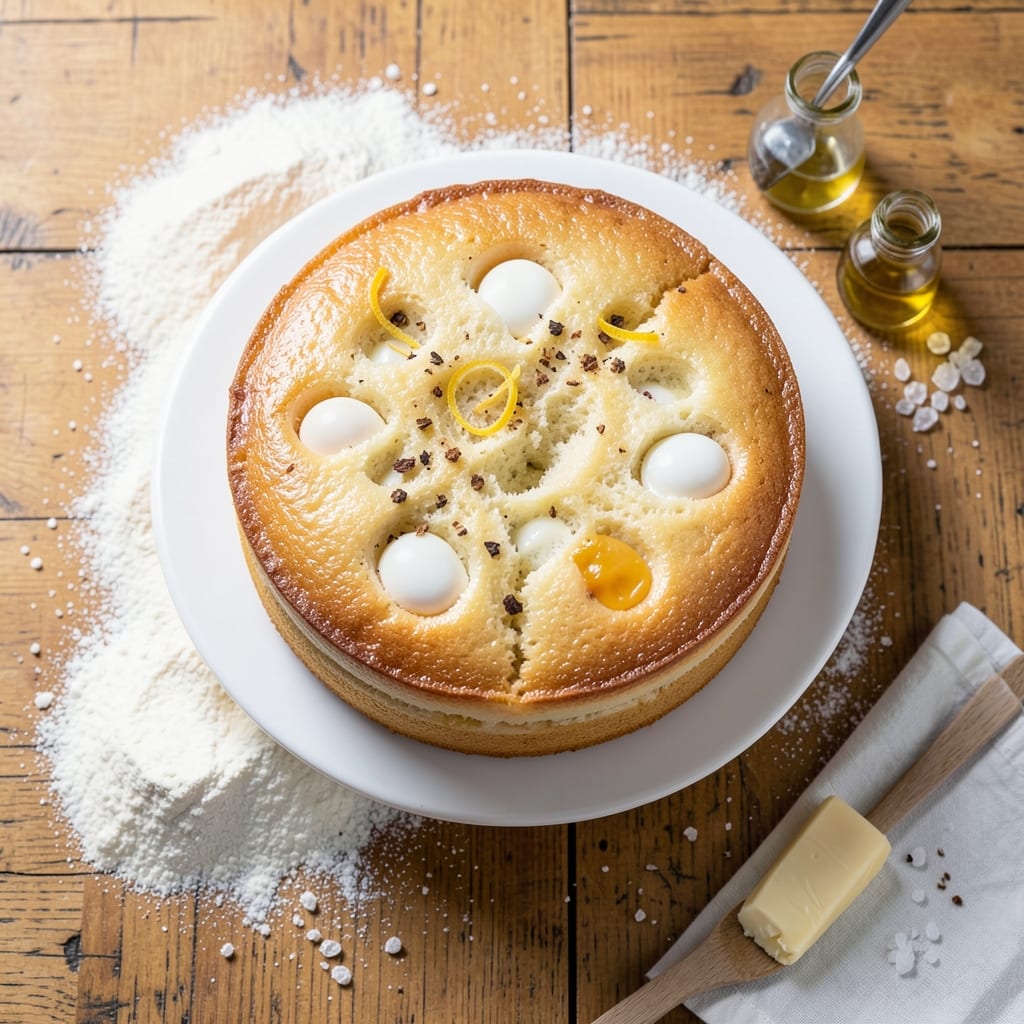
This 6-egg sponge cake recipe delivers the kind of ethereal, cloud-like texture that makes every slice feel like a celebration. The secret lies in the eggs—six of them—whipped to ribbon stage and folded into flour so delicately that the result is a tender, airy cake with layers so light they practically dissolve on your tongue. I perfected this method after years of experimenting with traditional sponge cakes, and it consistently delivers restaurant-quality results without a single layer of density.
The magic happens in the folding technique: incorporating the dry ingredients in three stages preserves the air bubbles created by the egg whites, ensuring maximum lift and an open crumb. Unlike many recipes that rely on baking powder or chemical leaveners, this version gets all its structure from the eggs themselves, creating a canvas that's perfect for soaking up syrups, fillings, or even serving plain with fresh berries. The cake bakes in a single tin, making it ideal for special occasions when you want to impress without the fuss of layering.
What you'll end up with is a cake that's so tender it practically melts in your mouth, with just enough structure to hold its shape when sliced. The texture is uniform throughout—no dense bottoms or cakey tops—thanks to precise baking times and temperature control. This recipe works equally well for vanilla sponge, chocolate variations, or citrus-infused cakes, giving you a foolproof base that adapts to any flavor profile you desire.
Whether you're baking for a birthday, anniversary, or simply treating yourself, this sponge cake delivers the kind of lightness that makes it feel like a luxury dessert. The best part? It's beginner-friendly once you master the folding technique—something you'll find easier than you think after the first attempt. Let's get started on creating layers that will have everyone asking for seconds.
Ingredients for 6 egg sponge cake
Six eggs, one tin, and the secret to restaurant-worthy lightness without layers.
| Ingredient | Amount | Notes |
|---|---|---|
| Large Eggs 🥚 | 6 whole | Room temperature, separated |
| All-Purpose Flour 🌾 | 2 cups | Sifted, plus extra for dusting |
| Granulated Sugar 🍚 | 1 ½ cups | Superfine preferred for smoothness |
| Unsalted Butter 🧈 | ½ cup | Room temperature, cubed |
| Vanilla Extract 🌸 | 1 tbsp | Pure vanilla for best flavor |
| Pinch of Salt 🧂 | ¼ tsp | Fine sea salt preferred |
| Cake Flour 🌾 | ½ cup | Optional for extra tenderness |
| Powdered Sugar 🍚 | ¼ cup | For dusting finished cake |
| Lemon Zest 🍋 | 1 tsp | Freshly grated for brightness |
| Heavy Cream 🥛 | ¼ cup | Optional for filling layers |
The eggs are everything here—six large, room-temperature eggs make all the difference. Kirkland Signature or Organic Valley eggs work perfectly if you want the best texture. Room temperature is non-negotiable: cold eggs won't whip properly, and you'll end up with dense layers. If your eggs are straight from the fridge, let them sit in warm water for 10 minutes. The flour? King Arthur all-purpose is my go-to—it's finely milled and consistent. For that extra-tender crumb, I add cake flour too, but it's optional if you're short on time. Sift everything before measuring to avoid lumps that'll weigh down your cake.
No vanilla extract? Vanilla bean paste works too, or even a pinch of vanilla sugar if you're in a pinch. The butter should be soft enough to press into the flour but not melted—think room temperature, not warm. For the sugar, superfine dissolves faster, but if you only have granulated, pulse it in a food processor for a few seconds. The lemon zest adds brightness, but if you're making a chocolate version, swap it for cocoa powder. And that heavy cream? Only if you're filling the cake—otherwise, skip it. The cake's light enough to eat plain with fresh berries or a dusting of powdered sugar.
This cake keeps beautifully for 3 days at room temperature, wrapped tightly in plastic. For longer storage, freeze slices wrapped individually for up to 3 months. The best part? It reheats perfectly—just pop slices in the oven at 300°F for 5 minutes to restore that fresh-baked texture. I always make a double batch: one for immediate serving, one to freeze for birthdays I forget about until the last minute. The powdered sugar? Save it for serving—it keeps the cake looking fresh longer.
Why You'll Love This Recipe
- Six Eggs, Zero Stress: I swear by this recipe because it’s the kind of cake that doesn’t demand perfection—just a bowl, a whisk, and patience while the eggs do the heavy lifting. No creaming butter and sugar until it’s just right; no folding flour in like you’re defusing a bomb. Whisk the eggs and sugar until pale and fluffy, fold in the dry ingredients, and let the oven work its magic. That’s it. Honestly, I’ve made this on a weeknight while scrolling through emails.
- Butter-Sugar Magic: Here’s what sold me—the way the butter and sugar blend into the eggs creates this unshakable structure, yet it’s light enough to eat with a fork. The vanilla? It’s not overpowering, but it lingers in every bite like a warm hug. And between us, that first slice is so good I’ll eat it straight from the pan if no one’s looking.
- Crowd-Pleaser Any Day: This cake is my go-to for birthdays, potlucks, or when I just need dessert without the fuss. Cut it into squares, layer with whipped cream, or serve it plain—it’s that versatile. I’ve even packed slices for lunch the next day (yes, even on a Tuesday), and it still tastes fresh. My kids ask for it more than store-bought cake, and that’s saying something.
- Budget-Friendly Luxury: Six eggs might sound like a lot, but it’s the secret to a cake that’s actually worth the effort—no dry, crumbly disappointment here. The butter and sugar are used efficiently, and the flour stretches further than you’d think. Plus, leftovers? They’re my secret weapon for quick breakfasts or a midnight snack. Not the prettiest, but the taste makes up for it every time.
Step-by-step instructions for light-as-air layers in one tin
This method delivers a perfectly fluffy, tender sponge with minimal effort—no folding stress, no waiting for layers to set.
Prepare Eggs and Butter for Maximum Volume
Separate the 6 whole Large Eggs into yolks and whites, keeping them in separate bowls. I like to use a fine-mesh sieve for this—it catches every last drop of yolk. Let both yolks and whites sit at room temperature for 10 minutes before using; cold eggs won't whip as fully.
While the eggs warm, beat the 0.5 cup Unsalted Butter with 1.5 cups Granulated Sugar in a stand mixer fitted with the paddle attachment. Mix on medium speed for 3-4 minutes until the butter is completely incorporated and the mixture is pale and fluffy. This step is crucial—it incorporates air that will help create those signature air pockets in the cake.
Whip Egg Whites to Stiff Peaks
In a separate, spotless bowl (any grease will prevent proper whipping), beat the egg whites with the 0.25 tsp Pinch of Salt and 1 tsp Lemon Zest on high speed until soft peaks form. Gradually add 0.25 cup Powdered Sugar while whipping—this stabilizes the whites and gives them that signature glossy sheen.
Continue whipping until stiff peaks form when you lift the beaters. The peaks should stand straight up and hold their shape for 10 seconds before slowly melting back. This is your signal that the whites are ready. If you over-whip, the cake will be tough—so stop as soon as you see this texture.
Combine Wet Ingredients with Dry Ingredients
Add the 1 tbsp Vanilla Extract to the yolk mixture and mix briefly. In a separate bowl, sift together the 2 cups All-Purpose Flour and 0.5 cup Cake Flour—this prevents lumps and ensures even distribution. Gently fold one-third of the flour mixture into the yolk mixture to lighten it, then fold in half of the whipped egg whites.
Now carefully fold in the remaining flour and egg whites in two additions, using a spatula to cut through the center and gently lift from the bottom. The goal is to maintain as much air as possible—don't overmix. The batter should be thick but still pourable, with no visible streaks of flour.
Bake in One Tin for Perfect Rise
Preheat your oven to 350°F and grease a 9-inch round cake pan generously with butter, then dust with flour. Pour the batter into the prepared pan and smooth the top with a spatula. Bake for 35-40 minutes until the top is golden brown and a toothpick inserted in the center comes out clean.
I know it seems counterintuitive, but don't open the oven during baking—resist the urge to peek! The sudden temperature drop can cause the cake to sink. When the timer goes off, let the cake cool in the pan for 10 minutes before transferring to a wire rack to cool completely.
Add Optional Cream Filling (If Using)
If you're using the 0.25 cup Heavy Cream for filling, whip it lightly with 1 tablespoon Powdered Sugar until soft peaks form. Once the cake is completely cooled, slice it horizontally into two equal layers. Spread the whipped cream between the layers, then dust the top with additional Powdered Sugar for that classic finish.
This cake keeps well for 3 days at room temperature or 1 week refrigerated—though I doubt it'll last that long! The secret to its lightness lies in the careful whipping of both yolks and whites, and the gentle folding that preserves all that incorporated air.
Pro Tips For Making 6 Egg Sponge Cake
- Whisk Eggs Until Ribbon Stage: The moment you think the egg whites are stiff enough, keep going for another 10 seconds—you’re aiming for that glossy, slow-dripping ribbon when you lift the whisk. I learned this the hard way after a batch collapsed like a sad soufflé because I called it done too soon.
- Melt Butter Slowly: Warm your butter in a microwave-safe bowl for 30 seconds at half power, then let it sit for 2 minutes to melt evenly. Dumping cold butter straight into hot eggs makes the batter seize up like a stubborn teenager, and nobody wants that.
- Sift Flour Twice: Give that flour a good shake in the sifter before adding it to the egg mixture, then sift it again right before folding—this cuts out lumps and keeps the texture light. Skipping this step is how you end up with a cake that feels like it’s got sandpaper in it.
- Don’t Overmix After Folding: Once you’ve folded in the dry ingredients, stop as soon as everything’s just combined—no need to stir like you’re trying to win a baking contest. Overmixing develops the gluten and turns your sponge into a dense brick. Two gentle turns with a spatula is all it takes.
Storing and reheating your 6 egg sponge cake
Room Temperature Storage
This sponge cake stays fresh and light for up to 3 days at room temperature when properly stored. Wrap it tightly in plastic wrap or place it in an airtight container with a slice of bread to absorb moisture. I like using clear plastic wrap because it lets me admire the cake while keeping it protected. Store it in a cool, dark place away from direct sunlight to prevent the butterfat from breaking down too quickly. 💫
Refrigerator Preservation
For longer storage, refrigerate the cake for up to 1 week. The cold temperature helps preserve the delicate texture, but I recommend slicing it before serving to avoid a dense bottom layer. Wrap individual slices in parchment paper and place them in a ziplock bag to maintain freshness. If you're planning ahead, this is a great way to keep portions ready for quick desserts.
Freezing for Future Use
Freeze this cake for up to 3 months for those lazy days when you need a last-minute dessert. Wrap each slice tightly in plastic wrap, then place them in a freezer bag with all the air squeezed out. When ready to serve, thaw at room temperature for 30 minutes before reheating. The texture remains surprisingly light after freezing, though it may lose a tiny bit of its airiness. 🥶
Reheating Perfection
To restore that fresh-baked texture, reheat slices in a 350°F oven for 5-7 minutes or until warmed through. For a quick fix, use the microwave on low power (50%) for 15-20 seconds—just enough to soften without drying out. I prefer the oven method because it gives the cake a slight crispness on the edges, almost like it was just pulled from the oven. Always let the cake come to room temperature before reheating to avoid condensation.
Reviving Day-Old Cake
If your cake has lost its bounce after a day or two, don't toss it! Brush the top with a simple sugar syrup (equal parts water and sugar, heated until dissolved) to revive its moisture. For extra flavor, add 1 tsp vanilla extract or 1 tbsp lemon juice to the syrup. This trick works wonders for sponge cakes and is especially useful if you've stored it in the fridge. The syrup also makes the cake perfect for soaking up fruit compotes or ice cream. ✨
Nutrition facts
Frequently asked questions
Why does this recipe use 6 eggs instead of the usual 3-4?
The extra eggs create a lighter, more delicate texture that's impossible with fewer. Each egg adds air and structure, resulting in that signature cloud-like crumb. The six eggs distribute moisture evenly, preventing dryness while maintaining maximum lift. This ratio is perfect for a single-tin cake that stays tender throughout.
Can I make this cake without a stand mixer?
Yes! Use a hand mixer for the butter-sugar mixture and egg whites. For the yolks, beat them by hand until thick and pale (about 5-7 minutes). The key is patience—whip the egg whites to stiff peaks using a whisk in a spotless bowl. Folding will take more effort, but the gentle technique is what matters most.
What's the secret to preventing a dense cake?
Three things: room-temperature eggs, proper whipping, and gentle folding. Cold eggs won't incorporate air properly, and overmixing destroys the delicate structure. Always fold in thirds, using a spatula to cut through the center and lift from the bottom. The batter should look thick but still pourable.
How do I adapt this for a chocolate version?
Replace the 1.5 cups granulated sugar with 1 cup sugar + 0.5 cup cocoa powder. Add 1 tbsp instant espresso powder to enhance chocolate flavor. For extra richness, melt 2 oz dark chocolate and fold it into the yolk mixture. The folding technique remains exactly the same.
Why does my cake sink in the middle?
Most likely from opening the oven door too early or underbaking. The cake needs 35-40 minutes at 350°F to set properly. Also check your oven temperature—calibration issues can cause uneven baking. If it sinks slightly, don't worry—it's still delicious! For next time, let the cake cool in the pan for 10 full minutes before removing.