
Desserts
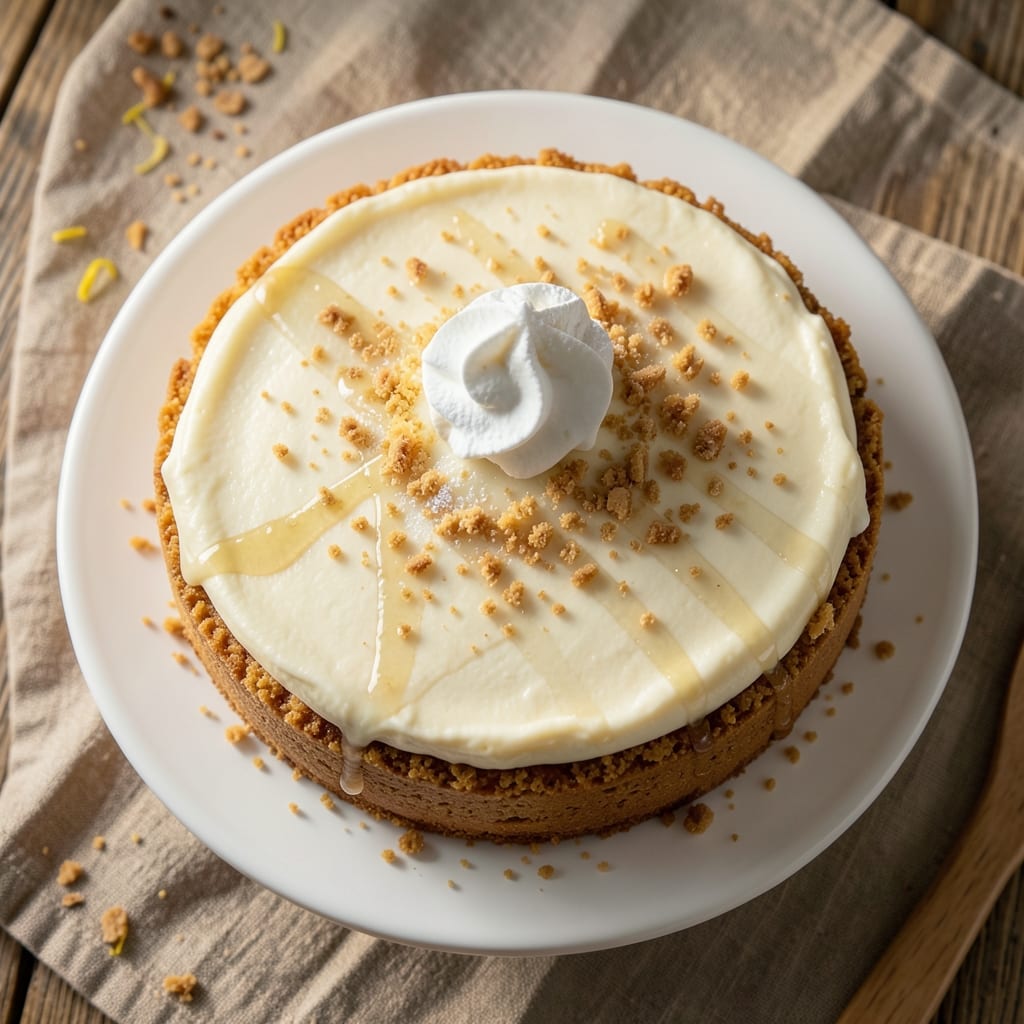
A 6-inch baked cheesecake delivers the perfect balance of a crispy graham cracker crust and a silky vanilla filling—no jiggle, no cracks, just creamy perfection every time. The secret lies in the water bath method, which ensures gentle baking and a smooth texture without overcooking. I’ve perfected this recipe after years of trial and error, and it’s become a crowd-pleaser for gatherings, holidays, or even a special dessert night in.
The crust starts with buttery graham cracker crumbs pressed into a thin, even layer, creating that satisfying crunch you crave. Meanwhile, the filling combines cream cheese, eggs, and vanilla extract for a rich, velvety center that stays firm yet tender. The water bath method prevents sinking while allowing the cheesecake to bake evenly, so you’re left with a slice that’s crispy at the edges and smooth in the middle.
What sets this recipe apart is its foolproof approach—no complicated techniques, just precise steps that guarantee success. Whether you’re a beginner or a seasoned baker, this method delivers a cheesecake that’s restaurant-quality without the fuss. The best part? It’s ready in just 90 minutes, including cooling time, so you can enjoy a homemade dessert without spending your whole evening in the kitchen.
Once cooled, top it with fresh berries, whipped cream, or a drizzle of caramel for extra flair. This cheesecake keeps well in the fridge for up to 5 days, making it perfect for meal prep or gifting. Let’s get started on creating your dream dessert!
Ingredients for 6 inch baked cheesecake
These 12 ingredients create the perfect 6-inch cheesecake with a crispy crust and silky center.
| Ingredient | Amount | Notes |
|---|---|---|
| Graham Cracker Crumbs 🍪 | 1 ½ cups | Honey or vanilla flavor preferred |
| Unsalted Butter 🧈 | ½ cup | Melted, full-fat version |
| Granulated Sugar 🍚 | ¼ cup | For crust sweetness |
| Large Eggs 🥚 | 3 whole | Room temperature preferred |
| Cream Cheese 🧀 | 16 oz | Full-fat, room temperature |
| Vanilla Extract 🌿 | 1 tbsp | Pure, high-quality |
| All-Purpose Flour 🌾 | ¼ cup | For filling stability |
| Granulated Sugar 🍚 | ¾ cup | For filling sweetness |
| Salt 🧂 | ¼ tsp | Fine sea salt preferred |
| Heavy Cream 🥛 | ½ cup | For extra richness |
| Aluminum Foil 📄 | 1 sheet | For water bath |
| Fresh Berries 🍓 | 1 cup | For garnish (optional) |
The graham cracker crust is where the magic starts. Honey or vanilla graham crackers give the best flavor—those chocolate ones are fun but not traditional. Trader Joe's has great options, or check the graham cracker aisle at Target. For the butter, Land O'Lakes or Plugrá melt beautifully without separating. The key is to press the crumbs firmly into the pan—no gaps! I like to use a glass to really pack it down. And trust me, room-temperature cream cheese is a game-changer—it mixes so much smoother than cold lumps.
No vanilla extract? Vanilla bean paste or even vanilla sugar works in a pinch, though pure extract is ideal. The heavy cream is optional but adds that restaurant-quality richness—skip it if you're watching calories. For the crust, oatmeal graham crackers add a nice texture twist, though honey flavor is classic. The flour in the filling isn't about extra structure—it's to prevent that dreaded cheesecake sink. And if you're worried about cracks, cover the edges with foil during baking (just don't forget to remove it before cooling!).
This cheesecake is a fridge staple—keeps perfectly for 5 days covered. For gifting, wrap tightly in plastic and add a ribbon. The crust stays crispy for days, but the filling is best enjoyed within 3 days for peak texture. Pro tip: Let it cool completely before refrigerating—it sets better that way. And if you're making it ahead? Bake it 24 hours early, store in the fridge, then bring to room temp before serving. The flavors only get better with time!
Why You'll Love This Recipe
- No-Fuss Crust: I swear by this graham cracker base—just melt butter, mix with crumbs, press it in, and you’re done. No rolling, no fuss, and it stays crisp even when the cheesecake gets creamy. (Between us, I’ve burned enough pie crusts to know this is the easy way.)
- Creamy Edge, Crisp Center: That butter-and-sugar swirl in the batter? It creates the most satisfying texture—smooth on the inside, with a golden, slightly caramelized edge. Honestly, it’s the kind of cheesecake that makes you pause mid-slice just to admire it.
- Portion-Perfect Slices: Six inches means single servings—no awkward leftovers or cutting struggles. Perfect for date night, potlucks, or when you just want one slice without feeling guilty. (Yes, even on a Tuesday night.)
- Budget-Friendly Luxury: Cream cheese and eggs stretch further than you’d think, and graham crackers are cheaper than fancy crusts. I’ve made this for under $10 total, and it still tastes like a bakery’s version. My secret weapon for looking fancy without breaking the bank.
Step-by-step instructions for 6-Inch baked cheesecake
Here's how to build a perfect cheesecake with a buttery graham crust and velvety filling every time.
Prepare the Crispy Graham Crust
Preheat your oven to 325°F—this gentle heat is key for even baking. In a medium bowl, combine the 1.5 cups graham cracker crumbs, 0.5 cup melted unsalted butter, and 0.25 cup granulated sugar. Mix until the crumbs are evenly moistened and the mixture holds together when pressed.
Press the mixture firmly into the bottom of a 6-inch springform pan, creating an even layer that reaches up the sides about ½ inch. Use a glass to compact it thoroughly—this prevents a crumbly crust. Bake for 10 minutes until lightly golden. Let it cool slightly while you prepare the filling.
Mix the Cheesecake Filling
In a large mixing bowl, beat the 16 oz cream cheese and 0.75 cup granulated sugar together until completely smooth and creamy. I like to use a hand mixer for this step—it ensures no lumps remain. Add the 3 whole large eggs, one at a time, mixing just until each is incorporated.
Stir in the 1 tbsp vanilla extract, 0.25 cup all-purpose flour, and 0.25 tsp salt. Finally, gently fold in the 0.5 cup heavy cream with a spatula—this adds richness without overmixing. The batter should be thick but pourable. Real talk: don't overbeat or you'll end up with a dense center.
Assemble and Bake with Water Bath
Pour the filling over the cooled crust, spreading it evenly. Wrap the springform pan tightly with the aluminum foil, creating a sealed water bath. Place the pan in a deep roasting pan and pour hot water into the roasting pan until it reaches halfway up the sides of the springform.
Return to the 325°F oven and bake for 50-60 minutes. The cheesecake is done when the edges are set but the center still jiggles slightly—it'll firm up as it cools. Here's the thing—if the top browns too quickly, tent it loosely with foil to prevent overbrowning.
Cool and Set for Perfect Texture
Remove the cheesecake from the water bath and let it cool in the springform pan for 1 hour at room temperature. Then refrigerate for at least 4 hours (overnight is even better). This slow cooling prevents cracking and ensures that silky texture we're after.
Run a thin knife around the edge before releasing the springform ring. Garnish with 1 cup fresh berries just before serving—their bright acidity cuts through the richness beautifully. Slice with a warm knife for clean, perfect portions every time.
Pro Tips For Making 6 Inch Baked Cheesecake
- CHILL THE CREAM CHEESE: Take your cream cheese out of the fridge at least 2 hours before mixing—room temperature is non-negotiable for this recipe. I learned this the hard way when my first batch turned out dense and grainy because I rushed it. Trust me, your mixer will thank you too.
- PRESS THE CRUST FIRM: Don’t just sprinkle graham crumbs and call it a day—press that crust hard into the pan, especially at the edges. Use a glass to really pack it down, or it’ll crumble when you slice. (Yes, even if it looks like you’re overdoing it.)
- BAKE LOW AND SLOW: Start at 325°F, not 350°F—this isn’t a race. A water bath (wrapped pan in foil with a tray of hot water underneath) keeps the center from cracking. I used to skip it, and half my cheesecakes ended up with a sad, sunken middle.
- WHISK EGGS SEPARATELY: Beat the egg yolks and whites separately—fold the yolks into the cream cheese mixture first, then gently fold in the stiffly whipped whites at the very end. This keeps the texture light, not rubbery. (And no, don’t use a hand mixer—your arms will hate you.)
Common mistakes when making this dish
Crust Too Crumbly
If your crust falls apart when pressing it into the pan, you likely didn’t moisten the crumbs enough. I’ve found that mixing the melted butter and sugar into the crumbs until they’re completely coated makes all the difference. For extra stability, chill the crust in the freezer for 10 minutes before baking—this helps it hold together better. 🧈
Overmixed Filling
Overbeating the filling incorporates too much air, which can cause cracks or a dense center. Mix just until the ingredients are combined—no more than 30 seconds per egg when adding them. I use a hand mixer on low speed to avoid this common mistake. A good rule of thumb: the batter should look thick but still pourable, like heavy pudding.
Uneven Baking
If your cheesecake has a raw center while the edges are overcooked, your oven temperature might be inconsistent. Always use an oven thermometer to confirm your oven is at 325°F—many ovens run hot or cold. Also, rotate the pan halfway through baking to ensure even heat distribution. For extra insurance, tent the top with foil if it browns too quickly.
Cracked Top
Cracks usually happen when the cheesecake cools too quickly or the oven temperature fluctuates. To prevent this, cover the edges of the pan with aluminum foil during baking, leaving the center exposed. After baking, let it cool completely at room temperature for 1 hour before refrigerating. This gradual cooling gives the filling time to set evenly.
Soggy Crust
A soggy crust often means the filling was too wet or the crust wasn’t baked long enough. To fix this, bake the crust for 10-12 minutes until it’s lightly golden and set. For extra insurance, chill the crust for 15 minutes in the freezer before adding the filling. This helps it stay crisp even after the filling is poured on top.
Cheesecake Sinks
If your cheesecake sinks in the middle, it likely didn’t set properly. The flour in the filling is key—it stabilizes the structure and prevents sinking. Another trick: tap the pan gently on the counter 2-3 times after pouring the filling to release any air bubbles. Also, ensure your eggs are room temperature—cold eggs can cause separation and sinking.
Nutrition facts
Frequently asked questions
Why does this recipe use a water bath?
The water bath creates gentle, even heat that prevents cracking and sinking while ensuring a perfectly set center. Without it, the cheesecake would overcook on the outside before the middle is done. The foil wrap helps maintain moisture and temperature consistency throughout baking. Think of it as a spa day for your cheesecake—gentle care for the best results!
Can I make this cheesecake without a springform pan?
Yes, but with caution! Use a 6-inch oven-safe metal pan with a removable bottom. Grease it well and line the bottom with parchment paper to prevent sticking. After baking, chill the cheesecake in the pan for 1 hour before removing it. For easier release, run a thin knife around the edges before unmolding. Pro tip: place the pan on a baking sheet to catch any drips during cooling.
How do I prevent cracks in the cheesecake?
Cracks usually happen from temperature shifts or overmixing. First, cover the edges of the pan with foil during baking to slow cooling. After baking, let it cool completely at room temperature for 1 hour before refrigerating. Also, avoid opening the oven door frequently—those temperature drops cause cracks. For extra insurance, chill the batter for 30 minutes before baking to reduce air bubbles.
Can I substitute heavy cream with something else?
For a lighter version, use ½ cup sour cream or Greek yogurt instead. If you want extra richness, try ½ cup mascarpone cheese mixed with 1 tbsp milk to thin it. Just remember, heavy cream adds that signature velvety texture—if you skip it, the cheesecake will still be delicious but slightly denser. The flavor difference is minimal, but the texture changes noticeably.
How long can I keep this cheesecake in the fridge?
This cheesecake stays fresh for up to 5 days when stored properly in an airtight container. For best texture, eat it within 3 days—after that, the filling becomes slightly denser but still delicious. If you're making it ahead, bake it 24 hours in advance, refrigerate, then bring to room temperature before serving. The crust stays crispy for days, but the filling is best enjoyed at its peak freshness.