
Desserts
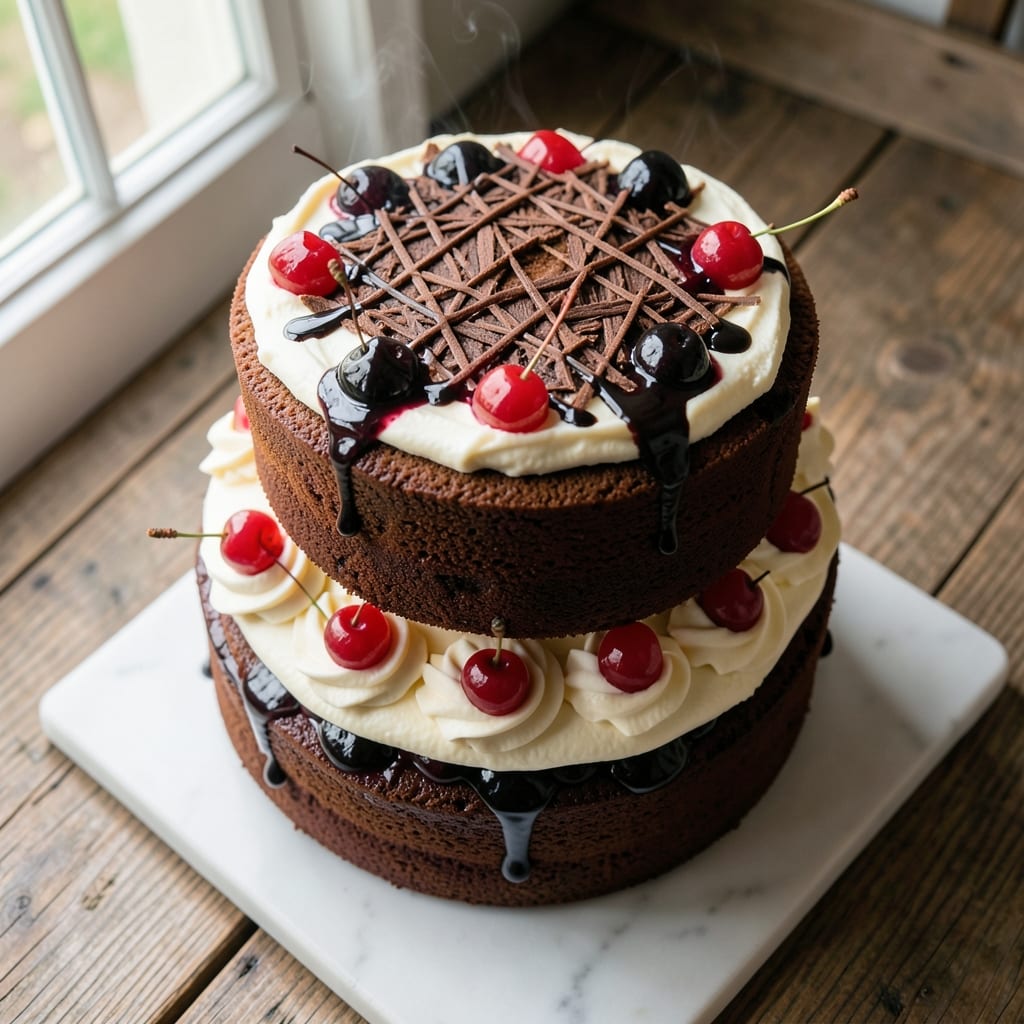
This alcohol-free Black Forest cake delivers all the classic flavors—rich chocolate layers, tangy cherry filling, and velvety whipped cream—without a drop of alcohol. The secret to a perfectly moist sponge lies in precise ingredient ratios and gentle baking, while the cherry compote uses reduced juice for concentrated sweetness. What you'll end up with is a showstopping dessert that rivals traditional versions, just with a booze-free twist.
The cake features three layers of tender chocolate sponge, each generously filled with a homemade cherry compote that's thick enough to hold its shape yet light enough to complement the sponge. Whipped cream adds airy contrast, and fresh cherries on top provide both visual appeal and a burst of fresh fruit flavor. This version maintains the signature Black Forest experience while being completely alcohol-free.
Assembling the cake requires patience—proper chilling between layers ensures clean slices and prevents sogginess. The final result is a dessert that looks as impressive as it tastes, with layers that stay distinct and flavors that harmonize perfectly. Whether serving for a celebration or satisfying a chocolate craving, this cake delivers restaurant-quality results at home.
Ready in about 3 hours (including chilling time), this recipe is perfect for special occasions or when you want to impress without the alcohol. The instructions walk you through every step, from baking the sponge to decorating the finished cake. Let's get started on creating this decadent dessert.
Ingredients for alcohol free black forest cake
Pantry staples meet specialty touches for this showstopping alcohol-free Black Forest masterpiece.
| Ingredient | Amount | Notes |
|---|---|---|
| All-Purpose Flour 🌾 | 3 cups | Sifted for light texture |
| Unsweetened Cocoa Powder 🍫 | ¾ cup | Dutch-processed preferred |
| Granulated Sugar 🍚 | 2 ¼ cups | Superfine for smoother batter |
| Light Brown Sugar 🍚 | ½ cup | Packed for moisture |
| Large Eggs 🥚 | 6 whole | Room temperature for even baking |
| Unsalted Butter 🧈 | 1 ½ cups | Softened to room temperature |
| Baking Powder 🧂 | 1 ½ tsp | Aluminum-free preferred |
| Salt 🧂 | ½ tsp | Fine sea salt |
| Vanilla Extract 🌿 | 2 tsp | Pure Madagascar preferred |
| Fresh Cherries 🍒 | 2 ½ cups | Pitted, halved for filling |
| Cherry Juice 🍒 | 1 cup | Reduced to 0.5 cup for compote |
| Granulated Sugar 🍚 | ½ cup | For cherry compote |
| Heavy Whipping Cream 🥛 | 2 cups | Chilled for stiff peaks |
| Powdered Sugar 🍚 | 1 cup | Sifted for smooth whipped cream |
| Fresh Cherries 🍒 | 1 ½ cups | Whole for garnish |
The cocoa powder is non-negotiable—Dutch-processed gives that rich, velvety flavor without bitterness. Valrhona or Guittard are my go-tos, but any high-quality brand works. The cherries? Fresh is best, but frozen pitted cherries (thawed) save time. For the cherry juice, Lundberg or Muir Glen organic canned juice reduces beautifully—just simmer until syrupy. The butter needs to be soft but not melted—press it between paper towels if it's too firm. Room-temperature eggs are crucial for even texture.
No vanilla extract? Seeds from 1 vanilla bean work perfectly—split it and scrape out the seeds. Short on cherries? Substitute 1.5 cups of pitted black cherries for the filling, or use cherry preserves (sieved to remove seeds). The whipped cream can be made ahead—just whip it up and refrigerate until ready to use. For a lighter version, substitute coconut whipped cream, though it won't be as stable. The baking powder must be fresh—if it's over a year old, test it in a small batch to ensure it still bubbles.
Store the cake layers wrapped in plastic at room temperature for up to 2 days, or freeze for 3 months. The cherry compote keeps in the fridge for 5 days—just reheat gently before using. Whipped cream is best used fresh but can be stored in an airtight container for 2 days. Assemble the cake just before serving to prevent sogginess. For a restaurant-worthy finish, dust with powdered sugar right before slicing.
Why You'll Love This Recipe
- Let’s be real: most cakes turn dry or sad after a day. Not this one. The brown sugar keeps it moist, and the cocoa adds a natural preservative-like quality. I’ve had slices last five days in the fridge—still tender, still delicious. Plus, it’s cheaper than ordering takeout when you’re craving something sweet. Win-win.
- No Fuss Layers: I swear, this cake comes together faster than a coffee break. Just mix the dry ingredients—flour, cocoa, sugars—and fold in the eggs. No creaming butter, no waiting for alcohol to evaporate. Honestly, the only thing taking longer is deciding whether to bake it first or assemble it right away.
- Chocolate That Stays True: That rich cocoa powder and brown sugar combo? It’s the real deal—deep, velvety, and not overpowered by alcohol substitutes. The eggs add a subtle richness that makes every bite feel indulgent, even without the boozy kick. Between us, it’s the kind of chocolate cake I’d happily eat for breakfast.
- Birthday or Boredom: This cake isn’t just for celebrations—it’s my go-to when I need a pick-me-up. Slice it for a coffee break, pack it for lunch, or serve it at a potluck. The layers hold up surprisingly well, and the frosting (if you add it) stays smooth for days. My roommates still ask for seconds, even after three helpings.
Step-by-step instructions for alcohol-free Black Forest cake
Here's how to build layers of decadent chocolate cake, cherry compote, and whipped cream—without a drop of alcohol.
Bake the Chocolate Layers
Preheat your oven to 350°F and grease three 9-inch round cake pans with butter, then dust with flour. In a large mixing bowl, combine the 3 cups all-purpose flour, 0.75 cup unsweetened cocoa powder, 1.5 tsp baking powder, and 0.5 tsp salt. Sift this mixture twice to ensure a light, airy texture—this prevents dense layers later.
In a separate bowl, beat the 1.5 cups unsalted butter and 2.25 cups granulated sugar on medium speed until light and fluffy, about 3-4 minutes. Add the 6 whole large eggs one at a time, mixing well after each addition. Scrape down the sides of the bowl as needed. Fold in the 0.5 cup light brown sugar and 2 tsp vanilla extract, then gently mix in the dry ingredients until just combined—overmixing develops gluten, which leads to tough cake.
Divide the batter evenly among the prepared pans. Bake for 25-30 minutes, or until a toothpick inserted into the center comes out clean. Let the cakes cool in the pans for 10 minutes before transferring to a wire rack to cool completely. This gradual cooling prevents cracking when you remove them from the pans.
Prepare the Cherry Compote
While the cakes cool, combine the 1 cup cherry juice and 0.5 cup granulated sugar in a small saucepan. Bring to a simmer over medium heat, then add the 2.5 cups pitted, halved fresh cherries. Cook for 10-12 minutes, stirring occasionally, until the cherries soften and the mixture thickens into a syrupy consistency. You want it to coat the back of a spoon but still hold its shape when chilled.
Remove from heat and let the compote cool completely. Once cooled, mash about half of the cherries lightly with a fork to release their juices while leaving some texture for contrast. This step ensures a balanced filling that's neither too runny nor too thick. Transfer the compote to a bowl and set aside—it will thicken further as it cools.
Assemble the Cake Layers
Place the first cake layer on a serving plate or cake stand. Spread a thin, even layer of the cherry compote over the top—about 1/4 cup. This prevents the whipped cream from soaking into the cake and keeps each layer distinct. Repeat with the remaining two layers, adding compote between each.
In a large mixing bowl, whip the 2 cups heavy whipping cream and 1 cup powdered sugar together on high speed until soft peaks form. Fold in the remaining 1.5 cups whole fresh cherries, reserving a few for garnish. This keeps the filling light and adds bursts of fresh cherry flavor with every bite. Spread half of the whipped cream mixture evenly over the top layer of cake.
Chill and Garnish
Cover the cake loosely with plastic wrap and refrigerate for at least 4 hours, or preferably overnight. This allows the flavors to meld and the cake to set properly. Chilling also prevents the whipped cream from melting too quickly once you serve it.
Before serving, top the cake with the remaining whipped cream, arranging the reserved 1.5 cups whole fresh cherries decoratively around the edges and on top. Dust lightly with powdered sugar if desired, but I prefer the natural beauty of the cherries. Slice with a sharp, hot knife for clean, professional-looking pieces—this ensures every guest gets a perfect portion.
Pro Tips For Making Alcohol Free Black Forest Cake
- Sift the Cocoa: I learned this the hard way—skipping it means dense, clumpy layers. Use a fine-mesh sieve to dust the cocoa powder directly into the dry ingredients, then whisk vigorously. This aerates the flour and prevents those dreaded lumps in your chocolate cake base.
- Whip Eggs to Ribbon Stage: Don’t just beat them until they’re pale. For that light, airy texture, whip the eggs at room temperature until they form soft ribbons when the whisk is lifted—about 3-4 minutes. Cold eggs won’t incorporate as well, and you’ll end up with a heavier cake.
- Don’t Overmix the Batter: I used to think more mixing = better flavor, but this cake suffers from it. Mix just until the dry ingredients disappear—about 20 seconds after the flour is incorporated. Overmixing develops gluten, making the layers tough instead of tender.
- Use Room-Temp Eggs and Butter: Cold ingredients throw off the bake. Let your eggs and butter sit out for at least 30 minutes before mixing—this ensures even distribution and a smoother crumb. I know, I know, but trust the process. Your future self will thank you.
Best sauces and condiments for these flavors
Cherry Compote Perfection
The star of this alcohol-free Black Forest cake is the homemade cherry compote, which needs to balance sweetness and texture just right. Simmer 1 cup cherry juice with ½ cup granulated sugar until reduced by half, then add 2.5 cups pitted, halved cherries. Cook until cherries soften but still hold shape—10-12 minutes—then mash half lightly for a jammy texture while keeping the other half intact. This creates a filling that's thick enough to hold layers but still offers bursts of fresh cherry flavor. 🍒
Whipped Cream Stability
For the whipped cream layer, chilling your 2 cups heavy whipping cream for at least 2 hours before whipping is non-negotiable. Use a stand mixer on high speed until soft peaks form, then gently fold in 1 cup powdered sugar and 1.5 cups whole cherries. The secret to stability? Avoid over-whipping—stop when the cream holds its shape but still feels light. Fold in cherries last to prevent deflation. For extra insurance, add ½ tsp vanilla extract to the cream before whipping. ✨
Chocolate Ganache Twist
Elevate your cake with a dark chocolate ganache drizzle—melt ½ cup dark chocolate chips with ¼ cup heavy cream over a double boiler, then cool slightly before drizzling over the assembled cake. This adds a luxurious finish without alcohol. For a lighter option, use white chocolate instead. The ganache should be thick enough to cling but still pourable—37-40°F is the ideal temperature range. 🍫
Citrus Zest Enhancer
Brighten the flavors with a lemon zest glaze—simmer 2 tbsp lemon juice with ¼ cup powdered sugar until dissolved, then brush lightly over the cake layers before assembling. This subtle citrus note cuts through the richness of the chocolate and complements the cherries beautifully. For a bolder touch, add 1 tsp lemon extract to the whipped cream. 🍋
Caramelized Onion Glaze
For a savory-sweet contrast, caramelize ½ cup thinly sliced onions in 2 tbsp butter until golden brown, then mix with 2 tbsp powdered sugar to create a glaze. Drizzle sparingly over the top layer before adding whipped cream. This unexpected twist adds depth that pairs surprisingly well with the chocolate and cherries. 🧅
Nutrition facts
Frequently asked questions
Can I substitute regular cherries for maraschino cherries in this recipe?
Maraschino cherries are too sweet and lack the natural depth of flavor. Use 2.5 cups fresh or frozen pitted cherries for the compote and 1.5 cups fresh cherries for garnishing. Fresh cherries give the best texture, but frozen (thawed) work in a pinch. The key is to pit them yourself for maximum flavor.
Why does my chocolate cake layer turn out dense instead of light?
Overmixing the batter or using old baking powder are the most common culprits. Sift your dry ingredients twice and mix just until combined—stop when no flour streaks remain. Also, ensure your butter and eggs are room temperature. Bake at 350°F for exactly 25-30 minutes (no longer) and avoid opening the oven door during baking.
How do I make this cake ahead of time?
Bake the layers and compote 1 day ahead, then store wrapped at room temperature. Assemble the cake 4-6 hours before serving to let flavors meld. The fully assembled cake keeps in the fridge for 2 days—just bring it to room temperature before slicing. For longer storage, freeze the baked layers (without filling) for up to 3 months.
Can I use store-bought whipped cream instead of making my own?
Yes, but homemade makes all the difference! Store-bought cream can be too sweet or watery. If using canned whipped cream, choose one with minimal additives. For stability, chill the assembled cake for 2 hours before serving. For extra fluffiness, fold in 1 tbsp powdered sugar to store-bought cream to mimic the homemade version.
What's the best way to slice this cake for clean layers?
Use a hot, sharp knife dipped in warm water between each slice. Wipe the knife clean after each cut. Run the knife through the same path twice to ensure clean separation. Chill the cake for 30 minutes before slicing for even cleaner results. This prevents crumbs and gives that restaurant-quality look!