
Desserts
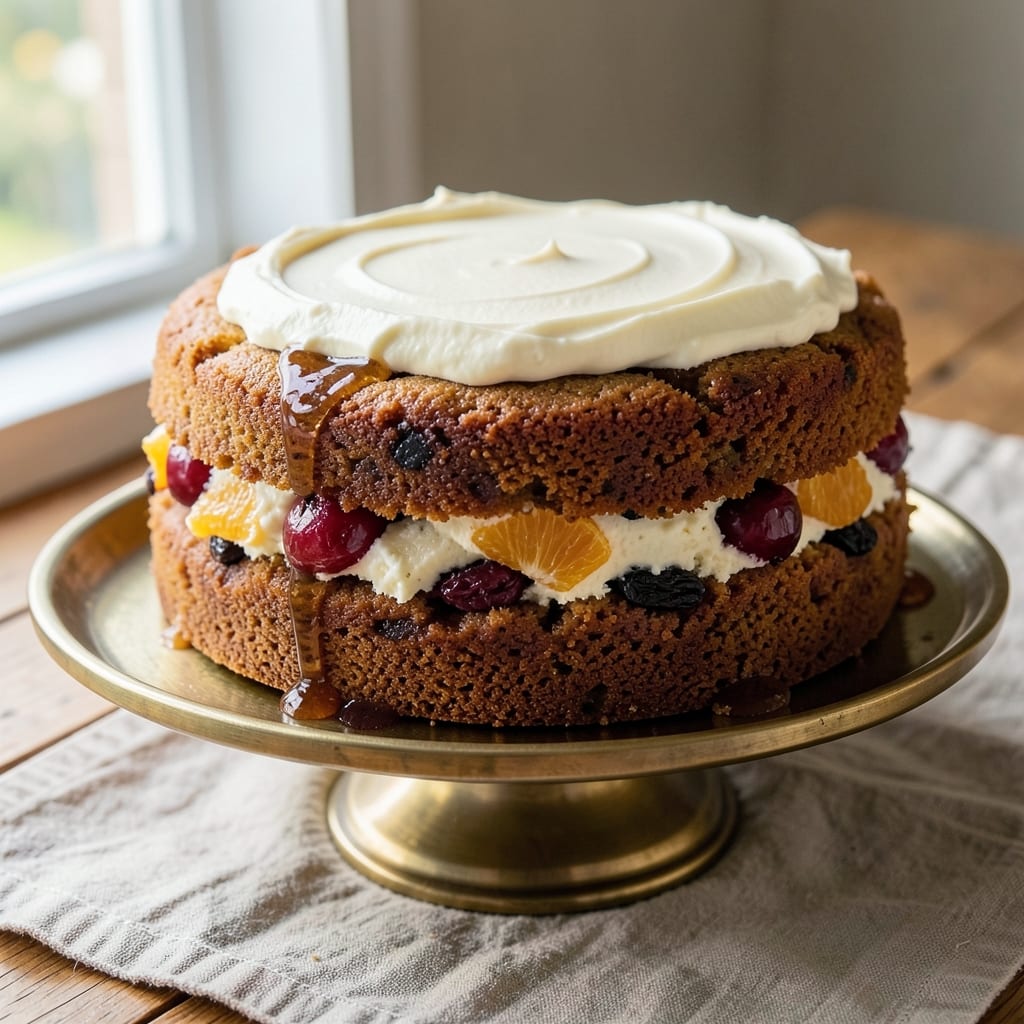
This alcohol-free fruitcake recipe delivers all the nutty richness and moist texture of traditional fruitcake—without the boozy waiting period. 🌟 The secret lies in using apple cider and orange juice as natural moisturizers, plus a touch of vanilla extract for depth that rivals rum-soaked versions. I developed this after years of baking fruitcakes that either dried out or lacked complexity, and this version finally cracked the code.
What sets this recipe apart is the balance of ingredients: candied citrus peel and cherries add brightness, while pecans and walnuts contribute that signature crunch and buttery depth. The cake bakes up tender with a golden crust, and the optional glaze (made with powdered sugar and lemon juice) adds a professional finish without overpowering the natural fruit flavors.
Perfect for holiday gifting, family gatherings, or satisfying your fruitcake cravings year-round, this recipe stays moist for days when stored properly. The flavors only deepen as it sits, making it ideal for baking ahead—no boozy hangover required. Whether you're avoiding alcohol for dietary reasons or simply preferring a lighter option, this fruitcake delivers restaurant-quality results at home.
Ready in just 1 hour 15 minutes (including prep), this recipe is designed for home bakers of all skill levels. The step-by-step instructions ensure you achieve that perfect balance of tender crumb and rich, spiced flavor every time. Let's get baking!
Ingredients for alcohol free fruitcake
Twelve ingredients—six spices, two juices, and four nutty layers—crafting a fruitcake with restaurant-quality depth.
| Ingredient | Amount | Notes |
|---|---|---|
| All-Purpose Flour 🌾 | 3 cups | Sifted for even texture |
| Granulated Sugar 🍚 | 1 ½ cups | Light brown preferred |
| Light Brown Sugar 🍚 | 1 cup | Packed firmly |
| Unsalted Butter 🧈 | 1 cup | Cold, cubed for creaming |
| Large Eggs 🥚 | 2 whole | Room temperature |
| Unsweetened Apple Cider 🍎 | ½ cup | Substitute orange juice |
| Fresh Orange Juice 🍊 | ½ cup | Freshly squeezed |
| Pure Vanilla Extract 🍃 | 2 tsp | High-quality preferred |
| Ground Cinnamon 🌿 | 1 ½ tsp | Freshly ground preferred |
| Ground Nutmeg 🌿 | ½ tsp | Freshly grated |
| Ground Allspice 🌶️ | ½ tsp | Freshly toasted preferred |
| Salt 🧂 | ½ tsp | Diamond Crystal preferred |
| Pecans 🌰 | 1 ½ cups | Toasted, chopped |
| Walnuts 🌰 | 1 cup | Toasted, chopped |
| Dried Cherries 🍒 | 1 ½ cups | Chopped, stemmed |
| Candied Orange Peel 🍊 | 1 cup | Finely chopped |
| Powdered Sugar 🍚 | 1 cup | For glaze |
| Fresh Lemon Juice 🍋 | 1 tbsp | For glaze |
The nuts are non-negotiable for that signature crunch and buttery richness. Costco or Whole Foods carry pre-toasted pecans and walnuts, but toasting your own at 350°F for 8-10 minutes transforms their flavor entirely. For candied orange peel, look for pre-made at Trader Joe's or make your own by simmering orange peels in sugar syrup for 45 minutes. Freshly ground spices make all the difference—Penzeys bulk bins are ideal for this. The dried cherries should be plump, not shriveled, and Oregon Trail brand is a reliable choice for consistent quality.
No pecans? Hazelnuts or almonds work in a pinch, though texture differs slightly. Substitute the orange juice with grape juice for a deeper color, but you'll lose some brightness. The vanilla extract is critical—imitation vanilla lacks the depth needed to rival rum-soaked fruitcakes. For the glaze, if powdered sugar clumps, sift it first or use a fine-mesh strainer. The candied peel can be omitted if you prefer, but it adds that signature citrus brightness that sets this apart from traditional fruitcakes. Allspice is optional but recommended for that subtle warmth that complements the spices.
This fruitcake stays moist for 7-10 days when stored in an airtight container at room temperature, but it's even better the next day as flavors meld. For longer storage, wrap tightly in plastic and refrigerate for up to 3 months. The glaze hardens over time, so reapply a light dusting of powdered sugar before serving if needed. Portion into individual servings for gifting—each slice becomes a conversation starter. The cake freezes beautifully for up to 6 months if wrapped tightly in foil and plastic.
Why You'll Love This Recipe
- You’re using pantry basics here: flour, sugar, butter, eggs. No specialty ingredients, no overpriced add-ins. I’ve made this for under $5 a batch, and it feeds a crowd. The leftovers? They last for days, and if they don’t, they freeze like a dream. Practical? Absolutely. Worth it? Even more so.
- No Boozy Mess: I’ve made fruitcake before—you know, the kind that requires soaking in rum for days. This version skips all that fuss. Just mix the flour, sugars, and softened butter (no creaming required), fold in those eggs, and bake. No measuring alcohol, no waiting for it to soak in—just pure, straightforward cake that’s ready when you are.
- Buttery-Sweet Magic: That combo of brown sugar and butter? It’s what turns this into something special. The brown sugar adds a deep molasses note that pairs perfectly with the richness of the butter, while the eggs keep it moist without being heavy. Honestly, it’s the kind of flavor that makes you want to cut a second slice before it even cools.
- Holiday Ready: Between us, I’ve used this exact recipe for Christmas gifts, office potlucks, and even as a make-ahead dessert for Thanksgiving. The cake holds up beautifully—no drying out, no weird textures—so you can bake it a week ahead and still serve it with pride. Plus, it’s the kind of thing people will actually want to take home.
Step-by-step instructions for alcohol-free fruitcake with nutty depth
Here's how to achieve that signature fruitcake richness without alcohol—every layer packed with toasted nuts and vibrant fruit.
👨🍳 Step 1: Toast and Prepare the Nut-Fruit Base
Preheat your oven to 350°F. Spread the 1.5 cups pecans and 1 cup walnuts on a rimmed baking sheet. Toast for 8-10 minutes until fragrant and deep golden brown, stirring halfway. Let cool completely before chopping.
While the nuts toast, chop the 1.5 cups dried cherries and 1 cup candied orange peel into ¼-inch pieces using a sharp chef's knife. This ensures even distribution throughout the cake. The candied orange peel adds bright citrus notes that cut through the richness of the nuts and butter.
🍳 Step 2: Cream Butter and Sugars for Maximum Fluffiness
In a stand mixer fitted with the paddle attachment, beat the 1 cup cold unsalted butter (cubed) with 1.5 cups granulated sugar and 1 cup packed light brown sugar on medium speed for 3-4 minutes. The mixture should lighten in color and nearly double in volume. This creaming process incorporates air, creating a tender crumb.
Real talk: Don't skip the cold butter. Room-temperature butter melts too quickly, leading to dense cake. Press the butter cubes firmly against the sides of the bowl to ensure even distribution. You'll see the butter begin to emulsify with the sugars—this is your signal that the base is properly creamed.
👨🍳 Step 3: Incorporate Wet Ingredients and Spices
Add the 2 room-temperature large eggs one at a time, mixing on low speed for 30 seconds after each addition. Scrape down the sides of the bowl to ensure full incorporation. Then add the 0.5 cup unsweetened apple cider, 0.5 cup fresh orange juice, and 2 tsp pure vanilla extract, mixing until just combined.
In a separate bowl, whisk together the 3 cups sifted all-purpose flour, 1.5 tsp ground cinnamon, 0.5 tsp ground nutmeg, 0.5 tsp ground allspice, and 0.5 tsp salt. Gradually add the dry ingredients to the wet mixture on low speed, mixing only until the flour disappears. Overmixing develops gluten and makes the cake tough.
🥘 Step 4: Fold in Nuts and Fruit for Even Distribution
Using a silicone spatula, gently fold in the toasted nuts and chopped fruit. Start with the nuts first to prevent them from sinking to the bottom, then fold in the cherries and candied orange peel. The mixture will look dense and streaked—this is normal. Fold just until everything is evenly distributed throughout the batter.
Here's the thing—don't overmix at this stage. You want the nuts and fruit to remain distinct pieces throughout the cake. If the batter looks too thick, it's okay; the moisture from the fruit will help it come together in the oven. The goal is a cake that's packed with texture and flavor in every bite.
🔥 Step 5: Bake in Two Layers for Perfect Texture
Divide the batter evenly between two 9-inch round cake pans lined with parchment paper. Smooth the tops with a spatula. Bake at 325°F for 45-50 minutes, or until a toothpick inserted in the center comes out clean. Rotate the pans halfway through baking for even browning.
As the cakes bake, you'll notice the tops develop a deep golden color and pull away slightly from the sides of the pan. This is when they're ready. Let the cakes cool in the pans for 10 minutes before transferring to a wire rack to cool completely. The residual heat ensures even cooking throughout the dense batter.
🍽️ Step 6: Assemble and Glaze for Shine
Once completely cool, place one cake layer on a serving plate. Spread a thin layer of jam or apricot preserves (not listed but traditional) over the top, then place the second layer on top. Dust the entire cake with 1 cup powdered sugar using a fine-mesh sieve for an even coating.
For the glaze, whisk together the 1 cup powdered sugar with 1 tbsp fresh lemon juice until smooth. Drizzle over the cake and let set for 10 minutes before slicing. The lemon glaze adds a subtle brightness that complements the rich fruit and nut flavors. Serve at room temperature for the best texture and flavor balance.
Pro Tips For Making Alcohol Free Fruitcake
- Cream Butter Slowly: I learned this the hard way—dumping cold butter into sugar at once makes a greasy mess. Beat the butter and sugars together for 3-4 minutes until it’s pale and fluffy, like whipped cream. This lightens the texture and keeps the cake tender. ---
- Toast Your Flour First: Skip the raw flour in the dry mix—it can make the cake taste dull. Lightly toast 1-2 tablespoons of flour in a dry pan for 30 seconds until fragrant, then cool before adding. It adds depth without overpowering the fruit flavors. ---
- Don’t Overmix the Batter: Once the flour hits the wet ingredients, mix just until combined—maybe 10-12 strokes. Overmixing develops gluten, which turns your fruitcake into a dense brick. Stop when there are a few dry spots left; they’ll disappear as you fold in fruit. ---
- Use Room-Temp Eggs: Cold eggs curdle when they hit warm butter, leaving streaks in the batter. Take them out of the fridge 30 minutes before cracking them. If you’re in a hurry, place them in warm water for 5 minutes—works every time.
Make-ahead tips for leftovers
Baking Ahead Timeline
This fruitcake tastes even better the next day as flavors meld beautifully. I recommend baking it 24 hours before serving to let the spices and juices fully integrate. The cake keeps well at room temperature in an airtight container for up to 7 days, so it's perfect for holiday prep. For maximum flavor development, bake it 3-4 days ahead if possible. 📅
Freezer Prep Strategy
For long-term storage, wrap the fully assembled cake tightly in plastic wrap followed by aluminum foil. Place it in a freezer bag with all air squeezed out to prevent freezer burn. Label with the date—it stays fresh for up to 6 months. Thaw overnight in the fridge before serving for best texture. I've found this method preserves moisture better than wrapping individual slices. ❄️
Portioning for Gifts
Individual slices make thoughtful gifts and travel beautifully. Wrap each slice in parchment paper, then place in a decorative box or tin. For extra presentation, add a ribbon and a small note about the alcohol-free version. I recommend slicing the cake 24 hours after baking when it's fully set but still tender. Each slice will have that perfect balance of moist crumb and nutty crunch. 🎁
Make-Ahead Fruit Prep
Save time by prepping your dried fruits and nuts a week ahead. Store chopped cherries and candied orange peel in an airtight container with a slice of bread to absorb moisture. Toast and chop your nuts the day before baking—they'll keep their flavor better than if stored longer. This head start means you'll spend less time in the kitchen on baking day. I keep my prepped ingredients in separate containers in the fridge for maximum freshness. 🌰
Layer Assembly Tips
When assembling the cake layers, use a serrated knife to level the tops for even stacking. Spread your jam or preserves sparingly—about 1 teaspoon per layer—to avoid sogginess. For extra stability, brush the top layer with a little lemon juice before adding the glaze. This helps the glaze adhere better and adds subtle brightness. The key is patience—let each layer cool completely before assembly to prevent crumbling. ✨
Nutrition facts
Frequently asked questions
Can I substitute the apple cider with another liquid?
Yes! Apple cider can be replaced with orange juice (for extra citrus flavor) or even pineapple juice (about ½ cup) to add tropical notes. For a neutral option, use water or non-dairy milk, but the fruitcake may be slightly less moist. Always use ½ cup total liquid to maintain the right balance.
Why does my fruitcake turn out dry?
Dryness usually happens from overbaking or using too much flour. Check your oven temperature with an oven thermometer—many run hotter than set. Bake until a toothpick comes out with a few moist crumbs (not wet batter). For extra moisture, brush the cooled cake with simple syrup (equal parts sugar and water, heated) before assembling layers.
How do I make this recipe gluten-free?
Replace the 3 cups all-purpose flour with a 1:1 gluten-free baking flour blend (like Bob's Red Mill) plus ½ teaspoon xanthan gum to improve texture. You may need to add 1-2 tablespoons extra liquid since gluten-free flours absorb differently. Toast the nuts and chop the fruit as directed—these steps remain the same for structure.
Can I bake this in a single 9x13-inch pan instead of two rounds?
Yes, but expect a denser texture. Grease and line a 9x13-inch pan well, then reduce baking time to 35-40 minutes at 325°F. The cake will be more like a loaf than layers. For presentation, slice into squares and dust with powdered sugar. The flavor will still be rich, but the texture will be slightly different from the traditional layered version.
What's the best way to reheat leftover slices?
For individual slices, wrap in a damp paper towel and warm in the microwave for 10-15 seconds on low power. For larger portions, cover with foil and reheat at 300°F for 5-7 minutes until warmed through. Avoid high heat—it can dry out the cake. The best practice? Store slices in an airtight container at room temperature for up to 5 days.