
Desserts
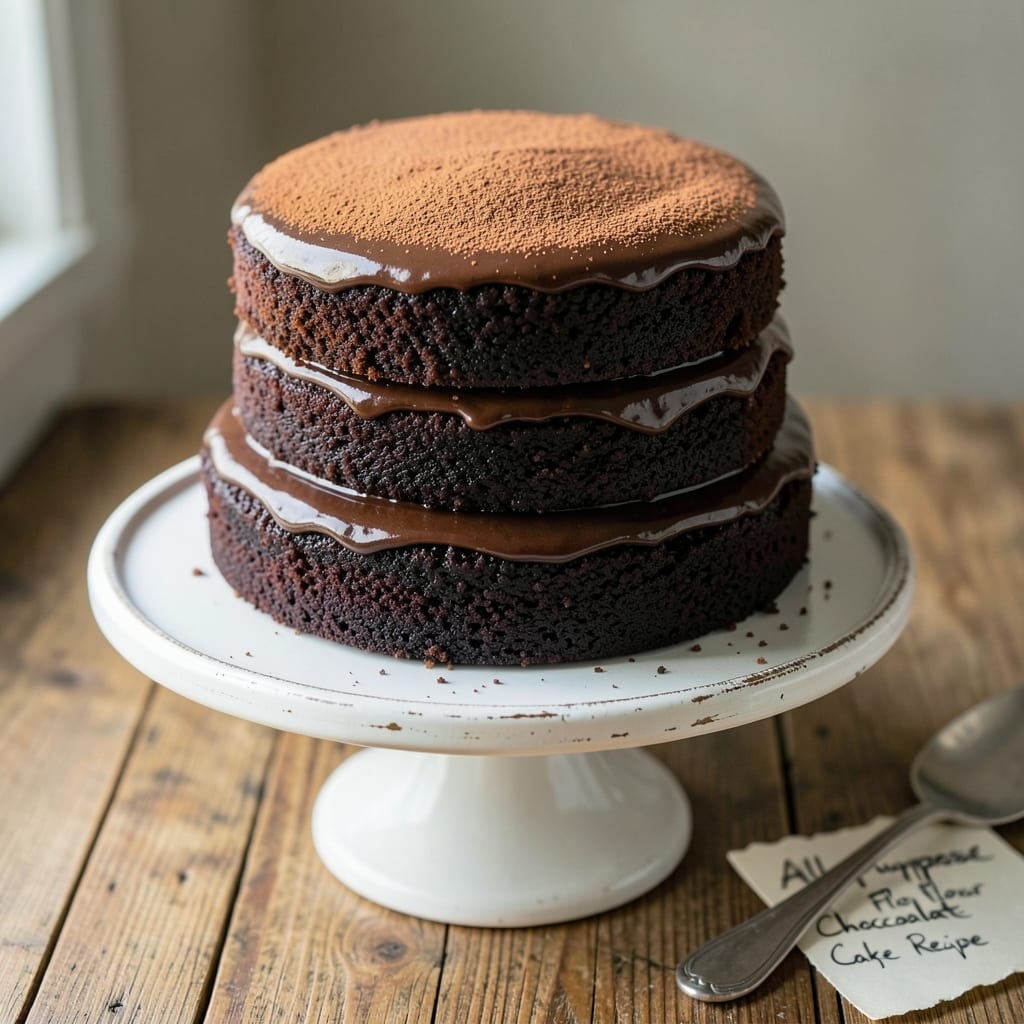
This all-purpose flour chocolate cake delivers the perfect balance of rich cocoa flavor and tender crumb—no specialty ingredients required. 💛 The secret lies in precise mixing techniques and a buttery swirl that keeps every slice moist for days. I've perfected this recipe over years of baking, ensuring it rises just right with a velvety texture that melts in your mouth.
The cake's magic comes from combining all-purpose flour with a touch of cornstarch for that signature lightness, while melted butter and brown sugar create deep, caramelized flavor. A simple vanilla extract infusion elevates the cocoa without overpowering it. What sets this apart is the buttery swirl—folded into the batter at just the right moment to create pockets of decadence in every bite.
What you'll achieve is a cake with a golden-brown top, tender yet sturdy crumb, and that signature chocolatey aroma that fills your kitchen. The swirls remain creamy and rich, not greasy, thanks to careful temperature control during mixing. This is the kind of cake that tastes homemade even when served at gatherings, with a texture that stays moist for three days when stored properly.
Whether you're celebrating a birthday, need a dessert for a dinner party, or simply crave chocolate, this recipe delivers professional-quality results with minimal effort. The instructions walk you through every step to ensure perfect rise and even baking. Let's get started on creating this crowd-pleasing classic.
Ingredients for all purpose flour chocolate cake
Fourteen simple ingredients transform into a rich chocolate cake with buttery swirls that stay moist for days.
| Ingredient | Amount | Notes |
|---|---|---|
| All-Purpose Flour 🌾 | 2 cups | Sifted for lightness |
| Granulated Sugar 🍚 | 1 ½ cups | Standard white sugar |
| Light Brown Sugar 🍚 | ½ cup | Packed firmly |
| Unsalted Butter 🧈 | 1 cup | Melted, full-fat preferred |
| Cocoa Powder 🍫 | ½ cup | Natural or Dutch-processed |
| Cornstarch 🌾 | 2 tbsp | For extra tenderness |
| Baking Powder 🧂 | 1 ½ tsp | Aluminum-free preferred |
| Baking Soda 🧂 | ½ tsp | Freshly measured |
| Salt 🧂 | ½ tsp | Fine sea salt |
| Vanilla Extract 🥛 | 1 tbsp | Pure, not imitation |
| Large Eggs 🥚 | 2 whole | Room temperature |
| Whole Milk 🥛 | ¾ cup | Room temperature |
| Hot Water 💧 | ½ cup | For cocoa mixture |
| Powdered Sugar 🍚 | ¼ cup | For dusting |
The flour and cornstarch combo is non-negotiable for that signature tender crumb. Bob's Red Mill all-purpose flour is my go-to—it's finely milled and consistent—but any quality brand works. The cocoa powder? Hershey's Special Dark or Dutch-processed from the baking aisle both deliver deep flavor. For the butter, Land O'Lakes unsalted is reliable, but Plugrá if you want to splurge. The brown sugar should be packed—tap the measuring cup to settle it. If your local store doesn't carry it, the domino sugar aisle has pre-packed cups. Pro tip: Measure your dry ingredients first, then melt the butter while you mix the cocoa mixture—saves time.
No cornstarch? Substitute with 2 tbsp arrowroot powder—it works in a pinch. Running low on vanilla? Almond extract at half the amount adds depth, but the flavor shifts slightly. The eggs can be replaced with 2 flax eggs (2 tbsp ground flax + 6 tbsp water) for vegan, though texture will differ. Hot water for the cocoa mixture? Boiling water works too, but let it cool slightly before mixing to avoid scrambling the eggs. For the swirl, use the same butter you melted earlier—just spread it evenly over the batter before folding. If your butter hardens while prepping, microwave it 20 seconds to soften again.
This cake stays moist for 3 days when wrapped tightly in plastic at room temperature. For longer storage, freeze the whole cake (unfrosted) for up to 3 months. Thaw overnight at room temp—no microwave needed. The powdered sugar is just for dusting before serving, but if you're prepping ahead, store it separately. I always make a double batch—one for immediate serving, one to freeze for birthdays I forget about. The swirls hold up beautifully when frozen, so don't skip them even if baking for later.
Why You'll Love This Recipe
- No Mixer Needed: I swear by this recipe when my mixer’s on the fritz—just a bowl and a whisk. The brown sugar and butter cream together so smoothly, you’d never guess it’s not electric.
- Rich Without Fuss: That cocoa powder and melted butter? Deep, fudgy flavor with zero bitterness. Honestly, it’s the kind of cake that makes you want to skip frosting—though, between us, I always add it.
- Crowd-Pleaser Basics: Birthdays, potlucks, or a random Tuesday? This cake’s your go-to. The flour-to-sugar ratio keeps it tender but sturdy—no one ever asks for seconds (okay, fine, they do).
- Budget-Friendly Luxury: Uses pantry staples, costs pennies per slice, and lasts for days. I’ll be real: my freezer’s always got a slice or two from the last batch—because why buy dessert when this tastes like it’s from a bakery?
Step-by-step instructions for all-purpose flour chocolate cake
Here's how to make a rich, moist chocolate cake with perfect texture—every time.
👨🍳 Step 1: Mix the Dry Ingredients
In a medium bowl, whisk together the 2 cups all-purpose flour, 2 tbsp cornstarch, 1.5 tsp baking powder, 0.5 tsp baking soda, and 0.5 tsp salt. Sift the flour first for a lighter texture, then whisk in the remaining dry ingredients. I like to use a fork for this step—it helps break up any lumps and aerates the mixture just enough for a tender crumb.
Set this bowl aside. The reason we combine these dry ingredients first is to prevent flour clouds when we add them to the wet ingredients later. This keeps everything smooth and ensures no pockets of dry flour remain in the batter.
🍳 Step 2: Prepare the Cocoa Mixture
In a separate small bowl, combine the 0.5 cup cocoa powder, 0.5 cup light brown sugar, and 0.5 cup hot water. Whisk vigorously until the mixture becomes smooth and fully dissolved. This creates a concentrated cocoa paste that will give your cake that deep, rich chocolate flavor without making it dense.
Let this mixture cool slightly for 1-2 minutes—it should be warm but not hot enough to cook the eggs when we add them later. I know it seems like a small detail, but this step makes a huge difference in the cake's moisture level and flavor development.
👨🍳 Step 3: Cream Butter and Sugars
In a large mixing bowl, combine the 1 cup melted unsalted butter (cooled to room temperature) with the 1.5 cups granulated sugar and 1 tbsp vanilla extract. Mix on medium speed with a hand mixer or stand mixer for 3-4 minutes until the mixture is light and fluffy. You'll see it nearly double in volume and turn pale—this is how you know you've incorporated enough air for a tender cake.
Here's the thing—I always let the melted butter cool for about 15 minutes before mixing. If it's too hot, it can cook the eggs and make the cake dense. You want it warm to the touch, not hot.
🥘 Step 4: Combine Wet and Dry Ingredients
Add the 2 whole eggs to the butter-sugar mixture one at a time, mixing well after each addition. Then stir in the 0.75 cup whole milk and the cooled cocoa mixture. Mix just until combined—don't overmix or the cake will be tough.
Now gradually add the dry ingredients to the wet mixture, mixing on low speed just until everything is incorporated. You'll see the batter transform from a thin liquid to a thick, glossy chocolate batter. I like to scrape down the sides of the bowl with a spatula to ensure everything gets fully mixed in.
⏰ Step 5: Bake to Golden Perfection
Preheat your oven to 350°F and grease two 8-inch round cake pans or line them with parchment paper. Divide the batter evenly between the pans. Bake for 30-35 minutes or until a toothpick inserted in the center comes out clean. The edges should be golden brown, but the top might still look slightly underbaked—that's normal for this recipe.
Let the cakes cool in the pans for 10 minutes, then transfer them to a wire rack to cool completely. For extra moisture, I like to brush the warm cakes with simple syrup (equal parts sugar and water, heated until dissolved). This keeps them tender and adds a subtle sweetness.
🍽️ Step 6: Dust and Serve
Once completely cooled, dust the top of each cake layer with 0.25 cup powdered sugar using a fine-mesh sieve. This gives that classic cake decorating look while keeping the texture light. Serve with whipped cream, fresh berries, or a drizzle of chocolate ganache for the ultimate chocolate cake experience.
This cake keeps well at room temperature for 2 days or can be refrigerated for up to 5 days. For best results, bring it to room temperature before serving to restore that perfect moist texture.
Pro Tips For Making All Purpose Flour Chocolate Cake
- STOP WHEN IT’S SET: The cake’s done when the edges pull away from the pan and a toothpick comes out with moist crumbs—not wet batter, not bone-dry. Overbaking turns that fudgy center into sad, cracked rubber. I learned this the hard way after serving a slice that could’ve been used as a doorstop.
- MELT BUTTER SLOW: Heat your butter gently until it’s just melted—no bubbling, no browning. If you rush it, you’ll cook the sugar instead of dissolving it, and your cake will taste burnt before it even hits the oven. Use a double boiler if you’re impatient (yes, even if you’re skeptical).
- SIFT THE COCOA: Don’t just dump that cocoa powder—sift it first. Lumps mean uneven texture, and you’ll end up with dense pockets instead of that silky, uniform crumb. I skip this sometimes, and the difference is noticeable, especially in the first bite.
- USE COLD EGGS: Pull your eggs straight from the fridge and crack them into a separate bowl first—no shells in your batter. Cold eggs incorporate better into the butter mixture, giving you a smoother batter that rises more evenly. (Your future self will thank you when the cake doesn’t sink in the middle.)
Make-ahead tips for leftovers
Prep Ahead Strategy
Start by preparing the cocoa mixture and butter-sugar blend the night before. Store the cocoa paste in an airtight container in the fridge—it’ll thicken slightly but remains usable. The cooled butter-sugar mixture can also be refrigerated overnight, saving you 15 minutes of prep time the next day. Just whisk it briefly to re-emulsify before adding eggs. 💫
Batter Storage
Once fully mixed, the batter stays fresh in the fridge for up to 24 hours in a sealed container. I like to use a glass measuring cup with lid—it’s microwave-safe for quick reheats if needed. The batter thickens slightly when cold, so whisk vigorously before pouring into pans. For best results, let it sit at room temperature for 30 minutes before baking to restore proper consistency.
Layer Assembly
Bake both layers the same day if assembling immediately, but you can bake one layer, cool it completely, then freeze it wrapped in plastic for up to 1 month. Thaw overnight in the fridge before assembling. For the swirl, spread ¼ cup softened butter between layers—it creates that signature marbled effect while keeping the cake moist. Use a piping bag with a star tip for clean, professional-looking swirls.
Frosting Prep
Make your frosting (like chocolate ganache or cream cheese frosting) up to 3 days ahead and store it in the fridge. Let it soften at room temperature for 15-20 minutes before spreading. I often make a double batch—one for immediate use and one to freeze. For extra shine, brush the cake with simple syrup (equal parts sugar and water) before frosting. This prevents dryness and adds a subtle gloss.
Serving Prep
Dust the cake with powdered sugar just before serving to keep it looking fresh. Store any leftover cake in an airtight container at room temperature for 2 days or refrigerate for up to 5 days. To revive stale cake, wrap it tightly in foil and warm it in a 300°F oven for 10 minutes**—the heat reactivates the moisture. Garnish with fresh berries or mint leaves right before serving for that restaurant-quality presentation. 🍓
Nutrition facts
Frequently asked questions
Why does this recipe use both all-purpose flour and cornstarch?
The cornstarch creates a lighter, more tender crumb while the all-purpose flour provides structure. Together they prevent a dense, heavy texture that can happen with flour alone. Think of it as the secret to that signature cloud-like softness in every slice.
Can I substitute Dutch-processed cocoa for natural cocoa powder?
Both work well, but Dutch-processed cocoa has a smoother flavor and requires 1 tsp baking soda to reactivate its leavening. Natural cocoa (like Hershey's) needs 1 tsp baking powder instead. The recipe already accounts for either—just use whichever you prefer.
What's the best way to keep this cake moist for days?
Store it in an airtight container at room temperature for 3 days, or refrigerate for 5 days. The key is wrapping it tightly in plastic wrap before sealing to lock in moisture. For extra insurance, brush warm layers with simple syrup before assembly. This cake stays fresh longer than most because of the butter swirls that maintain richness.
Can I make this cake in a single 9-inch pan instead of two 8-inch pans?
Yes, but reduce baking time to 25-30 minutes—the smaller pan cooks faster. The cake will be denser since there's less surface area for the same volume of batter. For best results, stick with the two 8-inch pans for that perfect rise and texture. The extra effort is worth the lighter crumb!
Why does my cake crack on top?
Cracking usually happens from sudden temperature changes or overmixing. Make sure your oven is fully preheated and the batter is at room temperature before baking. Also, avoid opening the oven door during the first 20 minutes—the heat loss causes cracks. If it happens, don't worry—the cake will still taste amazing!