
Desserts
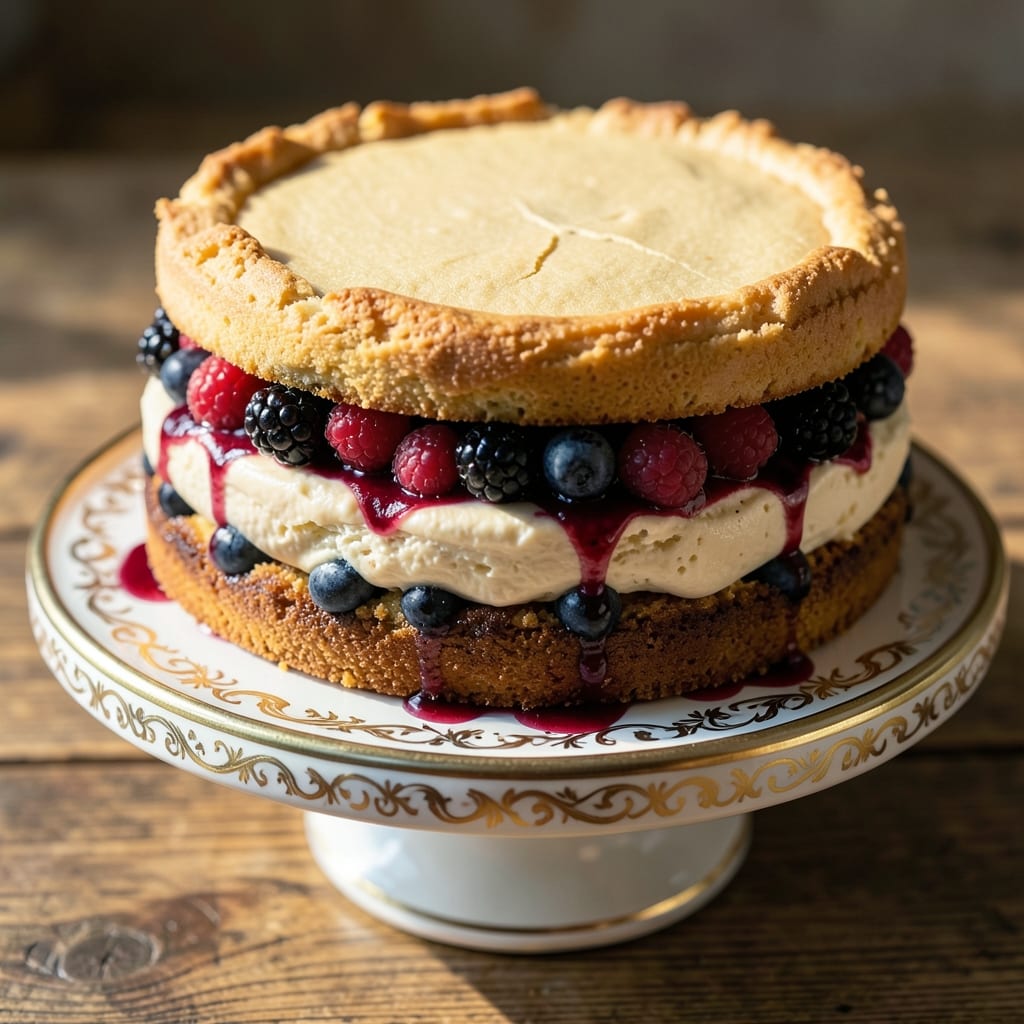
This almond berry cake recipe captures summer in every moist, vanilla-kissed layer and berry-studded swirl. The secret lies in almond flour's delicate texture and fresh berries that infuse the batter with natural sweetness, while a simple vanilla-almond cream swirl adds luxurious depth. I've perfected this recipe to deliver a cake that's tender yet sturdy enough to hold its shape, with just the right balance of nutty richness and fruity brightness.
The beauty of this recipe is its simplicity—no fancy techniques required, just precise measurements and gentle folding to maintain those airy layers. The almond flour creates a naturally moist crumb without needing extra fat, while the berries add both flavor and moisture. What makes it truly special is how the vanilla-almond cream swirl cuts through the dense cake layers, creating pockets of velvety goodness with every bite.
By the time you pull this cake from the oven, you'll have golden layers with a tender crumb and berries that peek through the surface, promising bursts of fresh flavor. The vanilla-almond cream swirls add visual appeal and a luxurious texture that transforms this into a showstopping dessert. It's elegant enough for special occasions but simple enough to make any day feel like a celebration.
Serve it warm with a dusting of powdered sugar or a scoop of vanilla ice cream for the perfect balance of textures. The cake keeps well at room temperature for up to three days, making it ideal for meal prep or gifting. Let's get baking—this recipe delivers restaurant-quality results with minimal effort.
Ingredients for almond berry cake
Almond flour, berries, and vanilla create a tender, nutty-sweet cake with luxurious swirls.
| Ingredient | Amount | Notes |
|---|---|---|
| Almond Flour 🌰 | 2 ½ cups | Finely ground, unsweetened |
| All-Purpose Flour 🌾 | ½ cup | For structure and binding |
| Granulated Sugar 🍚 | 1 ½ cups | White or light brown |
| Vanilla Extract 🌿 | 2 tsp | Pure, high-quality preferred |
| Fresh Mixed Berries 🍓 | 2 cups | Raspberries, blueberries, blackberries |
| Large Eggs 🥚 | 3 whole | Room temperature for best results |
| Unsalted Butter 🧈 | 1 cup | Cold, cubed for cream swirl |
| Powdered Sugar 🍚 | 1 ½ cups | For cream swirl and dusting |
| Almond Extract 🌰 | 1 tsp | Pure, for enhanced flavor |
| Baking Powder 🧂 | 1 ½ tsp | Aluminum-free preferred |
| Salt 🧂 | ½ tsp | Fine sea salt |
| Heavy Cream 🥛 | ½ cup | Cold, for cream swirl |
| Lemon Zest 🍋 | 1 tbsp | Fresh, for brightness |
| Vanilla Bean Seeds 🌿 | 1 tsp | Scraped from 1 bean |
| Powdered Sugar 🍚 | ¼ cup | Extra for final dusting |
The almond flour is the star here—Bob's Red Mill or Anthony's Goods are my go-tos for consistent texture. Freshly ground almond flour makes all the difference, so avoid pre-ground if possible. For the berries, local farmers markets or Trader Joe's have the best selection—look for vibrant, firm berries with no bruising. The vanilla extract should be pure, with vanilla listed as the sole ingredient. If you're using a vanilla bean, scrape the seeds for that extra depth of flavor. The butter matters too—Plugrá or Land O'Lakes are reliable for consistent results.
No almond flour? Substitute with 2 cups finely ground blanched almonds—just pulse them in a food processor until they resemble flour. Short on berries? Frozen work too, but thaw and drain them first to avoid excess moisture. The vanilla bean seeds can be skipped if you only have extract, but the flavor won't be quite the same. For the cream swirl, if you don't have heavy cream, whipped coconut cream works well for a dairy-free option. The lemon zest adds brightness—if you don't have fresh lemons, bottled zest works in a pinch, but fresh is always better. The baking powder should be fresh—if it's over a year old, replace it for proper rise.
This cake keeps beautifully—3 days at room temperature wrapped in a cake dome or 5 days in the fridge covered tightly. For longer storage, freeze the layers separately for up to 3 months. To serve, let it sit at room temperature for 30 minutes before slicing—this ensures clean layers and perfect swirls. The berries will soften slightly over time, but that just adds to the cake's natural sweetness. Dust with powdered sugar right before serving for that restaurant-quality finish.
Why You'll Love This Recipe
- No-Mix Necessary: The almond flour does most of the work—just fold in the dry ingredients, pour, and bake. Honestly, I’ve made this while scrolling through my phone. The berries add moisture without extra effort, and the vanilla ties everything together like a warm hug.
- Berries Meet Buttery Crunch: That first bite? Juicy berries bursting against a tender crumb, with almond flour giving it a subtle nutty depth. Between us, the sugar caramelizes just enough to make it feel like a treat—not just cake. (Yes, even on a Tuesday night.)
- Picnic to Dessert Table: Slice it for a potluck, pack it for a hike, or serve it at a brunch with coffee. The berries keep it fresh for days, and the almond flour means no one will guess it’s gluten-free. My daughter picks out the blueberries first, but still asks for seconds.
- Leftovers That Don’t Suck: This cake actually improves overnight—the flavors meld, and the texture stays perfect. I’ve reheated slices in the toaster for 10 seconds, and it’s still crave-worthy. Plus, the almond flour keeps it from drying out like regular cake does. My secret weapon for lazy mornings.
Step-by-step instructions for almond berry cake
Here's how to create layers of tender almond cake with vibrant berry filling and signature vanilla-almond cream swirls.
Prepare the Almond Berry Filling
In a small saucepan, combine the 2 cups fresh mixed berries with 1.5 cups granulated sugar. Cook over medium heat for 5-7 minutes until the berries soften and release their juices, forming a thick compote. The mixture should reduce slightly but still retain a chunky texture.
Strain the filling through a fine-mesh sieve to remove seeds and skins, pressing gently with a spoon to extract all the juices. Transfer the strained berry mixture to a bowl and let it cool completely before using. This step ensures a smooth filling that won't make your cake soggy. If the filling cools too much, warm it gently in the microwave for 20-30 seconds to make it easier to work with.
Mix the Cake Batter
Preheat your oven to 350°F and grease two 8-inch round cake pans with nonstick spray, then line the bottoms with parchment paper. In a large mixing bowl, whisk together the 2.5 cups almond flour, 0.5 cup all-purpose flour, 1.5 tsp baking powder, and 0.5 tsp salt until evenly combined. This dry mixture forms the foundation of your cake's tender crumb.
In a separate bowl, beat the 3 whole large eggs until frothy, then gradually whisk in the 1.5 cups granulated sugar until the mixture lightens in color. Add the 2 tsp vanilla extract, 1 tsp almond extract, and 1 tbsp lemon zest, mixing until fully incorporated. Gently fold the dry ingredients into the wet mixture until just combined—overmixing can make the cake dense. The batter should be smooth but still slightly lumpy, with no dry spots remaining.
Prepare the Vanilla-Almond Cream Swirl
In a medium bowl, beat the 1 cup unsalted butter (cold and cubed) with an electric mixer until smooth and creamy. Gradually add the 1.5 cups powdered sugar, mixing on low speed until combined. Add the 0.5 cup heavy cream, 1 tsp vanilla bean seeds, and mix until the cream swirl is light and fluffy. This mixture should hold its shape when piped but still be spreadable—like thick whipped cream.
For the swirl effect, divide the cream mixture into two equal portions. Spread one portion evenly over the bottom layer of cake, then pipe the second portion in a zigzag pattern across the top. Use a knife to gently swirl the cream into the cake batter before adding the next layer. This creates those signature marbled streaks that make this cake visually stunning.
Assemble and Bake the Cake Layers
Divide the cake batter evenly between the two prepared pans, filling each about ⅔ full. Bake for 18-22 minutes, or until a toothpick inserted into the center comes out clean. Rotate the pans halfway through baking for even browning. The edges should be golden while the centers remain slightly springy to the touch.
While the cakes are still warm, spread ½ cup of the cooled berry filling evenly over each layer. Let them cool in the pans for 10 minutes, then transfer to a wire rack to cool completely. This layering ensures the berry filling stays vibrant and the cake maintains its moisture without becoming soggy.
Final Assembly and Dusting
Once both layers are completely cool, place the first layer on a serving plate. Spread the remaining ½ cup berry filling evenly over the top, then place the second layer on top. Gently press down to create a clean edge. For the finishing touch, dust the entire cake with the 0.25 cup powdered sugar using a fine-mesh sieve, creating an even, snowy layer that contrasts beautifully with the rich cake and berries.
Slice with a serrated knife that's been dipped in hot water and wiped dry—this ensures clean cuts through the layers. Serve immediately or refrigerate for up to 3 days for a more intense berry flavor. The cake's almond base keeps it moist while the berry filling adds a bright, fruity contrast that makes every bite special.
Pro Tips For Making Almond Berry Cake
- Preheat Like a Boss: Fire up your oven to 350°F (175°C) and let it scream hot for 15 minutes—almond flour hates lukewarm pans. I learned this after my first batch turned out dense because the batter cooled too fast in a tepid oven. Trust me, the cake will rise higher and stay lighter. ---
- Toss Berries Dry: Pat those fresh berries completely dry with a paper towel before folding them into the batter. Wet berries release juice like a burst water balloon, turning your cake into a soggy mess. Do this step right after measuring—it takes 30 seconds and saves you from a gummy disaster. ---
- Mix Just Until Combined: Overmixing the batter turns your almond flour into glue. Stop when the dry ingredients disappear—no streaks, no lumps, just done. I used to whip it like I was making pancakes, and the cake ended up tough. Two minutes max with a spatula, then fold in those berries gently. ---
- Grease with Butter, Dust with Flour: Skip the nonstick spray—butter the pan, then coat it with flour (tap out the excess). Almond flour sticks like a stubborn ex, and nothing beats this combo for easy release. My first attempt with spray left me scraping cake off the pan like it was 1950s wallpaper. Worth the extra 30 seconds.
Storing and reheating this dish
Room Temperature Storage
Your almond berry cake stays fresh and moist at room temperature for up to 3 days when properly stored. I recommend using a cake dome or wrapping tightly in plastic wrap followed by a foil cover to lock in moisture. Place it on a wire rack inside an airtight container to prevent condensation from making the bottom soggy. The almond flour helps maintain moisture, so you won't need to worry about dryness like with traditional flour cakes. 🌟
Refrigerator Refresh
For longer storage, refrigerate your cake for up to 5 days—the cold actually intensifies the berry flavors while keeping the texture tender. Let it sit at room temperature for 30 minutes before serving to restore the perfect crumb. I find the cake's almond richness pairs beautifully with a scoop of vanilla bean ice cream when served chilled. Store leftover slices in airtight containers with parchment paper between layers to maintain freshness.
Freezing Layers Separately
For maximum longevity, freeze the cake layers individually for up to 3 months. Wrap each layer tightly in plastic wrap, then place in a freezer bag with all air removed. When ready to serve, thaw overnight in the fridge and assemble with fresh berry filling. The texture remains excellent when properly frozen—just avoid thawing at room temperature to prevent condensation. This method works particularly well for special occasions when you want to bake ahead.
Reheating Slices
If you prefer your cake warm, reheat individual slices in the microwave for 10-15 seconds on medium power. For a more even heat, place slices on a baking sheet and warm in a 300°F oven for 5-7 minutes. The microwave method is quickest, while oven reheating preserves the cake's delicate texture better. I often reheat slices before serving with whipped cream—the contrast of warm cake with cool topping is heavenly. 💛
Reviving Dried Edges
If your cake develops slightly dry edges during storage, don't worry—this is normal with almond flour cakes. Brush the edges with a simple sugar syrup (equal parts water and sugar, heated until dissolved) to restore moisture. Alternatively, place a damp paper towel in the container with the cake overnight to rehydrate from within. The berry filling will also help keep the cake tender, so don't remove it when storing.
Serving After Storage
Always let stored cake sit at room temperature for 20-30 minutes before slicing to ensure clean cuts and proper texture. The powdered sugar topping will look best if dusted fresh after bringing the cake to room temperature. For a restaurant-quality presentation, garnish with fresh berries and a sprinkle of toasted almond slivers. The cake's natural flavors develop beautifully over time, making it even more delicious the second day. 🍰
Nutrition facts
Frequently asked questions
Can I substitute almond flour with regular flour?
You can try, but the texture will change significantly. Almond flour creates a tender, moist crumb that regular flour can't replicate. If you must substitute, use 1.5 cups all-purpose flour plus 1 tbsp cornstarch and add 2 tbsp extra liquid (like milk or water) to compensate for the lack of moisture. Expect a denser cake with less nutty flavor.
How do I make this cake gluten-free?
This recipe is already gluten-free! The almond flour and all-purpose flour combination naturally avoids gluten. Just ensure your baking powder and vanilla extract are certified gluten-free. For extra insurance, use a dedicated gluten-free kitchen space to prevent cross-contamination. The cake will maintain its tender texture while being safe for gluten-sensitive diets.
Can I use frozen berries instead of fresh?
Yes, but thaw and drain them first to remove excess moisture. Frozen berries work well, but they'll release more liquid than fresh ones. For best results, spread them on a paper towel to absorb moisture before adding to the cake batter. This prevents a soggy texture. The flavor will be slightly less vibrant, but still delicious.
Why did my cake sink in the middle?
This usually happens from overmixing the batter or opening the oven door too early. Almond flour cakes are delicate—fold the dry ingredients just until combined. Also, check your baking powder is fresh (over 6 months old loses potency) and don't overfill the pans. Rotate the pans halfway through baking for even heat distribution. A toothpick test (clean when done) is more reliable than visual cues.
Can I make this cake in a single layer?
Use a 9-inch round pan and reduce the batter by ⅓ (about 1.5 cups). Bake for 25-30 minutes at 350°F until a toothpick comes out clean. The cream swirl will still work beautifully—just spread it evenly over the top before baking. This version is perfect for smaller gatherings or when you prefer a simpler presentation.