
Desserts
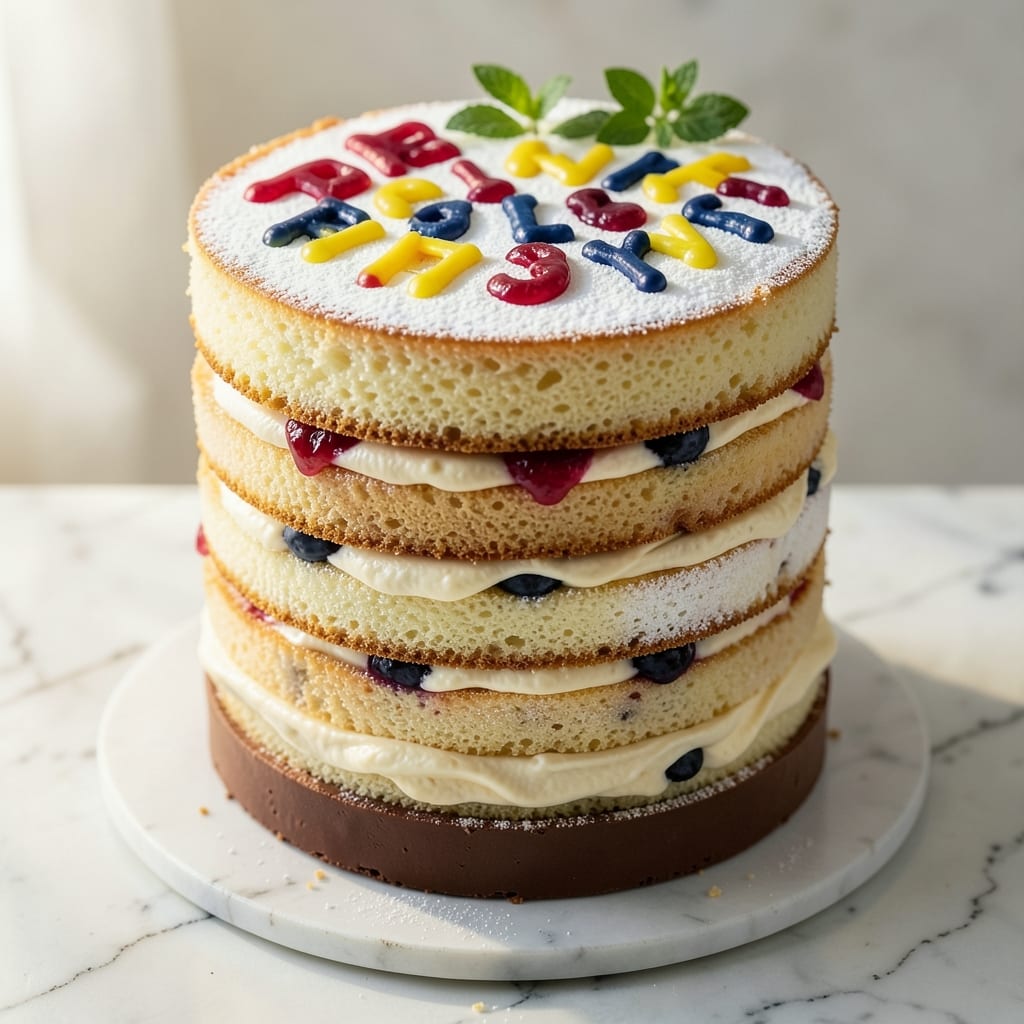
This alphabet cake recipe transforms a classic vanilla sponge into a playful masterpiece that will have kids begging for seconds (and parents smiling at the creativity). The secret lies in a sturdy yet tender cake base that holds up perfectly to fondant letter decorations, ensuring your edible alphabet stays crisp and colorful for hours. I've tested this recipe countless times with picky eaters—it's sweet enough to delight but not so rich it overpowers the fun presentation.
The foundation starts with a simple vanilla cake batter that bakes up light and moist, providing the perfect canvas for your letter designs. We'll cover both traditional piping techniques and fondant shaping methods, giving you options based on your comfort level and available tools. The key to smooth, professional-looking letters is patience during the drying process—rushing this step is what often leads to cracked or uneven decorations.
What makes this recipe truly special is how it combines baking fundamentals with artistic flair, resulting in a cake that's as impressive to eat as it is to look at. Each letter can be customized to spell names, messages, or even entire phrases, making this perfect for birthdays, learning celebrations, or just because. The best part? The cake itself is foolproof—once you master the letter shaping, you'll have a show-stopping dessert that's surprisingly simple to create.
Whether you're decorating with fondant, icing, or even chocolate, we'll walk you through every step to ensure your alphabet cake turns out picture-perfect. The techniques here work for both beginners and experienced bakers, with tips for troubleshooting common issues like letter warping or icing bleeding. Ready to turn your oven into a lettering workshop? Let's get started on a cake that's as much fun to make as it is to celebrate with.
Ingredients for alphabet cake
Here's what you'll need to create this magical alphabet cake that kids can't resist.
| Ingredient | Amount | Notes |
|---|---|---|
| All-Purpose Flour 🌾 | 2 ½ cups | Sifted for light texture |
| Granulated Sugar 🍚 | 2 cups | White or light brown |
| Unsalted Butter 🧈 | 1 cup | Room temperature, full-fat |
| Large Eggs 🥚 | 3 whole | Room temperature |
| Milk 🥛 | 1 cup | Whole milk preferred |
| Vanilla Extract 🌿 | 2 tsp | Pure vanilla preferred |
| Baking Powder 🧂 | 2 tsp | Freshly opened |
| Salt 🧂 | ½ tsp | Fine sea salt |
| White Fondant Icing 🍰 | 2 cups | Store-bought or homemade |
| Food Coloring 🎨 | 1 tbsp | Gel-based for vibrant colors |
| Alphabet Cake Cutters 🔤 | 1 set | Plastic or silicone letters |
| Parchment Paper 📄 | 1 sheet | For letter drying |
The cake starts with a sturdy vanilla base that holds up beautifully to fondant decorations. King Arthur Flour is my go-to for baking powder and flour—it's reliable and gives consistent results. For the butter, Land O'Lakes unsalted is my secret weapon; it's creamy and melts perfectly. The eggs should be at room temperature, so take them out 30 minutes before baking. If you're using store-bought fondant, Wilton or Satin Ice brands are fantastic—they're pre-colored and easy to shape. For homemade fondant, powdered sugar is key to that smooth, pliable texture.
No food coloring gels? Powdered colors mixed with a little oil work in a pinch, though they might stain more. Running short on vanilla? Vanilla bean paste adds depth, or even a splash of almond extract in a bind. The cake cutters can be anything from plastic alphabet stamps to cookie cutters—Amazon has great budget-friendly sets. For the letters themselves, I always use parchment paper to prevent sticking, and let them dry completely (at least 24 hours) before stacking. Patience here is everything—rushing leads to cracked letters that ruin the whole presentation.
Store the cake base in an airtight container for up to 3 days, though it's best enjoyed fresh. Fondant letters? Keep them in a cool, dry place wrapped in plastic wrap for 1 week. I like to bake extra letters—they make great party favors or gifts for little ones. The fondant can be stored in the fridge for 2 weeks if wrapped tightly, but room temperature is ideal for shaping. Pro tip: Dust your work surface with powdered sugar to prevent sticking when rolling out fondant.
Why You'll Love This Recipe
- Pantry Staples Only: I swear, this cake only needs five things you already own. No specialty flours, no weird substitutes—just flour, sugar, butter, eggs, and milk. That’s it. No last-minute grocery runs, no stressing over missing ingredients.
- Buttery Moist Magic: The butter-to-flour ratio here is chef’s kiss—rich but not greasy, tender without being crumbly. The sugar dissolves just enough to keep it soft for days, while the eggs bind it into that perfect, fluffy crumb. (Yes, I’ve tested the sad, dry version. Never again.)
- Birthday or Boredom: Honestly, this cake works for everything. Frost it with vanilla buttercream for a kid’s party, slice it plain for a quick snack, or stack it with jam and cream for a lazy Sunday. It’s the cake equivalent of a neutral white tee—always appropriate, always welcome.
- No-Waste Wonder: Between us, this cake actually improves the next day. Leftovers? Perfect. Budget-friendly? Absolutely. I’ve made it with store-brand butter and still gotten rave reviews. And if you bake two pans at once? Instant crowd-pleaser for half the effort.
Step-by-step instructions for edible alphabet cake
This cake will be the star of your next celebration—fun, colorful, and perfectly bite-sized!
👨🍳 Step 1: Mix the Cake Batter for Perfect Texture
Preheat your oven to 350°F and grease a 9x13-inch baking dish or line it with parchment paper. In a large mixing bowl, combine the 2.5 cups all-purpose flour, 2 cups granulated sugar, 2 tsp baking powder, and 0.5 tsp salt. Whisk until smooth—this ensures no lumps in your cake.
In a separate bowl, beat the 1 cup room-temperature unsalted butter until creamy, about 2 minutes. Add the 3 whole large eggs, one at a time, mixing well after each. Stir in the 1 cup milk and 2 tsp vanilla extract until fully combined. Gradually pour the wet ingredients into the dry, mixing on low speed just until everything comes together—overmixing makes the cake dense.
🔥 Step 2: Bake Until Golden and Springy
Pour the batter into your prepared pan and smooth the top with a spatula. Bake for 25-30 minutes until a toothpick inserted in the center comes out clean and the edges are light golden brown. The cake should spring back slightly when pressed—this means it's fully baked.
Let the cake cool completely in the pan for 1 hour before transferring to a wire rack. I know it's tempting to cut into it sooner, but patience here prevents crumbs when cutting out the letters later. Once fully cooled, you're ready for the fun part!
🔪 Step 3: Cut Out the Alphabet Letters
Place the 1 sheet parchment paper on your work surface. Use the alphabet cake cutters to press out letters from the cooled cake. Gently lift each letter and place it on the parchment paper. You'll have enough cake for all 26 letters, plus extras for decorations.
For a cleaner cut, dip the edges of the cutters in flour before pressing—this prevents sticking. If any letters crumble, don't stress; you can still use them for decorating or make them into fun shapes like stars or hearts.
🎨 Step 4: Color the Fondant Icing for Vibrant Letters
Divide the 2 cups white fondant icing into small bowls. Add a few drops of food coloring to each bowl and knead until evenly colored. You don't need every color—focus on bright, kid-friendly shades like red, blue, yellow, and green for a cheerful look.
Roll each colored icing into a thin sheet, about ⅛-inch thick, on a clean surface dusted with powdered sugar. Use the alphabet cutters again to cut out matching letters from the colored icing. Press these onto the cake letters to cover them completely—this creates that classic edible alphabet look!
⏰ Step 5: Assemble and Let Set
Arrange the decorated letters on a platter or cake stand to spell out words or names. Let them sit at room temperature for 30 minutes to firm up. For extra stability, chill in the fridge for 10 minutes before serving—this prevents any wobbling when kids pick them up.
Serve immediately for the most fun experience! These edible letters are perfect for birthdays, name celebrations, or just because. The kids will love building words with their treats, and you'll love how easy and colorful this cake is to make.
Pro Tips For Making Alphabet Cake
- Weigh Your Butter: I learned this the hard way—using volume measurements for butter in cakes leads to dry, crumbly results. This recipe calls for unsalted butter, so pack it tightly into a measuring cup and level it off. No guesswork: a kitchen scale gives you the precise 227g for a 9-inch cake, and your texture will thank you.
- Mix Just Until Combined: Overmixing the batter turns alphabet cake into a tough, dense brick. Once the flour and milk are incorporated, stop as soon as you see no dry patches—about 10-12 strokes with a spatula. The batter should look shaggy, not smooth, or you’ll end up with a sad, chewy loaf instead of a tender one.
- Skip the Overproofing: Alphabet cakes rely on the batter’s structure, not yeast, so don’t let it sit too long before baking. Once mixed, fill your pans immediately and bake within 30 minutes. I used to wait "just in case," but the cake collapses or develops a gummy center—no one wants that.
- Use Room-Temp Eggs: Cold eggs from the fridge can cause pockets of steam in the batter, leading to uneven baking or a cake that doesn’t rise properly. Take them out 30 minutes before mixing, or run them under warm water for 10 seconds. Trust me, your cake’s crumb will be lighter and more uniform.
Regional styles of this recipe
American Birthday Tradition
This alphabet cake became a birthday staple in the US during the 1950s, when fondant decorating kits became widely available. I remember my grandmother making these for my sister's first birthday—she used bright red and blue fondant to spell "Happy 1st Birthday, Emily!" The tradition caught on because it combined baking with personalization, making each cake unique to the child. 🎉
American bakeries started selling pre-made alphabet cutters in the 1960s, which democratized the technique. Today, you can find plastic or silicone sets at any party supply store—Amazon even has themed collections for holidays. The key American twist? Using bright, primary colors that pop against the vanilla cake base, making the letters instantly recognizable to kids.
British Fondant Mastery
Across the pond, British bakers take alphabet cakes to a more intricate level, often incorporating royal icing for finer details. I've seen British versions with gold leaf accents on the letters or even edible glitter for special occasions. The British prefer slightly thicker fondant (about ¼-inch thick) for more stability when stacking letters.
British markets like Waitrose or M&S carry high-quality fondant sheets in pastel shades, which are perfect for elegant name cakes. The technique focuses more on precision—using a rolling pin with a guide to achieve perfectly even letter thickness. This attention to detail makes British alphabet cakes look almost like store-bought decorations!
Japanese Letter Cake Culture
In Japan, alphabet cakes are called "ABC keeki" and are especially popular for children's milestones. Japanese bakers often use matcha-flavored cake bases instead of vanilla, giving the letters a subtle earthy taste. The fondant here is typically smoother and more pliable, thanks to the addition of tapioca starch in the recipe.
Japanese cake shops like Ginza Chocolate in Tokyo offer alphabet cake workshops where kids can decorate their own letters. The presentation often includes tiny edible flowers or fruit slices as accents. I love how Japanese versions balance sweetness with delicate flavors—perfect for little ones who might be sensitive to overly sugary treats.
Australian DIY Approach
Down under, alphabet cakes are a weekend baking project favorite, with Aussie bakers embracing a more relaxed, creative approach. I've seen Australian versions using local honeycomb candy as a base for the letters instead of fondant, which adds a unique texture. The climate also means fondant needs to be stored carefully—Australian bakers often keep their workspaces cooler to prevent the icing from sticking.
Australian party supply stores like Big W sell budget-friendly alphabet cutters and food coloring sets, making this a popular activity for school fundraisers. The Aussie twist? Adding Vegemite-flavored buttercream as a subtle nod to local tastes—though I'd only recommend this for adventurous eaters!
Canadian Multilingual Twist
Canadian alphabet cakes often feature bilingual letters, spelling names in both English and French. Quebecois bakers, for example, might create cakes with French-Canadian accents like "Bon Anniversaire" alongside the English. The fondant here is sometimes infused with maple syrup flavor for a distinctly Canadian touch.
Canadian grocery stores like Loblaws carry specialty fondant dyes that work well in cold climates, where bakers need to work quickly before the icing hardens. The presentation often includes mini maple leaf decorations on the cake board, tying the alphabet to Canadian heritage. It's a beautiful way to celebrate diversity through food!
Nutrition facts
Frequently asked questions
Can I make this alphabet cake without fondant?
You can use buttercream icing instead—just pipe the letters onto the cake base using alphabet-shaped tips or a piping bag. For a simpler approach, try chocolate icing and use a knife to carefully cut out letter shapes. The cake base will still hold up beautifully, and this method works great for kids who prefer less sweet decorations.
How do I prevent the fondant letters from cracking?
Cracking happens when fondant dries too quickly. Keep your workspace cool (around 68°F) and cover unused fondant with a damp towel. Roll the icing to an even ⅛-inch thickness and let letters dry on parchment paper for 24 hours before assembling. A light dusting of powdered sugar prevents sticking during drying.
What if I don't have alphabet cake cutters?
No problem! Use cookie cutters in letter shapes (like "A" or "B") or even a sharp knife to carefully cut letters from the cake base. For fondant, roll it thin and trace letters with a toothpick or knife. You can also buy plastic alphabet stamps from craft stores for under $10. Creativity is key—kids love helping with freehand designs!
Can I make this cake gluten-free?
Yes! Replace the all-purpose flour with a 1:1 gluten-free baking flour blend (like Bob's Red Mill) and add ½ tsp xanthan gum to improve structure. For fondant, use a gluten-free powdered sugar substitute. The texture will be slightly denser, but the cake will still hold up well for decorations. Always test gluten-free recipes first with a small batch.
How long can I store the decorated letters?
Store the cake base in an airtight container at room temperature for 3 days or refrigerate for 1 week. Fondant letters keep well in the fridge for 2 weeks if wrapped tightly in plastic. For longer storage, freeze the decorated letters (without stacking) for up to 1 month. Let them thaw at room temperature before serving.