
Desserts
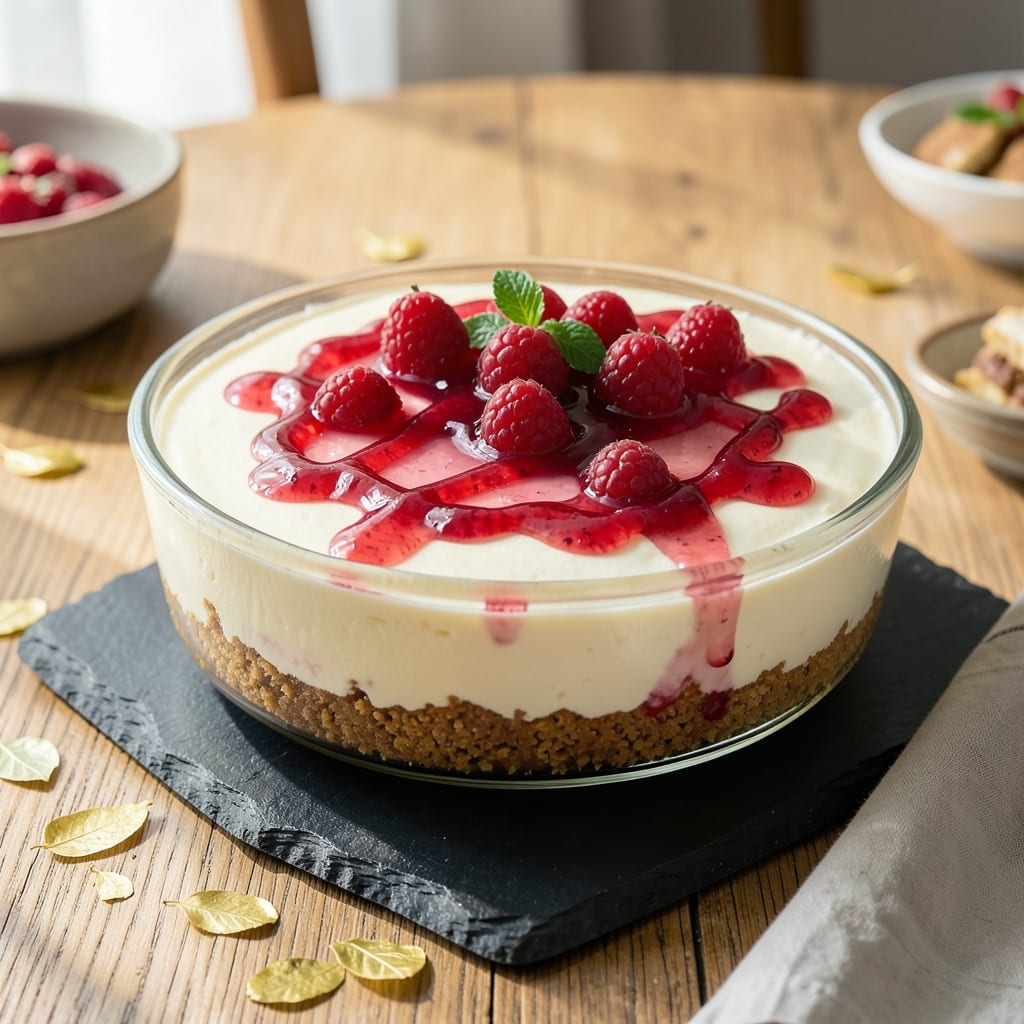
This amazing no-bake cheesecake recipe is the dessert game-changer you’ve been waiting for—creamy, dreamy, and ready in under an hour without a single minute in the oven. 💛 I’ve perfected the velvety texture that melts in your mouth, using a foolproof combination of cream cheese, sweetened condensed milk, and just the right amount of gelatin for that signature wobble. The best part? No baking, no stress, and no waiting for the oven to cool. The secret to this no-bake cheesecake lies in the layers: a buttery graham cracker crust that stays sturdy, a filling that’s silky-smooth but still holds its shape, and the magic of chilling time—because patience here means the difference between good and amazing. Whether you’re a beginner or a dessert pro, this recipe delivers restaurant-quality results with minimal effort. Once it’s set, you’ll have a cheesecake so rich and velvety it’ll fool anyone who thinks no-bake desserts are an afterthought. Top it with fresh berries, a drizzle of caramel, or a dusting of cocoa for that extra wow factor. The possibilities are endless, but the foundation—simple, foolproof, and foolhardy-delicious—is what makes this recipe a must-try. No oven? No problem. No fancy skills? Even better. This is the kind of dessert that turns a casual gathering into a showstopper, and the best part is, you’ll be the hero who made it happen. Let’s get started!
Ingredients for amazing no bake cheesecake
Eight simple ingredients transform into this velvety no-bake cheesecake masterpiece.
| Ingredient | Amount | Notes |
|---|---|---|
| Graham Crackers 🍪 | 1 ½ cups | Crushed into fine crumbs |
| Unsalted Butter 🧈 | ½ cup | Melted, full-fat preferred |
| Granulated Sugar 🍚 | ½ cup | For crust sweetness |
| Cream Cheese 🧀 | 16 oz | Full-fat, room temperature |
| Sweetened Condensed Milk 🥛 | 1 can | 14 oz can (standard size) |
| Unflavored Gelatin 💊 | 1 ½ tsp | Powdered, not sheet |
| Heavy Whipping Cream 🥛 | 1 cup | Full-fat for best texture |
| Vanilla Extract 🌿 | 1 tsp | Pure, high-quality |
| Salt 🧂 | ¼ tsp | Fine sea salt |
| Lemon Juice 🍋 | 1 tbsp | Freshly squeezed |
| Sour Cream 🥛 | ½ cup | Full-fat for richness |
| Whipped Cream 🍦 | ½ cup | For optional garnish |
| Fresh Berries 🍓 | 1 cup | Sliced strawberries/raspberries |
The cream cheese is non-negotiable here—full-fat Philadelphia is my go-to, but any brand works if it's rich and creamy. Trader Joe's and Walmart both carry it cheap, but if you're feeling fancy, grab a block from Whole Foods for that extra velvety texture. Room temperature is key: take it out of the fridge 30 minutes before mixing. The graham crackers? Honey Maid or Nabisco both crush perfectly—just pulse in a food processor for fine crumbs. No food processor? A heavy bag and rolling pin work too (trust me, it's satisfying).
No sweetened condensed milk? Mix 1 cup evaporated milk with 1 cup sugar, heat until dissolved, then cool completely—it's a total game-changer. Running low on gelatin? Agar powder at half the amount works for vegan versions, but the texture will be firmer. The sour cream adds that signature tang—full-fat only, please. No heavy cream? Whipped cream at double the amount gets you close, but it won't be as rich. Fresh berries? Frozen works in a pinch—just thaw and drain first. The lemon juice brightens everything—skip it if you're sensitive to citrus, but I promise you won't regret it.
This cheesecake needs 4-6 hours to set properly—patience is your friend. Store leftovers in the fridge for up to 5 days, but honestly, it disappears fast. I like to portion it into individual servings so it's always ready for dessert emergencies. The crust keeps well for 3 days if you make it ahead—just press it into the pan and refrigerate. For a showstopper, top with whipped cream and berries right before serving. The chilling time is worth every second—it's what turns good into amazing.
Why You'll Love This Recipe
- No Oven Needed: I swear by this recipe when I’m too tired for baking—just crush graham crackers, melt butter, mix, and chill. The condensed milk gives it that perfect thickness without a single oven turn-on.
- Creamy Without Effort: That combo of cream cheese and sweetened condensed milk? It’s like dessert magic. The crust stays crisp while the filling stays silky—no overbaking, no cracks, just pure, smooth satisfaction.
- Party in a Bowl: Between us, this is my secret weapon for potlucks or last-minute gatherings. The graham crust holds up, the flavor stays rich even at room temp, and honestly? No one will guess it’s no-bake.
- Budget-Friendly Luxury: I make this twice a month because it’s cheap but feels fancy. Graham crackers, butter, and cream cheese stretch far, and the condensed milk cuts costs without sacrificing taste. Leftovers? Even better cold.
Step-by-step instructions for velvet no-bake cheesecake
Here's how to create a silky-smooth dessert that requires no baking—just patience and precision.
👨🍳 Step 1: Create the Crust with Graham Cracker Crumbs
Preheat your oven to 350°F and melt the 0.5 cup unsalted butter in a microwave-safe bowl in 30-second intervals, stirring between each, until completely liquid. In a separate large bowl, mix the 1.5 cups graham cracker crumbs with the 0.5 cup granulated sugar and 0.25 tsp salt until evenly combined.
Pour the melted butter mixture over the dry ingredients and stir until everything is thoroughly moistened. Press the mixture firmly into the bottom of a 9-inch springform pan, creating an even layer. Bake for 8-10 minutes until lightly golden around the edges. Let it cool completely before proceeding—this prevents a soggy base.
🍳 Step 2: Bloom the Gelatin and Prepare the Filling Base
In a small bowl, sprinkle the 1.5 tsp unflavored gelatin over ¼ cup cold water and let it sit for 5 minutes to bloom. While it blooms, combine the 16 oz cream cheese (at room temperature), 1 can sweetened condensed milk, 1 tsp vanilla extract, and 1 tbsp lemon juice in a large mixing bowl.
Use an electric mixer to beat these ingredients on medium speed for 2-3 minutes until completely smooth and creamy. This step is crucial—any lumps will remain in your final cheesecake. The mixture should be thick but pourable. Here's where it gets fun: slowly pour in the bloomed gelatin mixture while mixing on low speed to dissolve it completely.
🥘 Step 3: Incorporate the Cream and Sour Cream
In a separate bowl, whip the 1 cup heavy whipping cream to soft peaks using a hand mixer. Fold this whipped cream into the cream cheese mixture along with the 0.5 cup sour cream in two additions, gently mixing just until fully combined. The batter should be thick but still able to flow easily.
Real talk: don't overmix here. You're looking for a smooth, velvety texture—not a stiff batter. Pour this mixture over the cooled crust, spreading it evenly with a spatula. Tap the pan gently on the counter a few times to remove any air bubbles. Cover and refrigerate for at least 6 hours or overnight—this is where the magic happens as it sets completely.
⏰ Step 4: Assemble and Chill to Perfection
Once fully set (it should be firm to the touch), carefully run a knife around the edge of the pan to loosen it. Top with the 0.5 cup whipped cream and arrange the 1 cup fresh berries on top. For extra presentation, you can create a berry pattern or simply distribute them evenly across the surface.
Return the cheesecake to the refrigerator for another 2 hours to allow the whipped cream to firm up slightly. This final chilling ensures clean slices and prevents the berries from sinking into the cheesecake. Serve it chilled—each bite should deliver that perfect balance of creamy, tangy, and slightly sweet flavors with a delightful crunch from the crust.
Pro Tips For Making Amazing No Bake Cheesecake
- CHILL THE CREAM CHEESE: Mix the cream cheese and condensed milk with cold hands—literally. Take it straight from the fridge, slice it into chunks, and let it sit in the bowl for 5 minutes before beating. I used to rush this and ended up with grainy cheesecake every time. Cold butter too if you’re using it in the crust—no one wants to chew through crumbs.
- TOAST THE CRUST: Pulse the graham crackers into crumbs, then mix with melted butter and sugar. Press it into the pan and bake at 350°F (175°C) for 5–7 minutes—just until it’s firm and smells toasty. Skipping this step means a soggy bottom later. Trust me, your cheesecake will hold together better, and the flavor won’t turn to mush after an hour in the fridge.
- WEIGH THE CONDENSED MILK: Use a kitchen scale for the condensed milk—don’t eyeball it. The sweetness-to-cream-cheese ratio is everything here. I once used a tablespoon too much and ended up with a dessert that tasted like dessert and a candy bar. Stick to the recipe’s weight (usually 14 oz/400g for 8 oz/225g cream cheese) unless you’re going for a specific flavor profile.
- FREEZE THE FILLING: After mixing the filling, divide it into two bowls and freeze one for 20 minutes. This tricks the texture into staying silky smooth instead of grainy. I was skeptical—why freeze when it’s no-bake?—but now I do it religiously. The contrast in temperatures keeps the final texture creamy, not clumpy. Just let it soften slightly before layering.
Troubleshooting great amazing no bake cheesecake
Crust Too Soggy
If your crust ends up soggy, it’s usually because the filling wasn’t fully set before cutting or the crust wasn’t baked long enough. First, always chill the cheesecake for the full 6 hours—this ensures the gelatin sets properly. For extra insurance, bake the crust for 10-12 minutes until golden and crisp. I’ve also found that pressing a parchment paper between the crust and pan before baking prevents moisture from seeping in. 💡
Filling Too Runny
A runny filling usually means the gelatin didn’t bloom properly or wasn’t incorporated well. Bloom the gelatin in cold water for 5 minutes—no shortcuts here! Also, make sure your cream cheese is fully room temperature (no cold lumps). If the mixture still feels too thin, add ½ tsp more gelatin and let it set longer. Pro tip: Use a thermometer to check the filling’s internal temp—it should reach 60°F before pouring. ✨
Cheesecake Not Setting
If your cheesecake isn’t firming up after chilling, the gelatin might be the culprit. Double-check your gelatin measurements—sometimes brands vary in strength. Another common issue is overmixing the batter, which can break down the gelatin’s structure. To fix it, let the cheesecake sit in the fridge for an extra 2 hours or even overnight. If it’s still too soft, try adding 1 tsp more gelatin to a fresh batch and mixing it in carefully. 🧊
Cracks on Top
Cracks often appear when the cheesecake sets too quickly or isn’t chilled evenly. To prevent this, tap the pan gently on the counter after pouring the filling to release air bubbles. Also, cover the pan with plastic wrap (pressed directly onto the surface) to create a smooth, even chill. If cracks already appear, don’t worry—they’re mostly cosmetic! Just drizzle with chocolate ganache or caramel to disguise them. 🍫
Grainy Texture
A grainy texture usually means the cream cheese or gelatin wasn’t mixed smoothly. Beat the cream cheese mixture for 3-4 minutes until completely smooth—no lumps allowed! If you’re using powdered gelatin, dissolve it fully in warm water (not boiling) before adding it to the mixture. For extra silkiness, I like to strain the filling through a fine-mesh sieve before pouring it into the crust. This catches any stubborn grains. 🥄
Berries Sinking In
If your berries sink into the cheesecake, it’s likely because the whipped cream topping wasn’t firm enough. Chill the cheesecake for the full 2 hours after adding toppings—this gives the whipped cream time to set. For a sturdier topping, fold in 1 tsp powdered sugar to stabilize the whipped cream. Another trick? Press the berries lightly into the whipped cream so they stay in place. 🍓
Nutrition facts
Frequently asked questions
Can I make this no-bake cheesecake without gelatin?
Yes! For a gelatin-free version, replace the 1.5 tsp gelatin with 2 tsp agar powder (mixed with 2 tbsp cold water) or ½ cup whipped cream at stiff peaks. The texture will be firmer but still creamy. Chill for 8 hours or overnight to ensure proper setting.
How do I prevent the crust from breaking when slicing?
Let the cheesecake chill for the full 6 hours before slicing—this ensures the gelatin sets completely. Run a thin knife around the edges of the pan first, then dip it in hot water and wipe dry between slices. For extra stability, chill the cheesecake on a tray in the freezer for 10 minutes before serving.
What’s the best way to store leftovers?
Wrap individual slices tightly in plastic wrap, then store in an airtight container. Keep in the fridge for up to 5 days, or freeze for 1 month. To reheat, let slices sit at room temperature for 10 minutes—no microwave needed! The texture stays perfect when handled gently.
Can I use digestive biscuits instead of graham crackers?
Digestive biscuits work beautifully—they’re slightly crispier and add a nutty depth. Crush 1.5 cups into fine crumbs and follow the same crust instructions. For extra flavor, toast the biscuits for 5 minutes at 350°F before crushing. The buttery richness pairs perfectly with the creamy filling.
Why does my cheesecake have a sour taste?
This usually happens if the lemon juice wasn’t balanced properly or the cream cheese was too tangy. Reduce the lemon juice to ½ tbsp or add ½ tsp vanilla bean paste to mellow the flavor. For extra sweetness, fold in 1 tbsp maple syrup with the gelatin mixture. Always use full-fat cream cheese—low-fat versions can taste sharper.