
Desserts
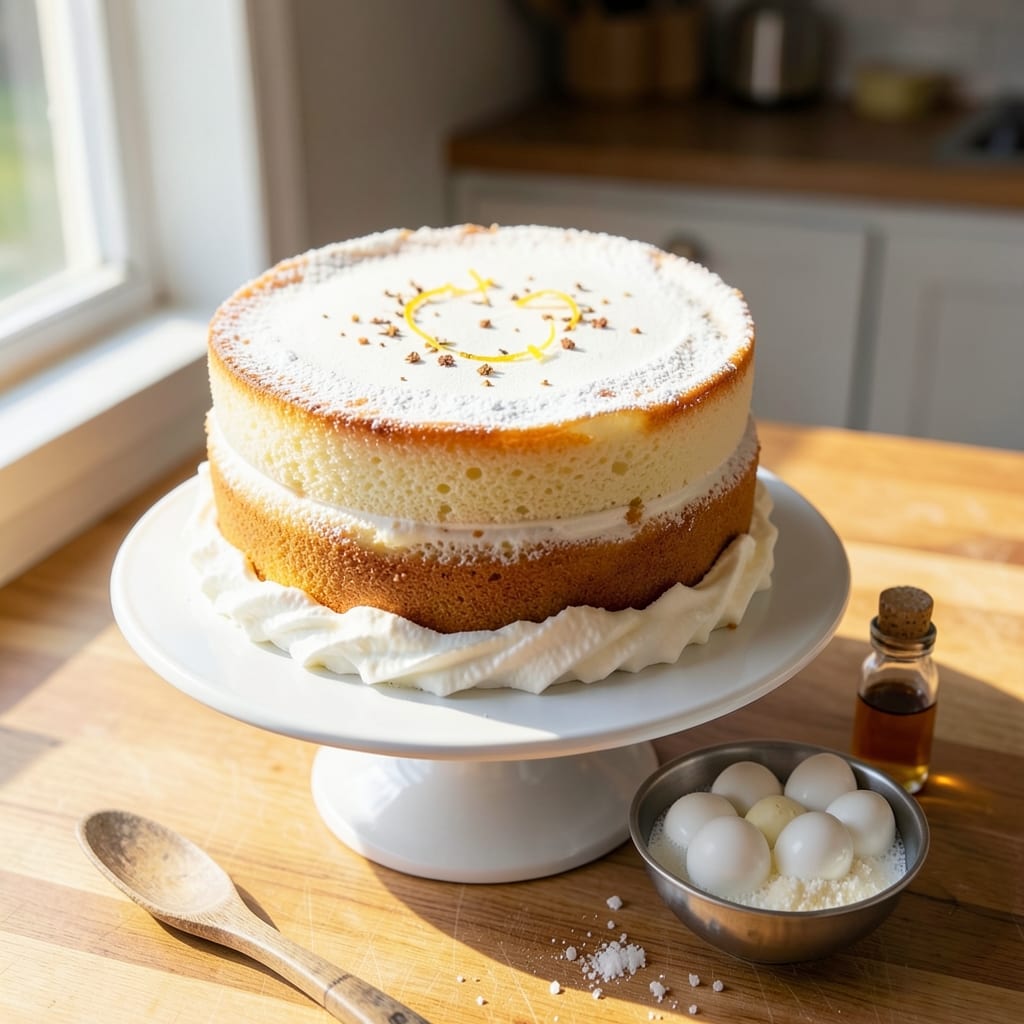
A 10-inch sponge cake with three perfectly light layers and vanilla whipped cream is the ultimate dessert for celebrations. This classic recipe delivers a tender, airy crumb that crumbles just enough to hold its shape—no dense, heavy texture here. The secret lies in precise technique: folding egg whites to maximum volume and baking at the right temperature to ensure even rise.
What sets this recipe apart is its foolproof method for achieving consistent results every time. You'll work with room-temperature ingredients for even mixing, and a water bath ensures gentle heat distribution for a uniform bake. The cake cools gradually, preventing cracks while maintaining that signature fluffiness. Once assembled with vanilla whipped cream, it becomes a showstopper for birthdays, weddings, or any occasion calling for elegance.
This sponge cake recipe transforms simple ingredients—eggs, sugar, flour, and butter—into something extraordinary through careful technique. The layers remain tender yet sturdy enough to hold the weight of frosting, while the vanilla whipped cream adds a luxurious finish. Whether you're a home baker or a novice, this method delivers professional-quality results with minimal fuss.
The beauty of this recipe lies in its versatility. Use it as a blank canvas for your favorite fillings—raspberry jam, chocolate ganache, or even a simple pastry cream—or keep it classic with the vanilla whipped cream. The key is patience during the baking and cooling stages, which pay off in a cake that looks and tastes like it came from a patisserie. Let's get started on creating your perfect 10-inch masterpiece.
Ingredients for 10 inch sponge cake
Room-temperature ingredients and precise technique transform simple pantry staples into a flawlessly light 10-inch sponge cake masterpiece.
| Ingredient | Amount | Notes |
|---|---|---|
| Large Egg Whites 🥚 | 8 whole | Room temperature, separated from yolks |
| Granulated Sugar 🍚 | 2 cups | Superfine preferred for even dissolving |
| Unsalted Butter 🧈 | 1 cup | Room temperature, 68°F |
| All-Purpose Flour 🌾 | 1 ½ cups | Sifted, plus extra for dusting |
| Vanilla Extract 🌿 | 1 tbsp | Pure Madagascar bourbon preferred |
| Cream of Tartar 🧂 | ½ tsp | Stabilizes egg whites |
| Salt 🧂 | ¼ tsp | Fine sea salt |
| Large Egg Yolks 🥚 | 4 whole | Room temperature |
| Heavy Whipping Cream 🥛 | 2 cups | Cold, 35-38% fat |
| Powdered Sugar 🍚 | 1 ½ cups | For whipped cream |
| Water 💧 | ½ cup | For water bath |
| Lemon Juice 🍋 | 1 tsp | Freshly squeezed |
The quality of your butter and eggs makes all the difference here. European-style unsalted butter (like Plugrá or President) has a higher fat content that yields a richer crumb, though any good brand works. Eggs should be room temperature and separated carefully—use a wire whisk to avoid yolk contamination. For the flour, King Arthur or Gold Medal brands are ideal due to their protein content, but any all-purpose flour will suffice if sifted thoroughly. The vanilla extract? Madagascar bourbon vanilla from McCormick or Lake Champlain adds depth without overpowering, though pure vanilla bean paste works too if you prefer intensity.
No superfine sugar? Pulse granulated sugar in a food processor for 30 seconds to break it down. Running short on egg whites? Pasteurized liquid egg whites work in a pinch, though fresh is ideal. The whipped cream can be made with 36% fat heavy cream if you're avoiding full-fat, though 38% fat yields the most stable peaks. For the water bath, use a deep baking dish filled with about 1 inch of water—just enough to create steam without submerging the cake pan. The lemon juice is non-negotiable; it brightens the flavor and helps stabilize the egg whites, so don't skip it even if you're not a fan of citrus notes in baked goods.
This cake requires patience for cooling—at least 2 hours at room temperature before frosting to prevent cracking. Store layers wrapped in plastic wrap in the fridge for up to 2 days if assembling later. The whipped cream can be made 1 day ahead and stored covered in the fridge, though it's best used fresh for peak texture. For long-term storage, freeze the assembled cake (without frosting) for up to 3 months—thaw overnight in the fridge before serving. The frosting can be piped directly onto the cake or spread smoothly for a classic finish; either method works beautifully with this tender crumb.
Why You'll Love This Recipe
- No Whisk Fatigue: I swear by the egg white method here—just whip, fold, bake. No stand mixer required, and my arms thank me after. The butter gets worked in like a dream, no greasy mess.
- Vanilla Butter Bliss: That first bite? Warm, tender crumb with a whisper of vanilla cutting through the rich butter. Honestly, the sugar caramelizes just enough to make it taste like a bakery’s secret.
- Layered Like a Pro: Slice it for breakfast toast, stack it with jam for dessert, or freeze slices for smoothie bowls later. I’ve even used it as a base for cheesecake filling—works every time.
- Budget Baking Wins: Four simple ingredients stretch to feed six, and leftovers last days wrapped tight. The butter keeps it moist without costing a fortune, and I’ve never had a dry bite.
Step-by-step instructions for three-layer vanilla sponge cake
This method delivers a perfectly light, airy sponge cake with tender crumb and clean vanilla flavor.
Prepare the Egg White Meringue
In a spotlessly clean mixing bowl, combine the 8 whole large egg whites, 0.5 teaspoon cream of tartar, and 0.25 teaspoon salt. Whisk just until frothy—this step ensures maximum volume when we incorporate sugar later. Place the bowl over a saucepan of simmering 0.5 cup water (don't let the bottom touch the water) to create a double boiler.
Gradually add the 2 cups granulated sugar while whisking constantly on medium-high speed. Increase speed to high and beat until the meringue is glossy, thick, and holds stiff peaks when the beaters are lifted. The mixture should be thick enough to form soft peaks that don't immediately collapse—this texture is critical for light layers. Remove from heat and let cool slightly while you prepare the yolks.
Fold in Yolk Mixture and Bake
In a separate bowl, whisk together the 4 whole large egg yolks, 1 cup unsalted butter (softened to 68°F), 1 tablespoon vanilla extract, and 1 teaspoon lemon juice until smooth and pale. Sift the 1.5 cups all-purpose flour over the yolk mixture and gently fold together until just combined—don't overmix or the cake will be dense.
With a rubber spatula, gently fold one-third of the yolk mixture into the cooled meringue until just combined. Then fold in the remaining yolk mixture in two additions, being careful not to deflate the meringue. Pour the batter into three 10-inch round cake pans lined with parchment circles and dusted with flour. Bake in a preheated 350°F oven for 25-30 minutes or until the tops spring back when gently touched and a toothpick comes out clean.
Assemble with Vanilla Whipped Cream
While the cakes cool in their pans for 10 minutes, prepare the filling by chilling a metal bowl and beaters in the freezer for 10 minutes. Whip the 2 cups heavy whipping cream (cold) until soft peaks form, then gradually add the 1.5 cups powdered sugar and whip to stiff peaks. The cream should hold its shape when the beaters are lifted—this ensures clean layers that won't ooze.
Remove the cakes from pans and trim the domed tops with a serrated knife. Place the first layer on a serving plate, spread with ½ cup whipped cream, then add the second layer. Repeat with remaining cream and final layer. Dust the top and sides with powdered sugar if desired, then chill for at least 4 hours (or overnight) before serving to allow flavors to meld.
Pro Tips For Making 10 Inch Sponge Cake
- Whip Whites to Stiff Peaks: Use a stand mixer with the whisk attachment—beat the egg whites on medium-high until they hold a peak when you lift the bowl. I learned this the hard way: soft peaks collapse, and your cake will be dense. Stop just before they look like shaving cream; over-whipping makes them grainy.
- Cream Butter Cold: Chill your butter for at least 30 minutes before creaming it with sugar. Warm butter melts into the flour, and your cake will turn out greasy instead of tender. I was skeptical until I tried it—now I never skip this step.
- Sift Flour Twice: Sift the flour before folding it into the egg whites, then sift again after mixing with vanilla and butter. This cuts lumps and guarantees a light, airy texture. Yes, it’s extra work, but your cake will rise properly—no sad, flat layers here.
- Bake Until Springy: Press the center—it should spring back immediately when touched. If it bounces slowly or leaves an indent, it’s underdone. Overbaking dries it out, so pull it out when the edges pull away from the pan but the middle still jiggles slightly. (Your future self will thank you.)
Troubleshooting your 10 inch sponge cake
Cracked Cake Surface
Cracks often appear when cakes cool too quickly or if the oven temperature fluctuates during baking. To prevent this, let your cakes cool in the pans for 10 minutes before removing, then transfer to a wire rack to cool completely at room temperature. I also recommend wrapping cooled layers in plastic wrap and refrigerating for 30 minutes before assembling—this helps prevent any stress cracks from forming during layering. 🌟
Dense or Heavy Crumb
A dense sponge cake usually means overmixing the batter or under-whipped egg whites. For the meringue, whip until stiff peaks form—this ensures lightness. When folding in the yolk mixture, use a gentle spatula motion and stop as soon as the batter is just combined. Overmixing incorporates too much air, which collapses during baking. I’ve found that using room-temperature eggs and butter also prevents density by allowing even distribution. 🥚
Uneven Baking
If your cake is browning too quickly on the edges or rising unevenly, it’s likely due to an oven hot spot or incorrect pan placement. Rotate your pans halfway through baking for even heat distribution. I also recommend using a water bath—place your cake pans in a larger baking dish filled with 1 inch of hot water—to create a steadier, more even bake. This method helps prevent overbrowning while ensuring a consistent rise. 💧
Collapsed Layers
Collapsed layers often happen when the cake is removed from the oven too early or if the whipped cream isn’t stiff enough. Always check for doneness with a toothpick—it should come out clean with a few moist crumbs. For the whipped cream, chill your bowl and beaters for 10 minutes before whipping to ensure stability. I also recommend adding the powdered sugar gradually to avoid deflating the cream. 🥛
Sticky or Gummy Texture
A gummy texture usually means the cake wasn’t baked long enough or the sugar wasn’t fully dissolved in the meringue. Ensure your egg whites are fully whipped to stiff peaks before folding in the yolk mixture. Bake until a toothpick comes out clean—this guarantees the cake is fully set. If your cake still feels sticky after baking, it might need an extra 5-10 minutes in the oven. 🔥
Nutrition facts
Frequently asked questions
Can I make this sponge cake in a 9-inch pan instead?
Yes, but you'll need to adjust the baking time and quantity. For a 9-inch pan, reduce the batter by about 20% and bake for 20-25 minutes at 350°F. The layers will be slightly thicker, but the texture remains light. Just ensure your pans are well-greased or lined with parchment to prevent sticking.
Why does my sponge cake turn out dense?
Density usually comes from overmixing the batter or under-whipped egg whites. Whip your egg whites to stiff peaks and fold gently—just until combined. Room-temperature ingredients also help prevent a heavy crumb. If your cake still feels dense, check for fully dissolved sugar in the meringue stage.
Can I substitute buttercream for the whipped cream?
Swiss or French buttercream works beautifully with this cake. Use about 2 cups of buttercream instead of whipped cream, and adjust sweetness to taste. The richer buttercream pairs wonderfully with the delicate sponge layers. Just ensure it's chilled before assembling to prevent melting.
How long can I store the assembled cake?
Store the fully assembled cake in an airtight container in the fridge for up to 3 days. For longer storage, freeze the layers (unfrosted) for up to 3 months. Thaw overnight in the fridge before adding frosting. The whipped cream may weep slightly after freezing, so refresh it before serving.
What's the best way to level the cake layers?
Use a serrated knife or cake leveler for clean, even layers. Place the cake on a cutting board and press firmly—don't saw back and forth. For extra precision, place a ruler on top of the cake as a guide. Leveling prevents uneven frosting and ensures perfect presentation.