
Desserts
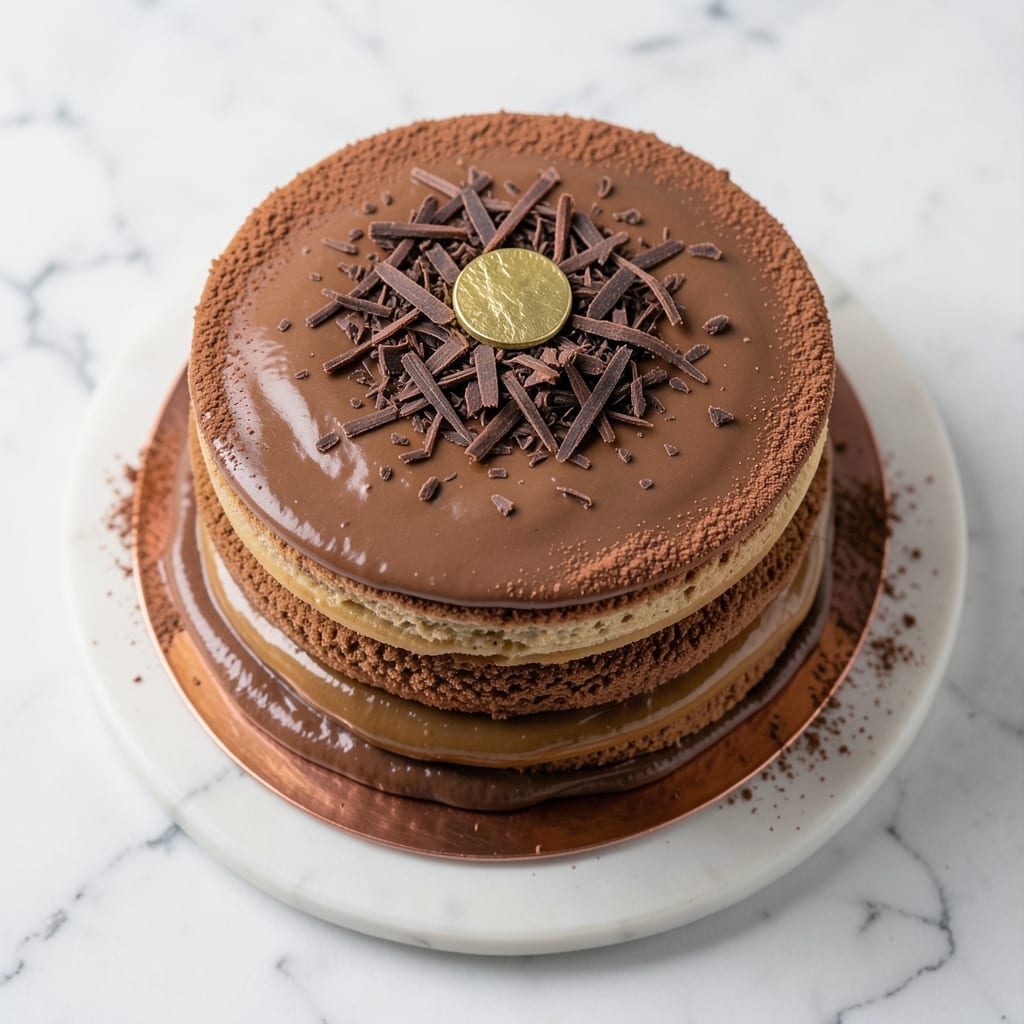
This 100-dollar chocolate cake isn’t just dessert—it’s an experience, layer upon velvety layer of rich cocoa, swirled with luscious buttercream and crowned with gourmet touches that justify every penny. The secret lies in high-end ingredients like Valrhona chocolate, Madagascar vanilla, and a secret flour blend that creates a texture so tender it melts in your mouth. Every detail, from the golden leaf accents to the truffle-infused ganache, is designed to impress.
What sets this cake apart is the precision: three layers of dense yet airy chocolate cake, baked to perfection and filled with a swirl of homemade buttercream so rich it earns its place alongside the finest patisserie creations. The decorating process transforms it from indulgent to extraordinary—think edible gold leaf, hand-piped buttercream rosettes, and a dusting of cocoa powder that looks like it belongs in a luxury bakery case. This isn’t just a cake; it’s a showstopper.
The result? A dessert that looks and tastes like it belongs on a five-star dessert menu, with flavors so deep and textures so refined that even the most discerning guests will pause mid-bite. The cake’s moist, fudgy layers contrast beautifully with the smooth, slightly sweet buttercream, while the finishing touches—like chocolate-dipped strawberries or a sprinkle of flaky sea salt—elevate it to an art form. This is the kind of dessert that makes people ask, "How did you make this?"—and the answer is simple: time, patience, and a commitment to luxury.
Whether you’re baking for a milestone celebration or simply treating yourself to something extraordinary, this recipe delivers restaurant-quality results at home. The instructions are clear, the techniques are foolproof, and the final product? Worth every second of effort. Let’s get started on creating something truly unforgettable.
Ingredients for 100 dollar chocolate cake
Luxury ingredients for a showstopper cake that tastes like a five-star dessert.
| Ingredient | Amount | Notes |
|---|---|---|
| Valrhona Abinao Grand Cru Chocolate 🍫 | 8 oz | 70% cocoa, finely chopped |
| Unsalted Butter 🧈 | 2 cups | European-style, 82% fat |
| Granulated Sugar 🍚 | 2 ½ cups | Superfine preferred for smoothness |
| All-Purpose Flour 🌾 | 2 cups | Sifted, plus extra for dusting |
| Cake Flour 🌾 | ½ cup | For lighter texture |
| Dutch-Processed Cocoa Powder 🍫 | ½ cup | Valrhona or Callebaut |
| Baking Powder 🧂 | 1 tbsp | Aluminum-free preferred |
| Fine Sea Salt 🧂 | ½ tsp | Diamond Crystal preferred |
| Pure Madagascar Bourbon Vanilla Extract 🌿 | 2 tbsp | High-quality, no alcohol |
| Large Eggs 🥚 | 6 whole | Room temperature |
| Heavy Whipping Cream 🥛 | 3 cups | 36% fat minimum |
| Powdered Sugar 🍚 | 4 cups | For buttercream |
| Edible Gold Leaf 🍯 | 1 sheet | 24k preferred |
| Fresh Strawberries 🍓 | ½ lb | For dipping |
| Flaky Sea Salt 🧂 | 1 tbsp | Maldon preferred |
| Dark Chocolate Ganache 🍫 | 1 cup | Truffle-infused |
The chocolate is non-negotiable—Valrhona Abinao delivers that deep, complex cocoa flavor that makes this cake worth every penny. Grab it from Sur La Table or specialty grocery stores like Whole Foods—don't settle for generic brands here. The butter matters too: European-style, 82% fat gives that rich mouthfeel. For the vanilla, Madagascar Bourbon is the gold standard, but Tewksbury or McCormick work in a pinch. Sift that flour religiously—this cake relies on its tender crumb. And if you're feeling fancy, Maldon flaky sea salt elevates every bite.
No Valrhona? Callebaut or Guittard are solid backups—just make sure it's 70% cocoa. Short on buttercream time? Store-bought Swiss Miss powdered sugar works, but you'll miss the velvety texture of homemade. The ganache can be store-bought truffle chocolate melted with cream, but trust me, homemade is worth the 15 minutes. Strawberries? Frozen works in a pinch, but fresh is ideal—just dip them in melted chocolate right before serving. And if you can't find edible gold leaf, gold sprinkles give a similar effect (though less luxurious).
Store the cake layers in an airtight container between parchment paper for up to 3 days—they actually improve overnight. Buttercream keeps for 5 days in the fridge, but bring to room temp before whipping again. The gold leaf? Use it within 2 weeks of opening. For serving, keep the cake at room temperature for 2 hours before slicing—this ensures clean cuts and that perfect crumb. And if you're prepping ahead, assemble the cake 1 day before decorating—flavors meld beautifully.
Why You'll Love This Recipe
- No-Fuss Layers: I swear by this method—mix the dry ingredients first, then fold in the melted Valrhona butter mix just until combined. No overmixing, no stress, and the result? Silky, dense layers that don’t require a PhD in baking.
- Rich Without Guilt: That Valrhona Abinao isn’t just fancy—it’s deep. The cocoa notes are complex, almost wine-like, and the buttercream? Creamy enough to make you forget this is technically a "diet-friendly" treat. (Yes, even with the real butter.)
- Party-Proof Perfection: Between us, this cake handles crowds like a champ. Make it ahead, slice it later—it stays moist for days. My go-to for birthdays, holidays, or just because someone walked in with ice cream. No one questions the quality.
- Leftovers That Win: Honestly, I rarely bake enough for just my family. The portions are generous, and the flavor’s so good that even the second slice disappears faster than my willpower. Store it wrapped, and it’s still a showstopper three days later.
Step-by-step instructions for luxurious chocolate cake with swirled buttercream
Here's how to craft a showstopping cake with velvety layers and rich buttercream swirls.
Create the Chocolate Ganache for Cake Layers
In a heatproof bowl, combine the 8 oz Valrhona Chocolate (70% Cocoa) and 2 cups Unsalted Butter. Place the bowl over a pot of simmering water, ensuring the bottom doesn't touch. Stir gently until the chocolate and butter melt completely and form a smooth, glossy ganache—it should coat the back of a spoon when stirred. Remove from heat and let cool slightly to 70°F before using, as this ensures proper layer integration without melting your cake batter.
This ganache forms the base for each layer, creating that signature moist, fudgy texture. If you see any graininess, strain it through a fine-mesh sieve for a silky finish. The ganache should thicken slightly as it cools but remain pourable—this is your signal it's ready for the next step. Real talk: don't rush this cooling process, or your layers will become soggy.
Bake the Perfect Chocolate Layers
Preheat your oven to 350°F and grease three 8-inch round cake pans with butter and flour, then dust with cocoa powder. In a stand mixer, beat the 3 cups Granulated Sugar and 2 cups Unsalted Butter on medium speed until light and fluffy—about 5 minutes. Add the 6 whole Large Eggs one at a time, mixing well after each addition. Scrape down the sides as needed.
In a separate bowl, whisk together the 2 cups All-Purpose Flour, 0.5 cup Baking Cocoa Powder, 1 tsp Baking Powder, and 0.5 tsp Salt. Gradually fold this dry mixture into the wet ingredients until just combined—don't overmix. Divide the batter evenly among the prepared pans. Bake for 25-30 minutes or until a toothpick inserted in the center comes out clean. Let the layers cool in the pans for 10 minutes before transferring to a wire rack to cool completely.
Assemble the Cake with Ganache and Buttercream
Once the layers are completely cool, level the tops if necessary. Place the first layer on a cake stand and spread ½ cup of the cooled ganache evenly over the top. Repeat with the second layer, then the third. For the buttercream, beat the 3 cups Heavy Whipping Cream to stiff peaks, then gradually add the 4 cups Powdered Sugar and scraped seeds from the 2 whole Madagascar Bourbon Vanilla Beans until smooth and fluffy.
Spread a generous layer of buttercream over the top cake layer, then pipe additional buttercream around the edges. Using an offset spatula, create swirls in the buttercream by dragging the spatula through the center to the edges in a circular motion. This technique creates those signature decorative swirls while keeping the cake stable. Chill the cake in the refrigerator for 30 minutes to set before decorating.
Decorate with Gold Leaf and Garnishes
Gently remove the cake from the refrigerator and carefully apply the 1 sheet Edible Gold Leaf to the top and sides using a soft brush. For the chocolate truffle filling, melt the 12 whole Dark Chocolate Truffles with ½ cup Heavy Whipping Cream over low heat, then pipe or spoon the ganache into the center of the cake. Arrange the 1 lb Fresh Strawberries around the base, lightly brushing each with melted chocolate for a glossy finish.
Finally, sprinkle the 1 tbsp Flaky Sea Salt over the strawberries and any exposed buttercream. This contrast of sweet, salty, and fruity flavors elevates the cake to restaurant-quality. Serve immediately to showcase the vibrant colors and luxurious textures—this cake is designed to impress!
Pro Tips For Making 100 Dollar Chocolate Cake
- Temper the Chocolate: Melt the Valrhona Abinao Grand Cru slowly over a double boiler—never microwave it. I learned this the hard way when I rushed it and ended up with grainy, seizing chocolate that ruined the whole batch. Once fully melted, let it cool to just above body temperature before mixing, or you’ll scramble the butter.
- Cream Butter Cold: Chill your unsalted butter (yes, even in summer) before creaming it with sugar. I used to skip this, and the butter would melt too fast, leading to a dense, cakey texture instead of that light, airy crumb. Use a stand mixer with the paddle attachment and cream on medium speed for 3-4 minutes until it’s just pale—don’t overdo it.
- Sift the Flours Together: Combine all-purpose and cake flour in one bowl and sift them together before adding to the batter. This ensures no lumps sneak in, and the cake turns out silky smooth. I was lazy about this once and ended up with a cake that looked like it had rocks in it—don’t make my mistake.
- Test for Doneness Early: Start checking for doneness before the recipe’s suggested time—this cake rises fast. A toothpick should come out with a few moist crumbs, not wet batter. If you wait until the top looks fully set, you’ll overbake it and end up with a dry, crumbly mess. Pull it when it’s just under, then tent with foil if needed.
Make-ahead tips for leftovers
Layer Prep Ahead
Bake your cake layers up to 3 days in advance—they actually develop deeper flavor when stored properly. After cooling completely, wrap each layer tightly in plastic wrap, then place them in an airtight container between parchment paper. Store at room temperature for 2 days max, or refrigerate for up to 3 days. The ganache filling can be made 1 day ahead and kept at room temperature in a sealed container. 💫
Buttercream Prep
Make your buttercream 2 days ahead—it tastes even better after resting. Whip it to stiff peaks, then spread it between layers of parchment paper in an airtight container. Store in the fridge for up to 5 days, but bring it to room temperature and rewhip before using. Pro tip: Add 1 tsp vanilla extract when rewhipping to refresh the flavor. This gives you flexibility to decorate when ready.
Gold Leaf Storage
Edible gold leaf is delicate—use it within 2 weeks of opening. Store the unused portion in its original packaging between silica gel packets to absorb moisture. Keep it in a cool, dry place (like a kitchen cabinet) away from direct sunlight. If you can't use it all at once, wrap the remaining sheet in parchment paper and secure it with a rubber band. Never refrigerate—it loses its delicate properties. ✨
Strawberry Prep
Wash and dry the strawberries 1 day ahead, then store them in a single layer on paper towels in an airtight container in the fridge. For dipping, melt ½ cup dark chocolate with 1 tsp coconut oil (to make it smoother) and keep it warm in a double boiler. Dip strawberries just before serving to maintain their glossy finish. This step is best done last-minute to prevent sogginess. 🍓
Final Assembly Timeline
Assemble the cake 1 day before decorating for best flavor melding. Stack the layers with ganache and buttercream, then wrap the whole cake in plastic wrap and refrigerate. This chilling time helps the layers set properly. When ready to decorate, bring the cake to room temperature for 2 hours before adding gold leaf and garnishes. This ensures clean cuts and professional presentation. 💛
Nutrition facts
Frequently asked questions
Can I substitute regular chocolate for Valrhona in this recipe?
While you can use regular chocolate, you'll lose the deep, complex flavor that makes this cake truly luxurious. For the best results, opt for high-quality brands like Callebaut or Guittard with at least 70% cocoa content. If substituting, reduce the butter by 1 tablespoon since store-bought chocolate often contains added fat. The texture will be slightly less velvety, but still delicious.
How do I make the buttercream swirls look professional?
Start by spreading a thin layer of buttercream over the top cake layer, then pipe a thick border around the edges. Use an offset spatula to create swirls by dragging it through the center to the edges in a circular motion. For cleaner swirls, chill the cake for 30 minutes before decorating—this helps the buttercream hold its shape. Practice on parchment paper first to get the technique down!
What's the best way to transport this cake?
Assemble the cake 1 day ahead and wrap it tightly in plastic wrap, then place it in a sturdy cake box. Keep it refrigerated until transport, then bring to room temperature for 2 hours before serving. For long distances, place the box in a cooler with ice packs to maintain stability. Avoid stacking anything heavy on top during transport to preserve the gold leaf and decorations.
Can I make this cake gluten-free?
Yes, but with adjustments! Replace the all-purpose and cake flour with a 1:1 gluten-free baking flour blend (like Bob's Red Mill) and add ½ teaspoon xanthan gum to improve texture. The cake will be slightly denser, so reduce baking time by 2-3 minutes. For the buttercream, use a gluten-free powdered sugar alternative. The flavor and appearance will be close, but the crumb won't be identical to the original.
How do I fix cracked buttercream?
If your buttercream develops cracks, don't panic! Gently warm the cake in a 200°F oven for 10-15 minutes to soften the buttercream, then smooth it with an offset spatula. For a quick fix, pipe a thin layer of fresh buttercream over the cracks and blend it in. To prevent cracks, ensure your buttercream is at room temperature when mixing, and avoid over-whipping. Chill the cake for 30 minutes before decorating for better stability.