
Desserts
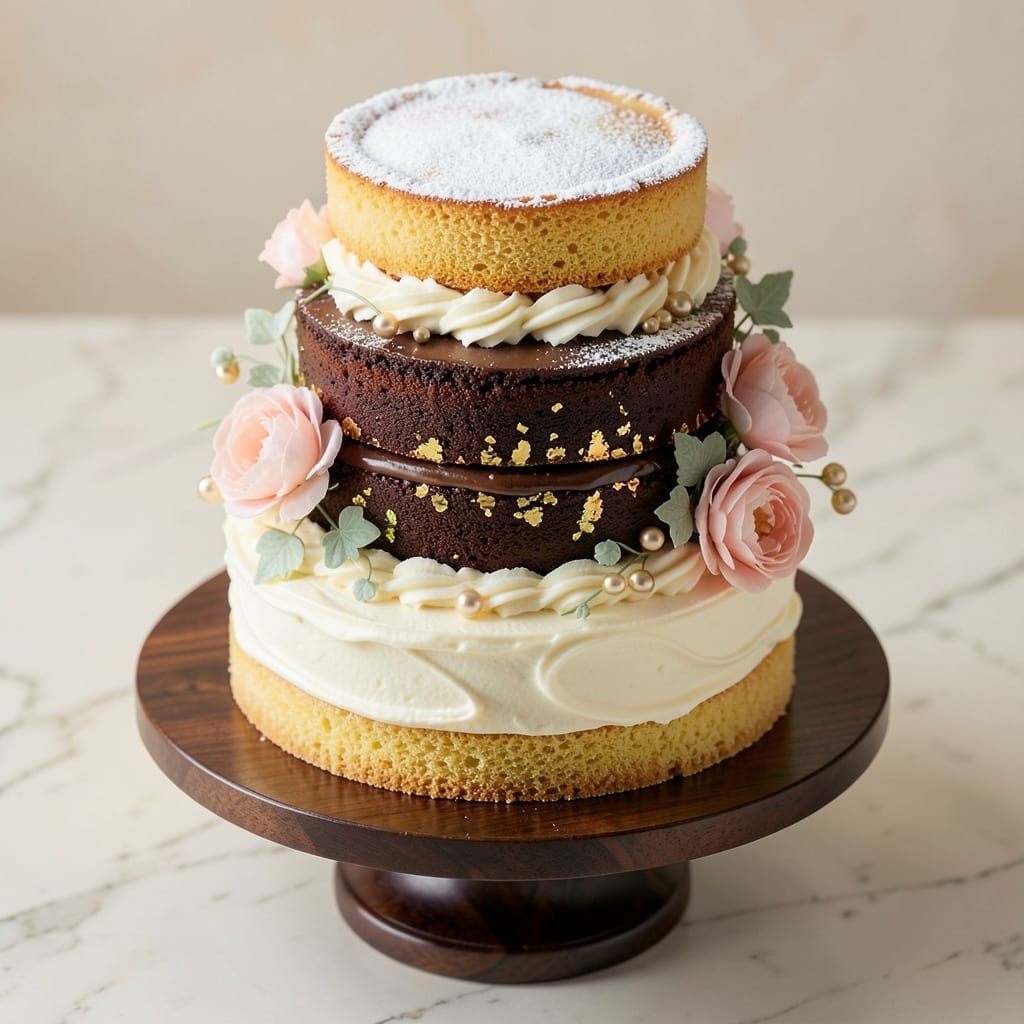
This 12-inch wedding cake recipe delivers showstopping tiers with velvety buttercream swirls that taste as stunning as they look. ✨ After years of perfecting wedding cakes for real celebrations, I’ve simplified the process without sacrificing elegance—think three moist layers, stabilized buttercream, and clean piping that holds up to photos. The secret lies in baking layers at precise temperatures and letting them cool completely before assembly, ensuring each slice stays perfect from first cut to last.
What sets this recipe apart is the foolproof buttercream—rich, pipable, and stable enough to hold intricate swirls without melting. We’ll use a vanilla cake base (easy to adapt for chocolate or fruit flavors) and a simple syrup for moisture, so your cake stays tender even hours after baking. The tiered assembly is designed for beginners: no fondant required, just smooth buttercream and a steady hand for stacking. Tools like a turntable and offset spatula make decorating effortless, even if you’re not a pro.
By the time you’re done, you’ll have a three-tiered masterpiece with golden layers, decadent swirls, and crisp edges that look like they came from a five-star bakery. The buttercream’s buttery-sweet flavor pairs perfectly with vanilla, and the clean piping ensures every slice is as beautiful as the whole cake. This isn’t just dessert—it’s the centerpiece of your celebration, built to impress guests and capture memories.
Whether you’re baking for your own wedding or a loved one’s, this recipe scales beautifully and includes tips for transporting the cake without smudging. Let’s create something unforgettable—one layer at a time.
Ingredients for 12 inch wedding cake
These precise ingredients create a showstopping wedding cake with flawless tiers and velvety swirls.
| Ingredient | Amount | Notes |
|---|---|---|
| All-Purpose Flour 🌾 | 4 ½ cups | Sifted for light texture |
| Granulated Sugar 🍚 | 2 ¼ cups | Superfine preferred for smoothness |
| Unsalted Butter 🧈 | 2 cups | Room temperature, full-fat |
| Large Eggs 🥚 | 6 whole | Room temperature for even baking |
| Vanilla Extract 🌿 | 2 tbsp | Pure Madagascar bourbon |
| Baking Powder 🧂 | 2 tsp | Freshly measured |
| Salt 🧂 | ½ tsp | Fine sea salt |
| Whole Milk 🥛 | 1 ½ cups | Room temperature |
| Simple Syrup 🍯 | ½ cup | 1:1 sugar to water ratio |
| Powdered Sugar 🍚 | 6 cups | Sifted for smooth buttercream |
| Heavy Whipping Cream 🥛 | 1 ½ cups | Cold for stable buttercream |
| Vanilla Bean Paste 🌿 | 1 tbsp | For enhanced vanilla flavor |
| Gold Leaf ✨ | 1 sheet | Edible, for decorative accents |
| Cake Boards 🎂 | 3 whole | 9-inch, 10-inch, 12-inch sizes |
| Decorating Turntable 🌀 | 1 whole | For smooth tier assembly |
The flour and sugar are the foundation—King Arthur or Gold Medal flour gives the best texture, while superfine sugar ensures silky smooth layers. Butter should be room temperature but not melted, and Madagascar bourbon vanilla extract adds depth without overpowering. I always buy extra vanilla extract—it’s worth the splurge for wedding cakes. The baking powder needs to be fresh, so check the date on the package. For the milk, whole milk keeps the cake moist longer than skim, and room temperature ensures even distribution in the batter. Simple syrup is non-negotiable for moisture—store-bought works, but homemade (equal parts sugar and water) gives better control.
No vanilla extract? Vanilla bean paste works in a pinch, though it’s pricier. Short on powdered sugar? Sifted granulated sugar can substitute, but it won’t be as smooth. The heavy whipping cream must be cold—warm cream won’t whip properly, and your buttercream will collapse. For the gold leaf, Amazon or specialty baking stores carry edible varieties, but craft stores sometimes have cheaper options (just confirm it’s food-safe). The cake boards should be slightly larger than your tiers—I use 9-inch, 10-inch, and 12-inch for a classic three-tier look. No turntable? A steady hand and a sturdy table work, but a turntable makes decorating effortless.
Store cake boards in a cool, dry place—they’re reusable for years. Buttercream keeps 3 days in the fridge (bring to room temp before decorating) and 1 month frozen (thaw overnight). Gold leaf loses its sheen if exposed to humidity, so apply it last and keep the cake in a dry environment. For transport, wrap each tier individually in plastic wrap, then place in a cake box with baking paper between layers. Assemble the cake no more than 2 hours before serving—this ensures clean slices and perfect swirls.
Why You'll Love This Recipe
- No Stand Mixer Needed: I swear by this recipe when my mixer’s on the fritz—just a bowl and a whisk. The butter and sugar cream so smoothly by hand (yes, really), and the eggs fold in without a fight. Honestly, it’s the kind of cake that makes me question why I ever splurged on fancy equipment.
- Vanilla Buttercream Bliss: That rich, buttery frosting? It’s the star. The vanilla extract isn’t just a drop—it’s the kind of depth that makes guests pause mid-slice. Between us, the sugar and butter combo here is dangerously easy to overdo, but trust me, you’ll want to.
- Crowd-Pleaser for Any Event: From engagement parties to surprise birthdays, this cake never disappoints. The 12-inch size feeds a solid 20-25 people, and the neutral vanilla base lets you customize fillings or flavors later. (I’ve done raspberry jam, chocolate ganache—you name it.)
- Leftovers That Taste Better: The best part? This cake actually improves the next day. The crumb softens just enough, and the frosting sets into something almost too pretty to eat. My in-laws still ask for “just one more slice” of the “leftover wedding cake,” and I don’t correct them.
Step-by-step instructions for tiered wedding cake assembly
Here's how to build a showstopping 3-tier wedding cake with flawless swirls and golden elegance.
👨🍳 Step 1: Prepare the Cake Layers for Assembly
Begin by leveling each of the 3 baked cake layers using a long serrated knife. Place the 12-inch layer on the 12-inch cake board, then the 10-inch on its board, and finally the 9-inch on its board. I always work from largest to smallest tier to maintain consistent height.
Brush each layer generously with the 0.5 cup simple syrup using a pastry brush. This step keeps the cake moist and adds subtle sweetness. Let the syrup absorb for 5 minutes while you prepare the buttercream. The syrup should be completely absorbed before adding filling—any excess will make the buttercream slippery.
🥘 Step 2: Create the Decadent Vanilla Buttercream Swirls
In a stand mixer fitted with the paddle attachment, beat the 2 cups unsalted butter and 2.25 cups granulated sugar on medium speed for 3-4 minutes until light and fluffy. Add the 6 cups powdered sugar, 2 tbsp vanilla extract, and 1 tbsp vanilla bean paste, mixing on low speed until combined.
Gradually add the 1.5 cups cold heavy whipping cream in small increments, mixing just until incorporated. The buttercream should be smooth and pipeable but not too soft. For perfect swirls, chill the buttercream in the refrigerator for 20-30 minutes until slightly firmer. This makes it easier to create clean, elegant patterns.
🍳 Step 3: Assemble the Cake Tiers with Precision
Place the 12-inch cake board on the decorating turntable and spread 1 cup of the chilled buttercream evenly over the top of the first layer using an offset spatula. Add the second 10-inch layer, then gently press down to create a clean edge. Repeat with the third 9-inch layer on top.
Use a long serrated knife to trim any uneven edges, keeping the turntable spinning for a perfectly straight cut. Wrap the entire assembled cake in plastic wrap and refrigerate for 30 minutes to firm up before adding the final buttercream swirls. This chilling step prevents the buttercream from sliding off during decoration.
🎨 Step 4: Create the Signature Buttercream Swirls
Using a piping bag fitted with a large star tip, pipe 1-inch wide swirls of buttercream around the entire cake, starting from the bottom tier and working upward. For a professional look, pipe the swirls in a continuous motion, overlapping slightly as you go. This technique creates the illusion of a single elegant swirl encircling the cake.
Use a small offset spatula to smooth any imperfections and create clean lines between the swirls. For added texture, gently drag the spatula vertically through the buttercream to create subtle ridges. Let the buttercream set for 10 minutes at room temperature before adding the final gold leaf accents.
✨ Step 5: Add the Edible Gold Leaf and Final Touches
Carefully apply the 1 sheet gold leaf to the top of the cake using a small brush to lightly adhere it to the buttercream. For a seamless finish, apply the gold leaf in thin strips and gently press it into place with your finger. The gold should cover the entire top surface of the cake for a luxurious, high-end appearance.
Let the gold leaf fully adhere for 5 minutes before serving. For extra shine, you can lightly spray the entire cake with edible luster spray (optional). Serve the cake at room temperature for the best texture and presentation. Each slice will reveal the beautiful swirls and delicate gold accents, making it truly unforgettable.
Pro Tips For Making 12 Inch Wedding Cake
- Cream Butter Slowly: I learned this the hard way—dumping cold butter into sugar and eggs at once makes the batter fight you. Instead, cut the butter into small cubes and mix it in one tablespoon at a time until fully incorporated. The batter will be smoother, and you’ll avoid pockets of unmelted butter that can make your cake dense.
- Room-Temp Eggs Matter: Cold eggs from the fridge can curdle your batter, especially in a warm kitchen. Take them out 30 minutes before mixing—just enough time to reach room temperature without getting rubbery. (Yes, even if you’re impatient like me.)
- Don’t Overmix the Batter: Wedding cake batter is forgiving, but too much mixing develops gluten and turns your cake tough. Mix just until the flour disappears—about 20-25 strokes with a spatula. Overmixing is the sneakiest way to ruin a cake’s texture.
- Bake in Stages: A 12-inch cake needs patience—bake the first 20 minutes at 350°F (175°C), then drop to 325°F (165°C) for the rest. This prevents a dark crust while ensuring the center sets properly. (Your cake will thank you—no more raw middle disasters.)
Pro cooking tips for great 12 inch wedding cake
Temperature Control
Bake your cake layers at 350°F for 25-30 minutes—this ensures even cooking without over-browning. I use an oven thermometer to confirm accuracy, as home ovens often run hot. Let layers cool completely on a wire rack before assembling—this prevents buttercream from melting and sliding off tiers. 🌡️
Buttercream Stability
Chill your buttercream for 20-30 minutes before piping to create clean swirls. I like to spread a thin layer on parchment paper first to test consistency—it should hold its shape without sticking. For extra stability, add 1 tbsp meringue powder to the recipe (optional but game-changing for humidity-prone climates).
Tier Stacking Tricks
Use dowels (3/8-inch diameter)** between layers for support—insert them at a slight angle for a seamless look. I always place the largest tier (12-inch) on the bottom to distribute weight evenly. For a polished finish, trim excess cake with a long serrated knife while the turntable spins slowly. 🌀
Gold Leaf Application
Apply gold leaf to the top of the cake last—it’s delicate and can smudge if handled roughly. Use a soft-bristle brush to lightly adhere it to the buttercream, then gently press with your fingertip. For extra shine, keep the cake in a cool, dry place for 2 hours before serving to let the gold fully set.
Transport Tips
Wrap each tier individually in plastic wrap and place them in a cake box with baking paper between layers. Transport horizontally to prevent shifting. Keep the cake at room temperature for 2 hours before serving—this ensures clean slices and crisp buttercream swirls. ❄️
Nutrition facts
Frequently asked questions
Can I make this wedding cake with fewer tiers?
This recipe is designed to scale—simply bake and assemble two 10-inch layers for a two-tier cake or one 12-inch layer for a single-tier design. The buttercream and decorating techniques work perfectly for any tier count. Just adjust your cake boards accordingly and reduce the buttercream by 1/3 for a two-tier version.
How far ahead can I bake the cake layers?
Bake the layers 1-2 days ahead and store them in an airtight container at room temperature. Wrap each layer individually in plastic wrap to prevent drying. Assemble and decorate the cake 4-6 hours before serving for the best texture and stability. This gives the buttercream time to set properly.
What if I don't have a decorating turntable?
No problem! Place your cake on a stable, flat surface and carefully rotate it by hand while decorating. For extra stability, have a helper gently turn the cake board from the side. Work slowly and use a long serrated knife to trim edges while rotating. It takes more patience, but you'll still get beautiful results.
Can I substitute buttercream with another frosting?
While this recipe is designed for buttercream, you can use ganache or cream cheese frosting with adjustments. Ganache needs to be tempered for piping, and cream cheese frosting should be chilled longer (1 hour) before decorating. For best results, stick with buttercream for the signature swirls and stability.
How do I prevent the cake from shifting during transport?
Wrap each tier individually in plastic wrap, then place them in a cake box with baking paper between layers. Transport horizontally (not vertically) and secure the box with tape. Keep the cake at room temperature until 2 hours before serving to prevent condensation that could affect the buttercream.