
Desserts
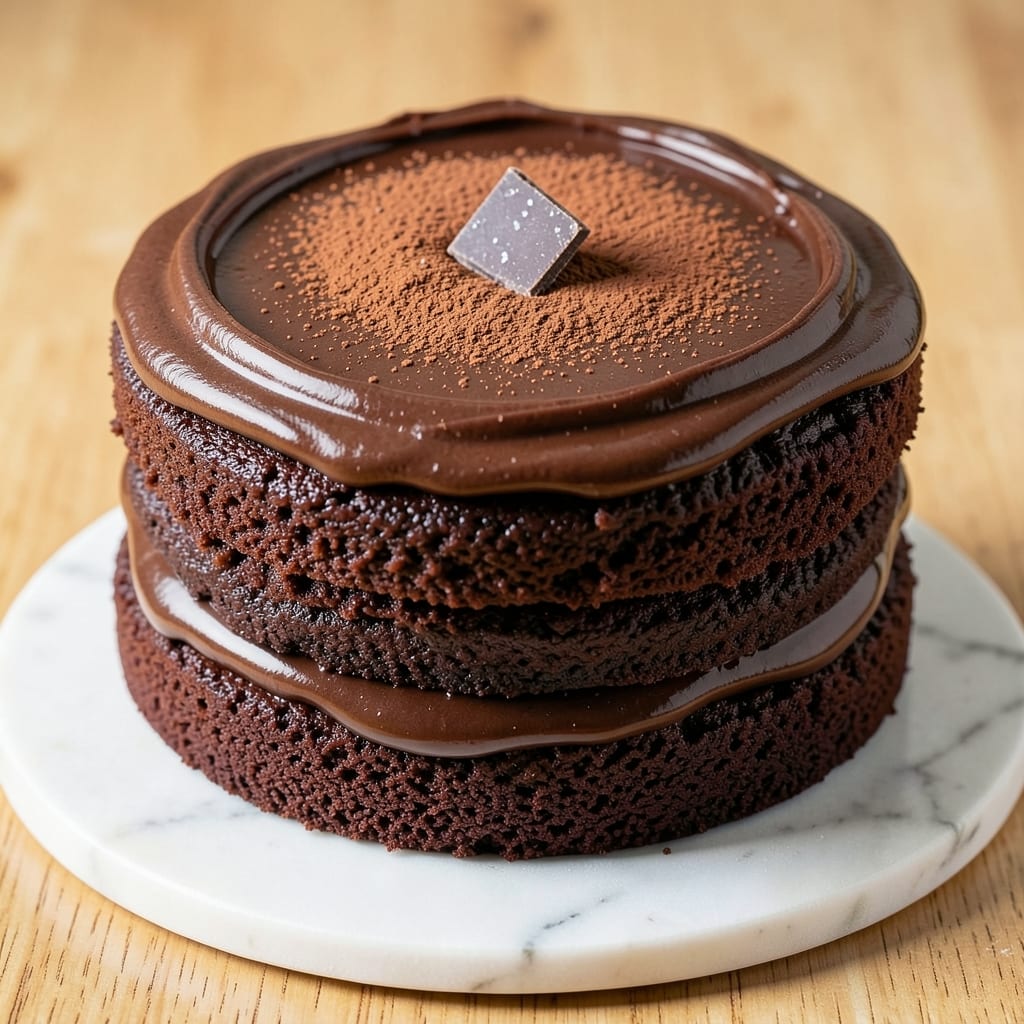
This 2-layer 6-inch chocolate cake delivers the perfect balance of rich, moist layers and velvety frosting—ideal for special occasions or weekend treats. 💛 The secret lies in precise baking techniques that ensure even layers and a tender crumb, while the frosting ties everything together with professional flair. Whether you're baking for a celebration or satisfying a craving, this recipe guarantees restaurant-quality results at home.
What sets this chocolate cake apart is the focus on texture and flavor harmony. The cake layers stay moist thanks to a simple yet effective combination of ingredients, while the frosting—whether buttercream or ganache—adds the perfect finishing touch. Leveling the layers and chilling between steps are critical for a clean, polished look and a stable structure. This method ensures your cake doesn’t just look impressive but tastes even better.
The result is a cake with moist, fudgy layers that hold up beautifully, topped with a smooth, flavorful frosting that complements rather than overpowers. Each bite delivers the perfect balance of chocolate intensity and sweetness, making it a crowd-pleaser. The assembly process is straightforward, but the attention to detail ensures professional-quality outcomes every time.
For added versatility, this recipe can be adapted for dietary preferences, such as vegan chocolate cake, without compromising texture or flavor. Let’s get started on creating your perfect chocolate cake.
Ingredients for 2 layer 6 inch chocolate cake
Rich chocolate layers and velvety frosting—just 12 ingredients for a showstopper cake.
| Ingredient | Amount | Notes |
|---|---|---|
| All-Purpose Flour 🌾 | 1 ½ cups | Sifted for light texture |
| Unsalted Butter 🧈 | 1 cup | Melted and cooled slightly |
| Granulated Sugar 🍚 | 1 ½ cups | Divided for batter and frosting |
| Cocoa Powder 🍫 | ½ cup | Natural or Dutch-processed |
| Buttermilk 🥛 | ¾ cup | Room temperature preferred |
| Large Eggs 🥚 | 2 whole | Room temperature for even baking |
| Vanilla Extract 🌿 | 1 tbsp | Pure, high-quality extract |
| Baking Powder 🧂 | 1 ½ tsp | Freshly measured |
| Salt 🧂 | ½ tsp | Fine sea salt preferred |
| Powdered Sugar 🍚 | 2 cups | For buttercream |
| Heavy Cream 🥛 | ½ cup | Cold for buttercream |
| Cocoa Powder 🍫 | ¼ cup | For frosting depth |
The cocoa powder is non-negotiable here. Valrhona or Ghirardelli brands give that deep, velvety flavor, but Hershey’s Special Dark works in a pinch. For the butter, Plugrá or Land O’Lakes unsalted are my go-tos—they melt evenly. The buttermilk? If you’ve got sour milk, use that (just add a splash of lemon juice). For the frosting, powdered sugar should be sifted—lumps ruin the texture. And that vanilla? Bourbon-infused takes it to the next level, but pure works fine.
No buttermilk? Mix 1 tbsp lemon juice or vinegar + 1 cup milk—wait 5 minutes. Running low on cocoa? Hershey’s cocoa powder is a solid backup. For the frosting, if you’re short on heavy cream, whipped topping (Cool Whip) works at half the amount. The secret to that perfect balance? Taste as you go—add a pinch more cocoa if the frosting tastes too sweet. And if you’re making this vegan, swap the butter for coconut oil and use flax eggs (1 tbsp ground flax + 3 tbsp water per egg).
Store the cake layers in an airtight container with parchment between them for up to 3 days. The frosting keeps 2 days in the fridge, but it’s best used fresh. For make-ahead magic, bake the cake 1 day ahead, then frost just before serving. If you’re freezing, wrap the whole cake tightly in plastic—it’ll stay moist for 3 months. And trust me, the leftovers? Even better the next day—the flavors meld beautifully.
Why You'll Love This Recipe
- Six-Inch Magic: This is the cake that fits when you actually want dessert—not a whole sheet pan. Two layers in one 6-inch pan means less batter, less mess, and still that rich, fudgy texture from the cocoa powder and buttermilk combo. Honestly, I make this for one and still get leftovers.
- Buttercream Ready: The moment you taste that first bite—creamy, slightly dense, with just the right crumb from the all-purpose flour—you’ll know why this is my go-to. The butter and sugar caramelize perfectly, and the buttermilk keeps it moist without being heavy. (Yes, even on a Tuesday night.)
- Party in a Pan: Need a last-minute dessert for two? Birthday? Date night? This cake slices neatly, serves beautifully, and you won’t spend hours decorating. Between us, I’ve used it for everything from a cozy night in to a surprise celebration. The 6-inch size makes it feel special without the fuss.
- Budget-Friendly Luxury: You’re using pantry staples—flour, butter, sugar—so this won’t break the bank. The cocoa powder gives it that decadent vibe, but the buttermilk keeps costs down. Plus, the leftovers? They taste just as good the next day, wrapped in foil or stored in the fridge. My secret weapon for stress-free baking.
Step-by-step instructions for 2 layer 6 inch chocolate cake
Here's how to bake a decadent chocolate cake with perfectly moist layers and velvety buttercream.
🍳 Step 1: Prepare the Batter for Rich, Moist Layers
Preheat your oven to 350°F and grease two 6-inch round cake pans, lining the bottoms with parchment paper for easy removal. In a medium bowl, whisk together the 1.5 cups all-purpose flour, 1.5 teaspoons baking powder, and 0.5 teaspoon salt. Sift this dry mixture into a separate large bowl for a light, airy texture—this prevents dense layers.
In another bowl, melt the 1 cup unsalted butter in the microwave in 30-second intervals, stirring between each, until fully melted but not hot. Let it cool slightly for 2 minutes—you want it warm to the touch, not scorching. Add the 1.5 cups granulated sugar and whisk until combined and slightly thickened.
Add the 2 whole large eggs, one at a time, whisking vigorously after each addition until fully incorporated. The mixture should lighten in color and become slightly ribbony. Stir in the 1 tablespoon vanilla extract and 0.5 cup cocoa powder, then gently fold in the dry ingredients using a spatula until just combined—overmixing develops gluten and makes the cake tough.
Finally, pour in the 0.75 cup buttermilk and mix until smooth. The batter should be thick but pourable. Divide it evenly between the prepared pans, tapping them gently on the counter to remove air bubbles. Bake for 25-30 minutes until a toothpick inserted into the center comes out clean with a few moist crumbs clinging to it. Let the cakes cool in the pans for 10 minutes before transferring to a wire rack to cool completely.
🥘 Step 2: Create the Ultimate Chocolate Buttercream
While the cakes cool, prepare the buttercream by beating the 1 cup unsalted butter (yes, we're using the same amount again—this is key for richness) with an electric mixer on medium speed until smooth and creamy, about 2 minutes. Gradually add the 2 cups powdered sugar, mixing on low speed until combined, then increase to high speed and beat for 3-4 minutes until light and fluffy.
Add the 0.5 cup heavy cream and mix until fully incorporated, scraping down the sides of the bowl as needed. This step ensures your frosting has the perfect consistency—not too stiff, not too runny. Finally, add the 0.25 cup cocoa powder and mix until smooth. Taste and adjust sweetness if needed, adding 1-2 tablespoons powdered sugar at a time until perfectly balanced.
👨🍳 Step 3: Assemble with Confidence for Flawless Layers
Once the cakes are completely cool, place one layer on a cake stand or plate. Use a serrated knife to level the top if needed—this ensures even frosting distribution. Spread a thin layer of buttercream (about ¼ inch thick) over the top of the first cake to create a "crumb coat." This prevents crumbs from mixing into your final frosting layer.
Place the second cake layer on top and gently press down to create a level surface. Apply another thin crumb coat of buttercream to the sides and top, then chill the assembled cake in the refrigerator for 15 minutes. This brief chilling helps the frosting set slightly, making it easier to work with.
⏰ Step 4: Frost and Finish for Show-Stopping Results
Remove the cake from the refrigerator and spread the remaining buttercream evenly over the top and sides using an offset spatula. For a smooth finish, dip the spatula in hot water, wipe it clean, and gently drag it over the frosting to create a polished look. If you prefer texture, use a fork or textured spatula to create swirls or rosettes.
Let the cake sit at room temperature for 30 minutes before slicing to allow the frosting to set properly. The final result should be a perfectly balanced cake—moist, rich chocolate layers with a velvety, slightly sweet buttercream that complements rather than overpowers the deep cocoa flavor. Serve immediately for the ultimate experience!
Pro Tips For Making 2 Layer 6 Inch Chocolate Cake
- Mix Butter Slowly: I learned this the hard way—dumping melted butter into dry ingredients at once makes the batter greasy and dense. Instead, cut cold butter into tiny cubes and mix it in one tablespoon at a time with the flour. The crumb will be lighter, and the layers won’t sink like a rock.
- Sift That Cocoa: Unsifted cocoa powder packs like cement, leading to uneven layers. Sift it with the flour before measuring—this aerates the batter and prevents dry spots. (Yes, even if you’re impatient like me, skip the sifting and you’ll regret it later.)
- Don’t Overmix: The moment your buttermilk batter loses its velvety texture, stop stirring. Overmixing develops gluten, which turns your cake into a tough, chewy brick. Fold just until combined—about 10 strokes max.
- Cool Layers Fully: I used to rush this, but cooling the layers for at least 20 minutes before frosting is non-negotiable. Warm layers melt buttercream instantly, making a soggy mess. Run a toothpick through the center—if it comes out clean, you’re good. (If not, wait another 5 minutes.)
Perfect pairings for these flavors
Classic Coffee Pairing
Nothing complements this rich chocolate cake like a hot cup of freshly brewed coffee—especially a medium-roast Arabica with notes of caramel and nuts. I love pairing it with a dark roast like Starbucks Sumatra or Peet’s Major Dickason’s Blend, which brings out the deep cocoa flavors without overpowering them. For an extra touch, sprinkle a pinch of espresso powder into the frosting before chilling—it enhances the chocolate depth and adds a subtle coffee aroma. ☕
Creamy Vanilla Ice Cream
A scoop of homemade vanilla bean ice cream is the ultimate pairing for this cake. The cool, creamy texture contrasts beautifully with the warm, dense chocolate layers. For a quick shortcut, use Breyers Vanilla or Ben & Jerry’s Phish Food—both provide that classic vanilla flavor without overpowering the cake. To elevate it further, drizzle a little chocolate ganache over the ice cream before serving. 🍦
Fruity Accompaniments
Fresh berries add a bright, tangy contrast to the richness of the cake. I recommend strawberries or raspberries, sliced and lightly tossed in a drizzle of honey or balsamic glaze. For a tropical twist, try mango slices or passion fruit purée—their acidity cuts through the sweetness perfectly. Arrange them on the side or even on top of the cake for a stunning presentation. 🍓
Wine Pairing Options
If you prefer wine, a sweet dessert wine like Moscato d’Asti or Port works beautifully with the chocolate cake. The slight sweetness and fruity notes complement the cocoa without competing with it. For a drier option, a Cabernet Sauvignon with 12-14% ABV can stand up to the richness, especially if it has hints of black cherry or vanilla. Chill the wine slightly before serving to enhance its refreshing qualities. 🍷
Chocolate-Dipped Strawberries
For a showstopping dessert spread, serve the cake alongside chocolate-dipped strawberries. Melt Ghirardelli 60% dark chocolate and dip fresh strawberries, then sprinkle with crushed pistachios or sea salt for added texture. The combination of warm cake, cool chocolate, and juicy strawberries creates a symphony of flavors and textures that’s impossible to resist. 🍫
Spiced Whipped Cream
Elevate your serving with spiced whipped cream—whip ½ cup heavy cream with 1 teaspoon vanilla extract, ½ teaspoon cinnamon, and a pinch of cardamom. Pipe it onto the cake or serve it on the side for dipping. The warmth of the spices enhances the chocolate flavor, adding depth and complexity to every bite. ✨
Nutrition facts
Frequently asked questions about 2-Layer chocolate cake
Can I use a different-sized pan for this recipe?
Yes, but you'll need to adjust baking times. For a 6-inch pan, bake 25-30 minutes. For an 8-inch pan, reduce oven temp to 325°F and bake 30-35 minutes. Always use a toothpick test—it should come out with a few moist crumbs. The cake batter volume is designed for two 6-inch layers, so scaling up requires more batter.
How do I prevent my cake layers from cracking?
Cracking usually happens from overmixing or uneven cooling. Stop mixing once dry ingredients are just combined, and avoid opening the oven door during baking. Let cakes cool in pans for 10 minutes before removing, then cool completely on a rack. For extra insurance, brush warm layers with simple syrup (equal parts sugar and water) before assembling.
Can I make this cake ahead of time?
Bake the layers 1 day ahead and store them in an airtight container with parchment between them. The frosting can be made 2 days ahead and refrigerated. Assemble the cake just before serving—this prevents soggy layers. For long-term storage, freeze the fully assembled cake (without frosting) for up to 3 months.
What's the best frosting alternative if I don't like buttercream?
Try a rich chocolate ganache made with ½ cup heavy cream and 8 oz dark chocolate. Heat the cream until steaming, pour over chopped chocolate, then whisk until smooth. Let it cool to a spreadable consistency. For a lighter option, use whipped cream mixed with 1 tbsp cocoa powder—it's lighter but still decadent. Both options pair beautifully with the deep chocolate flavor.
Why did my cake turn out dense instead of moist?
Dense cake usually means overmixing or incorrect baking.