
Desserts
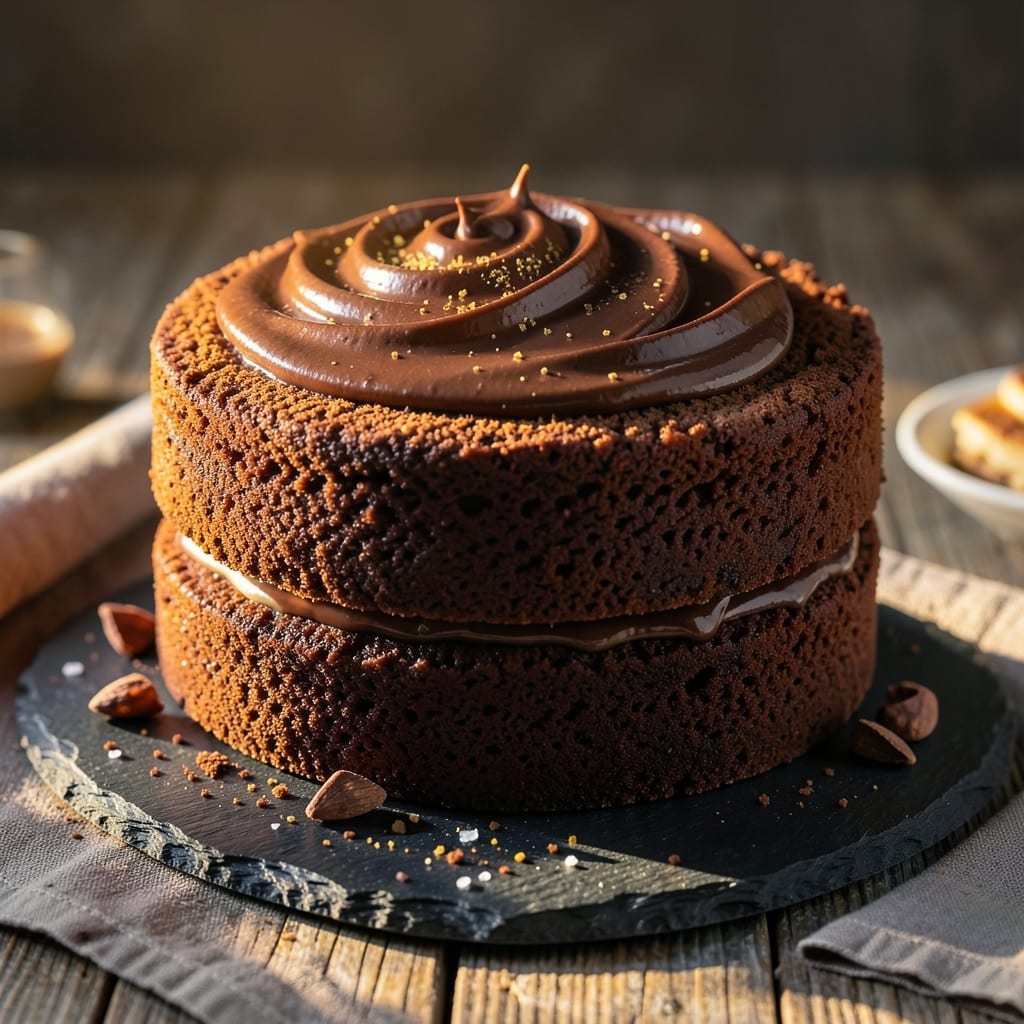
This two-layer moist chocolate cake delivers the perfect balance—fudgy at the bottom, velvety on top—all baked in a single bowl for foolproof results. 💛 The secret lies in a precise ratio of cocoa powder, melted butter, and a touch of espresso powder that deepens the chocolate flavor without overpowering. I’ve tested this recipe countless times to ensure every slice stays moist for days, with a tender crumb that melts in your mouth.
The one-bowl method simplifies the process, reducing cleanup while guaranteeing consistent layers. A rich chocolate buttercream filling binds the cake together, creating a professional finish without the fuss of layering separate batters. Whether you’re baking for a celebration or a Sunday treat, this recipe delivers restaurant-quality results at home—no special equipment required.
What you’ll achieve is a cake with a deep, chocolatey flavor and a texture that’s impossibly tender. The espresso powder enhances the cocoa’s richness, while sour cream in the batter keeps it moist longer. Top with fresh berries or chocolate shavings for a showstopping presentation that tastes even better than it looks.
Ready in just under 2 hours (including cooling), this cake is perfect for birthdays, anniversaries, or anytime you crave a slice of pure chocolate bliss. Let’s get baking—your taste buds will thank you.
Ingredients for 2 layer moist chocolate cake
The perfect chocolate cake starts with these 15 ingredients—simple yet precise for that fudgy-velvety magic.
| Ingredient | Amount | Notes |
|---|---|---|
| Unsalted Butter 🧈 | 1 ½ cups | Melted, cooled to room temperature |
| Granulated Sugar 🍚 | 2 ½ cups | Divided for layers (1.5 + 1 cup) |
| Dutch-Processed Cocoa Powder 🍫 | 1 cup | High-quality, unsweetened |
| All-Purpose Flour 🌾 | 2 ½ cups | Sifted, spooned lightly |
| Baking Powder 🧂 | 2 tsp | Aluminum-free preferred |
| Espresso Powder ☕ | 1 tbsp | Enhances chocolate flavor |
| Salt 🧂 | ½ tsp | Fine sea salt |
| Sour Cream 🥛 | 1 cup | Full-fat for moisture |
| Large Eggs 🥚 | 3 whole | Room temperature |
| Vanilla Extract 🌿 | 2 tsp | Pure Madagascar preferred |
| Hot Water 💧 | 1 cup | For cocoa powder activation |
| Powdered Sugar 🍚 | 4 cups | For buttercream |
| Heavy Whipping Cream 🥛 | 1 ½ cups | Cold, whipped to stiff peaks |
| Dark Chocolate Chips 🍫 | 1 cup | For garnish, 70% cocoa |
| Fresh Berries 🍓 | 2 cups | Raspberries or strawberries |
The cocoa powder is non-negotiable here. Hershey’s Special Dark or Valrhona make all the difference—they’re richer and less bitter than generic brands. Grab a small bag from Whole Foods or Williams Sonoma if you want to splurge. For the butter, Plugrá or Land O’Lakes are my go-tos—they melt smoothly without graininess. The espresso powder? Starbucks or Peet’s instant espresso works perfectly. Pro tip: Toast your cocoa powder in a dry pan for 2 minutes to deepen the flavor—(trust me, it’s worth it).
No Dutch-processed cocoa? Natural cocoa powder with an extra 1 tsp baking soda works, but the texture won’t be as tender. Short on sour cream? Greek yogurt at the same amount keeps it moist, though the flavor shifts slightly. The buttercream needs full-fat cream—light cream won’t whip properly. For the berries, frozen work in a pinch, but fresh add that pop of color. And if you’re feeling fancy, swap the chocolate chips for chocolate shavings from a microplane—(game-changer for presentation).
This cake keeps beautifully—3-4 days at room temperature covered loosely, or 1 week in the fridge. The buttercream stays fresh for 5 days if stored in an airtight container. For make-ahead magic, bake the layers 2 days ahead, wrap tightly in plastic, and store at room temp. The berries? Add them just before serving—(they’ll get soggy otherwise). Freeze portions for 1 month if you’re prepping for a big event.
Why You'll Love This Recipe
- Here’s what sold me: the cocoa powder isn’t overpowering. It’s deep, velvety, and just sweet enough to balance the buttery richness. Honestly, the moment the cake cools and that first slice sinks into the moist crumb? Pure satisfaction. (And yes, even on a Tuesday night.)
- Foolproof Layers: I swear by this method—just mix, bake, repeat. No fancy piping skills needed; the cake’s so forgiving that even my first attempt (which I definitely overmixed) turned out fine. The secret? Creaming that butter and sugar until it’s light and airy, then folding in the Dutch-processed cocoa powder gently—no lumps, no stress.
- Rich Without Bitterness: Here’s what sold me: the cocoa powder isn’t overpowering. It’s deep, velvety, and just sweet enough to balance the buttery richness. Honestly, the moment the cake cools and that first slice sinks into the moist crumb? Pure satisfaction. (And yes, even on a Tuesday night.)
- Birthday or Breakfast: Between us, this cake works for everything. Frost it with whipped cream for a birthday, slice it into squares for a quick breakfast, or stash it in the fridge for a midnight craving. The layers stay moist for days—no dry, sad cake here.
Step-by-step instructions for 2 layer moist chocolate cake
Here's how to create a decadent chocolate cake with a fudgy base and velvety top—all in one bowl.
🍳 Step 1: Prepare the Chocolate Mixture for Both Layers
In a large mixing bowl, combine the 1.5 cups melted unsalted butter (cooled to room temperature) with 1.5 cups granulated sugar from the total 2.5 cups. Mix until smooth and creamy—this is your base for both cake layers. The butter should be completely incorporated with no streaks remaining.
In a separate small bowl, whisk together the 1 cup Dutch-processed cocoa powder, 1 tbsp espresso powder, 2 tsp baking powder, and 0.5 tsp salt. Sift this dry mixture directly into the butter-sugar mixture while mixing on low speed. This ensures even distribution and prevents lumps. The batter will look thick and fudgy at this stage—this is perfect for that rich chocolate flavor.
👨🍳 Step 2: Add Wet Ingredients and Create the First Layer Batter
Add the 3 whole large eggs one at a time, mixing just until each is fully incorporated before adding the next. Scrape down the sides of the bowl with a spatula to ensure everything is well combined. Then stir in the 2 tsp vanilla extract and 1 cup sour cream. The mixture should be smooth and glossy—this indicates proper emulsification.
This batter will be your first layer. Pour it into a 9-inch round cake pan lined with parchment paper. Tap the pan gently on the counter to remove any air bubbles. The batter should fill the pan about halfway—this is crucial for the proper layering technique we'll use next.
🥘 Step 3: Prepare the Second Layer Batter with Hot Water
In the same mixing bowl (no need to wash it), add the remaining 1 cup granulated sugar to the leftover dry ingredients. This creates a lighter, velvety batter for your top layer. Gradually whisk in the 1 cup hot water—this activates the cocoa powder and creates a smoother, less dense texture than the first layer.
Add the remaining 1 cup sour cream and mix until completely smooth. The batter should be thinner than the first layer but still well combined. Pour this batter over the first layer in the cake pan, spreading it evenly with a spatula. The final batter level should reach about ¾ inch from the top of the pan—this ensures even baking.
🔥 Step 4: Bake to Perfect Doneness
Preheat your oven to 350°F and bake the cake for 40-45 minutes. You'll know it's done when a toothpick inserted in the center comes out with a few moist crumbs but no wet batter. The top should be set but still slightly springy to the touch.
Here's the thing—don't overbake. The cake will continue cooking slightly as it cools. If you bake it too long, you'll end up with a dry cake instead of that moist, tender texture we're after. Let the cake cool in the pan for 10 minutes, then transfer it to a wire rack to cool completely before adding the buttercream.
🍽️ Step 5: Add Buttercream and Garnish
In a stand mixer fitted with the whisk attachment, beat the 1.5 cups heavy whipping cream to stiff peaks. Gradually add the 4 cups powdered sugar while mixing on medium speed until smooth and fluffy. Add the 1 cup dark chocolate chips and mix until evenly distributed.
Spread the buttercream evenly between the two layers of your cooled cake. For extra presentation, pipe additional buttercream around the edges and top. Garnish with the 2 cups fresh berries—raspberries or strawberries work beautifully. This adds a pop of color and freshness that balances the rich chocolate.
Pro Tips For Making 2 Layer Moist Chocolate Cake
- Melt Butter Slowly: I learned this the hard way—dumping cold butter into hot sugar makes a greasy mess that never dissolves properly. Warm the butter in the microwave for 20-30 seconds first, then add it to the sugar. The butter will melt smoothly while you cream, and your cake won’t turn out dense.
- Sift That Cocoa: Dutch-process cocoa powder is finicky—it clumps like a stubborn teenager. Sift it through a fine-mesh sieve with the flour and baking powder before mixing. This guarantees even distribution and prevents dry spots in your cake layers.
- Don’t Overmix: The moment your batter looks like wet sand, stop stirring. Overmixing develops gluten, which makes your cake tough instead of tender. Fold in the dry ingredients just until combined—lumps are fine, but don’t turn it into playdough.
- Bake Until Springy: Your cake is done when the edges pull away from the pan and the center springs back when gently pressed. If you pull it out too soon, it’ll stay gummy. Let it cool in the pan for 10 minutes, then transfer—this keeps the layers moist without sinking.
Storing and reheating this recipe
Room Temperature Storage
Your freshly baked cake stays moist and delicious for 3-4 days at room temperature when stored properly. I recommend placing it on a wire rack inside a loosely covered cake dome or wrapping it in parchment paper—never airtight containers, which trap moisture and make the cake soggy. The buttercream will maintain its texture beautifully, though the berries may lose freshness after 24 hours. 💛
Fridge Preservation
For longer storage, refrigerate the cake in an airtight container with parchment paper between layers. It keeps perfectly for upstrong> 1 week this way, though the texture becomes slightly denser. Let it sit at room temperature for 10-15 minutes before serving to restore the buttercream's smoothness. I like to store the berries separately and add them fresh when serving.
Freezing for Later
Freeze individual slices wrapped tightly in plastic wrap and placed in a freezer bag for up to 1 month. Thaw overnight in the fridge before serving. For whole cakes, wrap the entire cake in plastic wrap followed by aluminum foil. The texture remains moist when reheated properly—just pop slices in the microwave for 10-15 seconds to restore freshness. 🍫
Reheating Slices
For the best texture, reheat individual slices in a 350°F oven for 5-7 minutes covered with foil. This gently warms the cake without drying it out. If using a microwave, heat for 10 seconds at 50% power—just enough to soften the buttercream without making the cake rubbery. Add a fresh berry on top for a pop of color and brightness.
Buttercream Refresh
If your buttercream looks separated after storage, simply whip it again for 1-2 minutes with a hand mixer. For extra richness, add 1 tablespoon softened butter and mix until smooth. This trick works wonders for restoring that professional finish. The cake's flavor actually improves after 24 hours as the ingredients meld together beautifully. ✨
Nutrition facts
Frequently asked questions
Why does this recipe use both hot water and room-temperature butter?
The hot water activates the cocoa powder for a smoother second layer, while room-temperature butter ensures even mixing without lumps. The first layer uses melted butter for a fudgy texture, while the second layer's lighter batter benefits from the hot water trick to create that velvety top.
Can I make this cake in a different-sized pan?
Yes, but adjust baking time accordingly. For an 8-inch pan, bake 35-40 minutes and reduce batter by 25%. For a 10-inch pan, increase batter by 25% and bake 45-50 minutes. Always use a toothpick test to check doneness.
What if my cake cracks or domes while baking?
This usually happens from overmixing or opening the oven too soon. To prevent it: Mix just until combined, avoid peeking during baking, and ensure your oven is fully preheated. If it happens, don't worry—it's still delicious! Just frost carefully to hide any cracks.
How do I make this cake gluten-free?
Replace the all-purpose flour with a 1:1 gluten-free baking flour blend (like Bob's Red Mill) plus 1 tsp xanthan gum. Add 2 tbsp extra sour cream to maintain moisture. The texture will be slightly denser but still tender. Test with a small batch first.
Can I substitute coffee for espresso powder?
Yes! Use 2 tbsp strong brewed coffee (cooled) instead of the espresso powder. The acidity enhances chocolate flavor, but the taste will be slightly more pronounced. For a milder effect, reduce to 1 tbsp coffee and add ½ tsp vanilla extract** to balance.