
Desserts
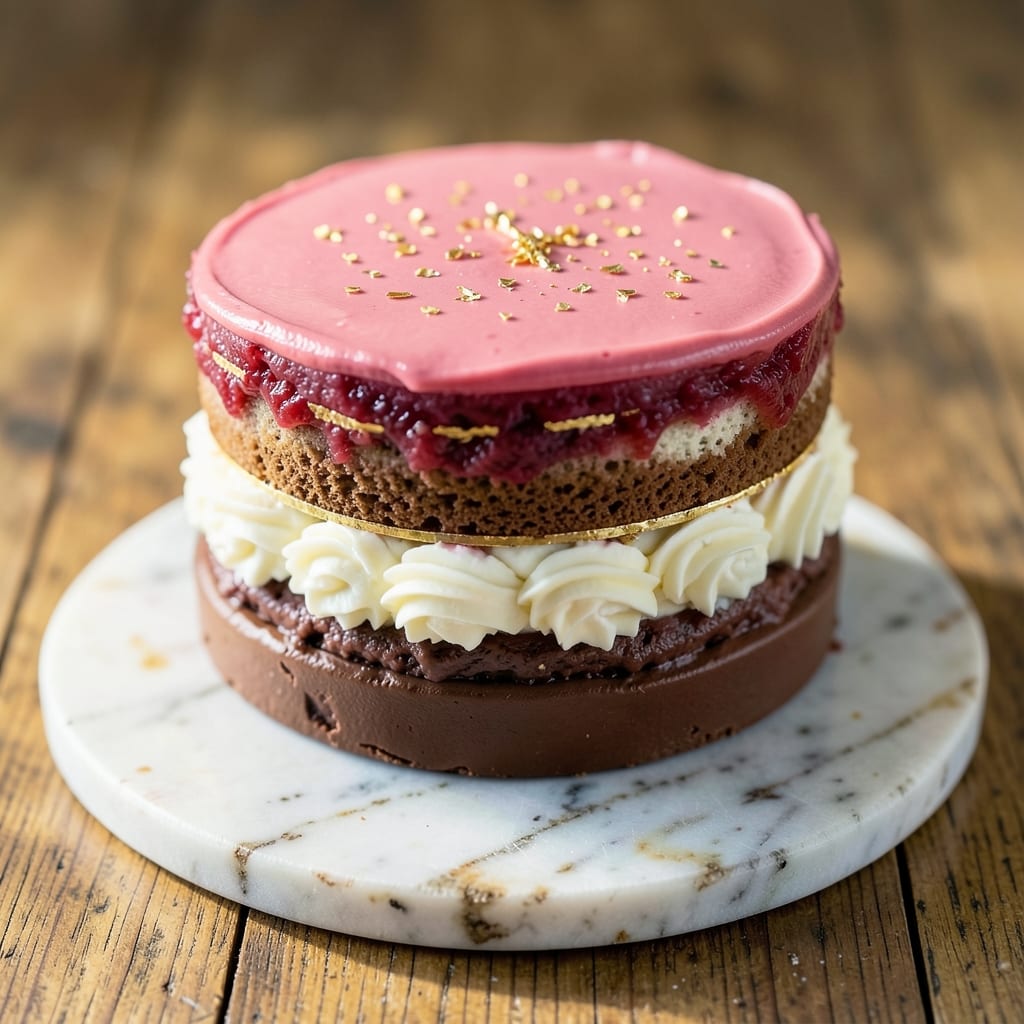
This 3-color cake recipe transforms any celebration into a showstopper with layers of bold flavors and vibrant hues that look as stunning as they taste. 💫 The secret lies in balancing three distinct batters—rich chocolate, velvety vanilla, and tangy red velvet—while ensuring each layer stays moist and perfectly level for clean slices every time. I’ve tested this recipe countless times to guarantee a cake that’s as impressive to cut as it is to eat, with a buttercream filling that ties all the flavors together seamlessly.
What sets this recipe apart is the foolproof technique for achieving professional-looking layers without a cake leveler. We’ll use a simple two-step baking method—first baking the layers at a precise 350°F for 25-30 minutes, then cooling them completely before assembly—to prevent crumbling. The frosting, a smooth vanilla buttercream, gets tinted to match each layer, creating a harmonious visual effect that’s almost too pretty to slice. Even beginners can master this with the right patience and a few key tools.
The result is a cake that’s visually striking and deliciously balanced, with each bite offering a new flavor experience. The chocolate layer stays dense yet tender, the vanilla remains light and airy, and the red velvet adds a subtle tang that cuts through the richness. Top it with piped borders, sprinkles, or fondant accents for extra flair, or keep it classic with a simple dusting of powdered sugar. This isn’t just a cake—it’s a centerpiece that makes every occasion feel special.
Perfect for birthdays, weddings, or holiday gatherings, this recipe scales easily for crowds while keeping the assembly process manageable. Pro tip: Prep your layers the day before baking to save time, and let the cake rest for 30 minutes after frosting to ensure clean slices. Ready to bake a cake that steals the show? Let’s get started.
Ingredients for 3 color cake
Twelve essential ingredients create three stunning cake layers—chocolate depth, vanilla elegance, and red velvet tang.
| Ingredient | Amount | Notes |
|---|---|---|
| All-Purpose Flour 🌾 | 4 ½ cups | Sifted for light texture, spooned and leveled |
| Unsalted Butter 🧈 | 2 ¼ cups | Room temperature, European-style preferred |
| Granulated Sugar 🍚 | 3 ½ cups | Divided equally for each batter |
| Large Eggs 🥚 | 12 whole | Room temperature, separated for each batter |
| Baking Powder 🍃 | 1 ½ tbsp | Diamond Crystal preferred (spoon & level) |
| Cocoa Powder 🍫 | ½ cup | Dutch-processed, sifted for smooth batter |
| Red Food Coloring 🎨 | 1 tbsp | Gel-based for vibrant color, divided |
| Blue Food Coloring 🎨 | 1 tbsp | Gel-based for vibrant color, divided |
| Vanilla Extract 🌿 | 1 ½ tbsp | Pure Madagascar bourbon preferred |
| Buttermilk 🥛 | 1 ½ cups | Fresh, for red velvet layer |
| White Vinegar 🍶 | 1 tbsp | For homemade buttermilk |
| Powdered Sugar 🍚 | 4 cups | Confectioners' sugar for buttercream |
| Heavy Whipping Cream 🥛 | 1 ½ cups | Cold, for whipped buttercream |
| Salt 🧂 | 1 tsp | Fine sea salt for each batter |
The flour and butter form the foundation, so prioritize quality. King Arthur or Gold Medal flours yield the lightest texture, while European-style butter (like Plugrá) adds richness. For the cocoa powder, Valrhona or Dutch-processed brands ensure smooth batter without bitterness. Room-temperature eggs are non-negotiable—they emulsify better, preventing dense layers. If your kitchen runs warm, separate yolks and whites and chill them briefly before mixing. The food coloring should be gel-based (like Wilton) to avoid altering batter consistency—liquid dyes can make your cake gummy.
No gel food coloring? Natural alternatives work: matcha powder (1 tsp for green), beet juice (1 tbsp for pink), or spirulina (½ tsp for blue). Short on buttermilk? Mix 1.5 cups milk + 1 tbsp vinegar, let sit 5 minutes. The powdered sugar must be sifted—lumps in buttercream create texture issues. For the whipped cream, use cold equipment (chill your beaters 15 minutes beforehand) to stabilize peaks. Vanilla extract matters too—Madagascar bourbon offers complex notes, while imitation extracts add artificial aftertaste. Pre-measure everything to avoid mid-bake adjustments that disrupt layer symmetry.
Store dry ingredients (flour, cocoa, baking powder) in airtight containers for up to 6 months, away from heat. Butter keeps 3 months at room temperature if wrapped tightly. Whipped buttercream lasts 3 days refrigerated, but freezes beautifully for 2 months—thaw overnight in the fridge. Colored batters can be prepped 1 day ahead and refrigerated; bring to room temp before baking. Assembled cake holds 3 days at room temperature (covered), or 1 week refrigerated. For long-term storage, freeze fully assembled cakes (unfrosted) for up to 3 months—thaw overnight before serving.
Why You'll Love This Recipe
- Three-Batch Magic: I swear, this cake only needs three bowls—one for each color—and a single mixing session. No fancy piping bags or last-minute scrambling. Just fold in your food coloring (or cocoa powder for that chocolate layer) right into the basic batter, and boom: vibrant layers without the stress.
- Butter-Sugar Bliss: That creamed butter and sugar combo? It’s the secret weapon here. The eggs bind it all together while keeping the texture light, and the baking powder gives it that perfect rise—no dense, heavy cake vibes. Honestly, the vanilla layer alone makes me want to skip dessert and just eat a slice for breakfast.
- Party or Pantry: Between us, this cake works for everything. Need a showstopper for a birthday? The three colors make it look extra special. Craving something simple for a weekday? The layers keep well, so I’ll often bake one and portion it out for days—no sad, dried-out cake here.
- Pantry Staple Power: All the ingredients are things I already have: flour, butter, sugar, eggs. No weird substitutions or hard-to-find items. And if I make a full sheet pan version, it stretches into way more servings than a single-layer cake—perfect for feeding a crowd without breaking the bank. (Yes, even on a Tuesday night.)
Step-by-step instructions for creating a stunning 3-Color cake
Precision and patience create this showstopping cake—each layer requires careful technique.
👨🍳 Step 1: Prepare the Three Batters Separately
Divide the 3.5 cups granulated sugar equally into three bowls—1 cup per batter. Sift together 1.5 cups all-purpose flour, 1.5 tbsp baking powder, and 1 tsp salt for each bowl. In separate bowls, beat 2.25 cups unsalted butter with 1 cup sugar, 2 whole eggs, and 0.5 tbsp vanilla extract until light and fluffy.
For the red velvet layer, whisk 1.5 cups buttermilk (mix 1.5 cups whole milk with 1 tbsp white vinegar) and 1 tbsp red food coloring into the dry ingredients. For the yellow layer, simply mix the dry ingredients with the wet. For the blue velvet layer, combine 0.5 cup cocoa powder with dry ingredients and add 1 tbsp blue food coloring to the wet mixture. Fold each batter gently to avoid deflating.
🍳 Step 2: Bake Layers at Perfectly Controlled Temperatures
Preheat oven to 350°F. Grease and line three 8-inch round cake pans with parchment. Pour batters evenly into pans—fill each ¾ full. Bake the red velvet layer first for 25-30 minutes, then the yellow, then the blue velvet layer, rotating pans halfway for even baking. Test doneness by inserting a toothpick—it should come out clean with no wet batter clinging.
Real talk: Your oven might run hot, so start checking at the 20-minute mark. Overbaking dries out the layers, while underbaking causes collapse. Let each layer cool in pans for 10 minutes, then transfer to a wire rack to cool completely before assembling—this prevents crumbling.
🥘 Step 3: Create the Signature Buttercream and Assemble
Beat 2.25 cups unsalted butter (softened) with 4 cups powdered sugar on medium speed until light. In a separate bowl, whip 1.5 cups cold heavy whipping cream to stiff peaks, then gently fold into the buttercream. Divide into three bowls and tint each with red, yellow, and blue gel food coloring for vibrant layers.
Place the red velvet layer on a cake stand. Spread ½ cup red buttercream evenly, then add the yellow layer. Repeat with ½ cup yellow buttercream, then top with the blue velvet layer. Spread the remaining 1 cup blue buttercream over the top and sides, creating a smooth finish. Chill the cake for 1 hour before decorating to set the frosting.
⏰ Step 4: Decorate and Serve with Confidence
Use a serrated knife to trim any uneven edges. For a polished look, dust the top with powdered sugar or pipe swirls with leftover buttercream. The colors should pop vividly—gel-based food coloring ensures vibrant hues that won’t bleed. Slice into 12 equal wedges and serve immediately for the most impressive presentation.
Here's the thing—this cake holds its structure beautifully when served at room temperature. If transporting, keep it refrigerated and bring to room temp before slicing. Each bite delivers the perfect balance of texture and color, making it a showstopper for any occasion.
Pro Tips For Making 3 Color Cake
- Weigh Your Butter: Butter is the cake’s fat backbone—don’t eyeball it. Use a kitchen scale for 100g per color batch (about 7 tablespoons). Pack it lightly into the measuring cup to avoid air pockets that throw off texture. I learned this the hard way when my first 3-color cake had one layer too dense—turns out, I’d scooped it straight from the fridge like a lazy chef.
- Mix Just Until Combined: Overmixing the batter after adding baking powder turns your layers gummy. Stop mixing the second the flour disappears—about 15-20 strokes max. The moment you see streaks of dry flour, call it done. I used to beat it like I was punishing the bowl, and my cakes ended up tough as boot leather.
- Chill the Bowls: Place your mixing bowls in the fridge for 10 minutes before whipping the butter and sugar. Cold butter emulsifies better and holds air longer, giving you taller, fluffier layers. Skip this, and your cake might collapse in the middle—trust me, I’ve seen it happen when I was in a rush.
- Layer the Colors Fast: Once you’ve poured the first layer, work quickly to assemble the whole cake. The batter starts setting within 10-15 minutes at room temp. If you dawdle, the layers won’t bond properly, and you’ll end up with a cake that looks like a poorly stacked Jenga tower. Keep a damp towel handy to wipe the pan edges clean between layers.
Best sauces and condiments for this 3 color cake
Buttercream Perfection
This vanilla buttercream is the star—creamy, stable, and vibrant when tinted. I swear by European-style butter (like Plugrá) for richness, and cold heavy cream ensures stiff peaks when folded in. For extra stability, chill your mixing bowl and beaters 15 minutes before whipping. 🥛
Pro tip: If your buttercream is too soft, refrigerate it 10 minutes before tinting. Gel food coloring (like Wilton) blends seamlessly without altering texture—avoid liquid dyes, which can make your frosting watery. Divide the buttercream into three bowls and tint each with 1 tsp red, 1 tsp yellow, and ½ tsp blue gel coloring for bold layers.
Flavor Boosters
Elevate your buttercream with 1 tsp vanilla bean paste (for depth) or ½ tsp almond extract (for nutty notes). For a tangy twist, add 1 tbsp lemon juice to the yellow layer’s buttercream. These subtle additions keep the frosting from tasting one-note while maintaining its smooth, pipeable consistency.
Glaze Alternatives
Skip buttercream? A simple glaze ties the cake together beautifully. Whisk 1 cup powdered sugar with 2 tbsp milk and 1 tsp vanilla, then divide into three bowls. Tint each with red, yellow, and blue gel coloring. Drizzle between layers and over the top for a sleek, modern look. This method works especially well for gluten-free or vegan cakes where buttercream isn’t an option.
Fondant Finishes
For a showstopping effect, cover the cake in white fondant (like Wilton) and hand-paint the colors with edible watercolors. Start with a thin base coat, then layer 2-3 colors for depth. Seal with a glossy edible spray (like AmeriColor) to make the colors pop. This technique is perfect for wedding cakes or holiday centerpieces where drama is key.
Storage Hacks
Buttercream frosting lasts 3 days refrigerated in an airtight container, but for longer storage, freeze it for up to 2 months. Thaw overnight in the fridge, then re-whip briefly to restore smoothness. If your cake sits too long before serving, brush the top with simple syrup (equal parts sugar and water, heated) to refresh moisture and prevent drying.
Nutrition facts
Frequently asked questions
Can I use liquid food coloring instead of gel?
Liquid food coloring will work, but it can make your batter thicker and potentially alter the texture of your cake layers. For best results, use gel-based coloring which blends smoothly without adding extra moisture. If you only have liquid, reduce it by half and mix it with a tiny bit of the wet ingredients before adding to the dry mix.
How do I prevent my cake layers from crumbling when assembling?
Let each layer cool completely in the pan for 10 minutes, then transfer to a wire rack to cool fully before assembling. This helps them set properly. Also, use a serrated knife to level the tops—never a sawing motion that can create crumbs. Chill the cake for 1 hour after frosting to give the buttercream time to firm up before cutting.
What's the best way to make this cake gluten-free?
Replace the all-purpose flour with a 1:1 gluten-free baking flour blend (like Bob's Red Mill) and add ½ tsp xanthan gum per cup of flour. Use a gluten-free buttercream recipe with vegan butter and coconut milk cream instead of heavy cream. The baking times may vary slightly—check for doneness at 20 minutes instead of 25.
Can I bake the layers ahead of time?
Yes! Wrap each cooled layer tightly in plastic wrap and store at room temperature for 2 days or refrigerate for 1 week. Bring layers to room temperature before frosting. For long-term storage, freeze the unfrosted layers for up to 3 months. Thaw overnight in the fridge before assembling.
How do I make the colors pop even more?
For extra vibrancy, use edible luster dust (like AmeriColor) to add shine to the finished cake. You can also pipe white buttercream borders between the colored layers to create a "stained glass" effect. Another trick: Add a tiny bit of citric acid (⅛ tsp) to your buttercream—it enhances color brightness while keeping flavors balanced.