
Desserts
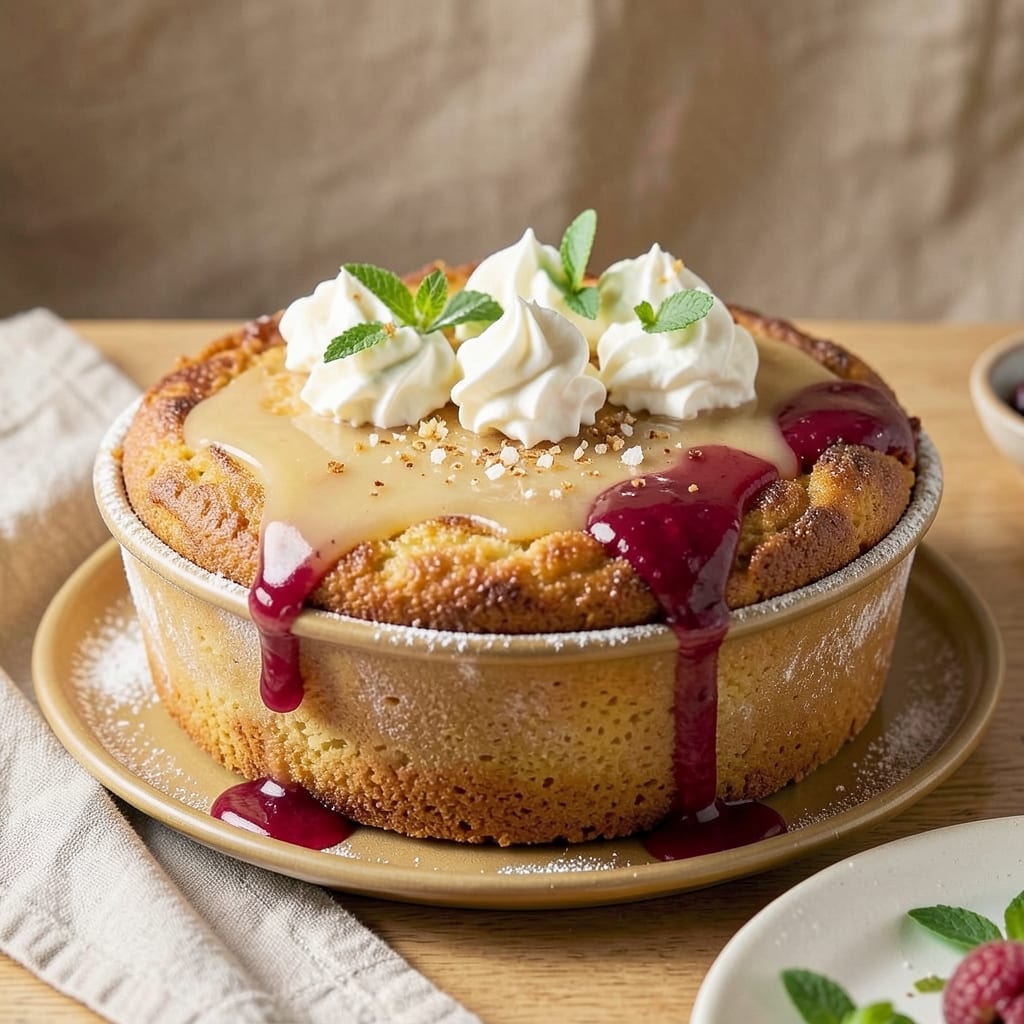
A 3-inch cake pan recipe transforms simple ingredients into a perfectly portioned dessert that’s ready in just 30 minutes. This single-serve cake delivers rich, moist layers with a tender crumb—ideal for a quick indulgence or elegant presentation. The secret lies in precise measurements and gentle baking to ensure every bite is perfectly balanced. What sets this recipe apart is its versatility—whether you’re baking a classic vanilla cake, a decadent chocolate treat, or a citrus-infused delight, the technique remains the same. The small pan ensures even cooking, eliminating the guesswork of larger batches. With just a handful of ingredients and minimal effort, you’ll achieve restaurant-quality results at home. The result is a golden, domed cake with a delicate crumb and a tender center, perfect for serving solo or as a thoughtful surprise. Top it with fresh berries, whipped cream, or a dusting of powdered sugar to elevate it further. This recipe proves that even the smallest pans can deliver big flavor. Whether you’re celebrating a special occasion or simply craving a moment of sweetness, this cake is your answer. Let’s get started!
Ingredients for 3 inch cake pan
A carefully balanced mix of dry ingredients, fats, and liquids creates a perfectly scaled cake.
| Ingredient | Amount | Notes |
|---|---|---|
| All-Purpose Flour 🌾 | ½ cup | Sifted for light texture |
| Granulated Sugar 🍚 | ¼ cup | Superfine preferred for smoothness |
| Unsalted Butter 🧈 | ¼ cup | Room temperature for creaming |
| Large Eggs 🥚 | 1 whole | Room temperature for even baking |
| Vanilla Extract 🌸 | 1 tsp | Pure extract for authentic flavor |
| Baking Powder 🧂 | ½ tsp | Aluminum-free for stability |
| Salt 🧂 | ¼ tsp | Fine sea salt preferred |
| Whole Milk 🥛 | ¼ cup | Room temperature for smooth batter |
| Vanilla Bean Paste 🌸 | ½ tsp | Optional for enhanced flavor |
| Powdered Sugar 🍚 | 2 tbsp | For dusting finished cake |
| Fresh Raspberries 🍓 | ¼ cup | Maceraed for garnish |
| Heavy Cream 🥛 | ¼ cup | Whipped for topping |
| Lemon Zest 🍋 | 1 tsp | Freshly grated for brightness |
The butter and sugar ratio is critical for achieving the tender crumb in a 3-inch pan. European-style butter with higher fat content (82-86%) yields superior results, though regular unsalted butter works well. For the flour, King Arthur or Gold Medal brands are ideal due to their consistent protein levels. Pre-sift the dry ingredients to eliminate lumps and ensure even distribution throughout the batter. The vanilla extract should be pure—McCormick or Nielsen-Massey are reliable brands. If using vanilla bean paste, select high-quality varieties like Madagascar Bourbon for optimal flavor.
No vanilla extract? Almond extract at half the amount provides a similar aromatic depth, though with a distinct nutty undertone. Substitute whole milk with evaporated milk or coconut milk for a richer texture, though the latter may alter the cake's subtle sweetness. For those avoiding dairy, unsweetened almond milk plus 1 tbsp melted butter replicates the moisture content. The baking powder is non-negotiable—ensure it's fresh by testing with vinegar (active if it fizzes). For lemon zest, use only the outer layer of organic lemons to avoid bitterness from pesticides. Pre-macerate the raspberries in 1 tsp powdered sugar for 15 minutes to intensify their flavor.
Store the cake in an airtight container at room temperature for up to 3 days, though it's best enjoyed within 24 hours for maximum moisture. For longer storage, wrap tightly in plastic wrap and refrigerate for up to 5 days. The whipped cream should be prepared fresh and stored in a sealed container in the refrigerator for up to 2 days. To revive slightly dried cake, warm it in a 300°F oven for 5-10 minutes with a damp paper towel. For make-ahead convenience, bake the cake 1 day in advance and store properly—it actually develops deeper flavor overnight.
Why You'll Love This Recipe
- No Mixer Needed: I swear by this recipe when my stand mixer’s on vacation—just cream butter and sugar by hand, crack eggs, and fold in flour. The batter’s so light it practically whips itself, and honestly? The effort feels like half of what I’d put into a 9x13 pan.
- Butter-Sugar Magic: That creamed butter and sugar combo? It’s the secret weapon here. The vanilla extract deepens the flavor without overpowering, and the eggs add just enough richness to make every bite feel like a little dessert. (Yes, even in cake form.)
- Portion Control: Three-inch pans mean single servings—perfect for lunchboxes, potlucks, or when I’m finally eating that fancy dessert I’ve been saving for. No leftovers to stress over, just one perfect slice at a time.
- Budget-Friendly Luxury: This recipe uses pantry staples—no specialty ingredients, no fancy tools. A stick of butter, a cup of sugar, and a handful of eggs stretch to make multiple pans. My wallet thanks me every time.
Step-by-step instructions for single-serve cake pan decadence
Master this delicate balance of technique and timing for a perfectly textured single-serve cake.
👨🍳 Step 1: Prepare the Cake Batter with Precision
Preheat your oven to 350°F and grease a 3-inch cake pan thoroughly with 2 tablespoons vegetable oil, then dust with 0.5 cup all-purpose flour (sifted) to prevent sticking. In a medium bowl, whisk together the 0.5 cup all-purpose flour, 0.5 teaspoon baking powder, and 0.25 teaspoon salt. Set aside—this dry mixture ensures a light, airy crumb.
In a separate large bowl, cream the 0.25 cup unsalted butter (room temperature) and 0.25 cup granulated sugar on medium speed until light and fluffy, about 3-4 minutes. This step incorporates air, which is critical for that signature tender texture. Add the 1 whole large egg and 1 teaspoon vanilla extract, mixing until fully combined. Gradually pour in the 0.25 cup milk while mixing on low speed to avoid overdeveloping the gluten.
🍳 Step 2: Combine Wet and Dry Ingredients Gently
With the mixer on low speed, add the dry ingredients in three parts, mixing just until combined after each addition. Avoid overmixing—this is where many home bakers go wrong. The batter should be smooth and slightly thick, like heavy pudding. If it looks too thick, add 1 tablespoon milk at a time until it reaches a pourable consistency.
Here's the thing—this batter needs to be just right. Too thin and your cake will sink; too thick and it won't rise properly. The ideal consistency allows the batter to coat the back of a spoon without dripping. Once satisfied, carefully pour the batter into your prepared 3-inch cake pan, filling it about ¾ full. Tap the pan gently on the counter to remove any air bubbles that may have formed during pouring.
🔥 Step 3: Bake to Golden Perfection with Precision
Place the cake pan in the center rack of your preheated oven and bake for 25-30 minutes. The cake is done when a toothpick inserted into the center comes out clean and the edges are golden brown. I know it's tempting to peek early, but resist—opening the oven door causes temperature fluctuations that can affect the rise.
Real talk: Your oven might run hot, so start checking at the 20-minute mark. The cake should spring back slowly when gently pressed in the center. If it browns too quickly, loosely cover the pan with aluminum foil to prevent over-browning while allowing steam to escape. Once fully baked, remove from the oven and let it cool in the pan for 10 minutes before transferring to a wire rack to cool completely.
🍽️ Step 4: Assemble Your Single-Serve Masterpiece
While the cake cools, prepare the fresh berries by washing and patting them dry. Arrange 0.5 cup fresh berries on a small serving plate or directly on top of the cooled cake for a vibrant presentation. In a small bowl, gently fold 0.25 cup powdered sugar into the 0.25 cup whipped cream until just combined—this prevents the whipped cream from becoming grainy.
Slice the cake horizontally into two equal layers if desired, or serve it whole for a dramatic single-serve presentation. Spread a thin layer of the whipped cream mixture between layers if slicing, then top generously with the remaining whipped cream. Garnish with additional berries and a dusting of powdered sugar for that restaurant-quality finish. Serve immediately for the best texture and flavor experience.
Pro Tips For Making 3 Inch Cake Pan
- Preheat Pan First: I learned this the hard way—cold pans steal heat from your batter, leading to uneven baking. Pop that 3-inch pan in a 350°F oven for 10 minutes before adding the batter, even if the recipe doesn’t say so. Your cake’s edges will thank you.
- Whisk Eggs Separately: Overmixed eggs make your cake dense, and this tiny pan doesn’t forgive sloppy texture. Whisk yolks and whites separately until yolks are ribbony and whites hold stiff peaks—then fold them gently into the butter-flour mix. Yes, it’s extra steps, but the crumb is worth it.
- Skip Overfilling: A 3-inch pan is unforgiving—fill it past 2/3 full, and you’ll end up with a cracked, sunken mess. Tap the pan lightly on the counter after adding batter to pop any air bubbles, then level it off with a knife. Trust me, your cake will rise better.
- Butter the Pan Twice: Grease it, dust with flour, then grease it again—this isn’t just for looks. The second butter layer creates a nonstick barrier that actually works, especially with this recipe’s high butter-to-flour ratio. (Yes, even if it feels like overkill.)
Storing and reheating this 3 inch cake pan
Room Temperature Storage
Your freshly baked cake stays fresh and moist at room temperature for up to 2 days when stored in an airtight container like a Rubbermaid Brilliance container with a tight-sealing lid. I like to place a slice of bread on top of the cake inside the container to help maintain moisture. Avoid storing near strong-smelling foods—cakes absorb odors easily. 🌟
Refrigerator Preservation
For longer storage, refrigerate your cake in an airtight container for up to 5 days. The cold temperature actually preserves the moisture better than room temperature storage. Let the cake sit at room temperature for 10-15 minutes before serving to restore some of the original texture. I find this method works particularly well for cakes with whipped cream toppings.
Freezing for Later
Freezing is ideal for single-serve cakes you want to preserve for 3 months. First, let the cake cool completely, then slice it horizontally into individual portions. Wrap each slice tightly in plastic wrap, followed by a layer of aluminum foil to prevent freezer burn. Place the wrapped slices in a freezer bag and remove as much air as possible before sealing. 🧊
Thawing Techniques
Thaw frozen cake slices overnight in the refrigerator for the best results. If you're in a hurry, you can microwave individual slices on 50% power for 10-15 seconds to restore freshness. For a more traditional approach, place the frozen slice on a plate and let it sit at room temperature for 30-45 minutes. Always bring it to room temperature before serving to prevent condensation from making the cake soggy.
Reviving Dry Cakes
If your cake develops a dry texture during storage, don't toss it! Brush the top with a simple syrup made by heating 2 tablespoons granulated sugar with 1 tablespoon water until dissolved. Let the cake absorb the syrup for 10 minutes before serving. This trick works wonders for restoring moisture to cakes that have dried out during storage.
Whipped Cream Storage
Store any leftover whipped cream in an airtight container in the refrigerator for up to 3 days. For best results, add a pinch of powdered sugar to the whipped cream before storing to help preserve its texture. When ready to use, simply whip it again briefly with a hand mixer to restore its light, airy consistency. This method keeps the whipped cream fresh without becoming grainy. ✨
Nutrition facts
Frequently asked questions
Can I use a 3-inch cake pan for cupcakes instead?
No, a 3-inch cake pan is too small for cupcakes—it typically makes just 1-2 servings. For cupcakes, use a standard 6-cup or 12-cup muffin tin. The small pan is perfect for single-serve desserts or mini layered cakes, but the batter volume is designed specifically for its dimensions.
Why does my cake sink in the middle even with the right baking time?
This usually happens from overmixing the batter (developing too much gluten) or opening the oven door too early. Mix just until combined and avoid peeking! Also, ensure your oven is properly calibrated—many home ovens run hot. A cake tester should come out clean, not wet.
Can I make this recipe gluten-free?
Yes! Replace the all-purpose flour with a 1:1 gluten-free baking flour blend like Bob's Red Mill, but reduce the baking powder to 0.25 teaspoon and add 0.25 teaspoon xanthan gum to mimic gluten's structure. The texture will be slightly denser but still delicious.
How do I adjust this for a 4-inch cake pan?
Double all ingredients (except baking powder—use 1 teaspoon) and bake at 325°F for 35-40 minutes. The larger pan requires lower heat to prevent over-browning. The batter should fill the pan ¾ full—don't overfill or it may overflow.
What's the best way to serve this single-serve cake?
For an elegant presentation, slice it horizontally into two layers, add a dollop of whipped cream between them, then top with fresh berries and powdered sugar. Serve on a small dessert plate with a side of vanilla ice cream for extra decadence. Perfect for celebrations or a special treat!