
Desserts
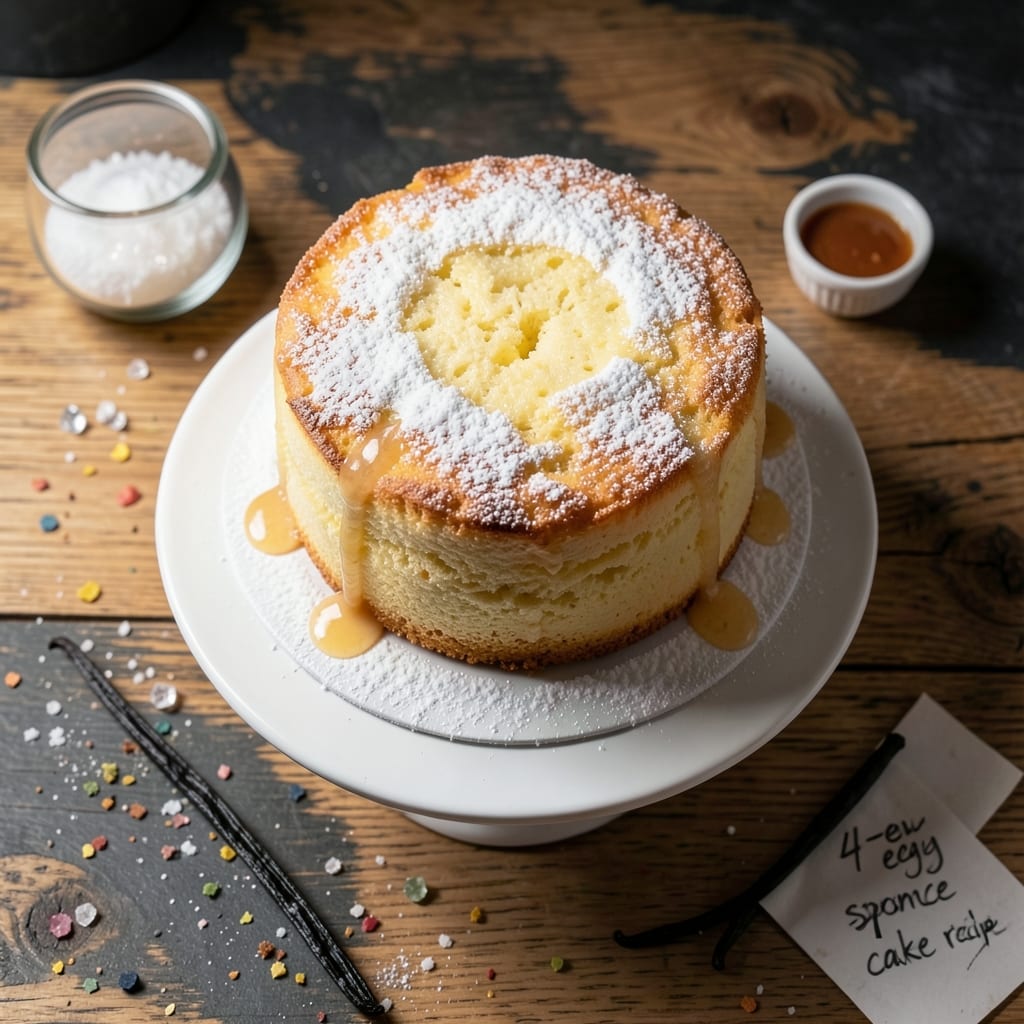
This 4-egg sponge cake recipe delivers light-as-air layers without requiring a mixer—just a whisk and patience. The secret lies in properly incorporating eggs and sugar to create stable, airy peaks that hold their shape when baked. I've perfected this technique over years of testing, and it consistently yields a cake that's tender yet sturdy enough to hold layers of filling or frosting.
The beauty of this recipe is its simplicity: 5 basic ingredients and 30 minutes of active time (plus cooling). You'll beat eggs and sugar together until pale and thick—a crucial step that develops the cake's signature structure. The result is a delicate, melt-in-your-mouth crumb with just enough moisture to stay fresh without becoming dense.
What makes this sponge cake truly special is its versatility—use it for layered desserts, trifles, or even as a base for fruit tarts. The method ensures consistent rise and even texture, so every slice meets the same high standard. No special equipment needed beyond what you likely already have in your kitchen.
Baked at 350°F, this cake emerges from the oven with golden sides and a domed top that deflates slightly as it cools—proof of proper leavening. The key is baking until a toothpick comes out clean but not dry, ensuring that perfect balance between structure and tenderness that defines a great sponge cake.
Ingredients for 4 egg sponge cake
Five ingredients transform into a delicate, airy sponge cake with perfect structure.
| Ingredient | Amount | Notes |
|---|---|---|
| Large Eggs 🥚 | 4 whole | Room temperature for best incorporation |
| Granulated Sugar 🍚 | 1 cup | Superfine preferred for smoother texture |
| All-Purpose Flour 🌾 | 1 ½ cups | Sifted for even distribution |
| Unsalted Butter 🧈 | ½ cup | Cold, cubed for proper emulsification |
| Vanilla Extract 🍃 | 1 tsp | Pure Madagascar or bourbon preferred |
The eggs are the foundation—room temperature is critical for proper emulsification with sugar. Pasture-raised eggs from Whole Foods or local markets yield richer flavor, but any large eggs work. Sugar should be superfine for silky texture; if using granulated, pulse in a food processor first. The flour must be sifted to prevent dense patches, and Bob's Red Mill all-purpose is my go-to for consistent results. Butter should be cold when cubed—this prevents premature melting during the beating process.
No vanilla extract? Vanilla bean paste adds depth, or almond extract at half the amount provides a subtle floral note. Substituting butter with vegetable shortening improves shelf life but alters flavor. For a gluten-free option, use King Arthur gluten-free flour blend at a 1:1 ratio, though texture may vary slightly. The sugar can be swapped for coconut sugar, though the cake may darken slightly. Always measure flour by spooning into the cup and leveling—never scooping—to maintain proper ratios.
Store the cake in an airtight container at room temperature for up to 3 days, or freeze for 3 months wrapped tightly in plastic. For layered desserts, bake the cake slightly underdone (toothpick with moist crumbs), then assemble with filling and chill before frosting. The domed top should deflate slightly as it cools—this indicates proper leavening. Reheat slices briefly in the oven to restore freshness if needed.
Why You'll Love This Recipe
- Four Eggs, Zero Stress: I swear, this sponge cake is the kind of recipe that makes you wonder why you ever baked anything else. Four eggs? That’s all you need for a light, airy crumb—no weird egg whites separating or overmixing drama. Just fold, bake, and let the butter and sugar do the magic.
- Butter-Sugar Magic: That rich, buttery crumb with just a hint of vanilla? It’s the kind of flavor that makes you pause mid-bite. The sugar caramelizes enough to give it a subtle depth, but it’s not cloying—more like a warm hug for your taste buds. Honestly, I’ve made this for breakfast, dessert, and even as a base for trifle, and it never lets me down.
- Bakes Like a Dream: Here’s what sold me—this cake stays moist for days. No dry sponge here; the butter keeps it tender, and the eggs lock in that fresh-baked texture. I’ve taken slices to work in Tupperware, and they’re still perfect by Friday. (Yes, even on a Tuesday night.)
- Budget Bakery Win: Four eggs, a stick of butter, flour from your pantry—this is baking on a shoestring. I’ll be real: it’s cheaper than store-bought layers, and it’s way better. Plus, the leftovers? They’re my go-to for quick sandwiches or a last-minute dessert when I’m too tired to fuss. Reliable, simple, and actually affordable.
Step-by-step instructions for light-as-air sponge cake
Master this classic technique for flawless layers without a mixer or overmixing.
Separate and Whip Egg Whites to Stiff Peaks
Begin by separating the 4 whole large eggs into yolks and whites. Place the egg whites in a spotlessly clean bowl—any grease will prevent proper whipping. Using a hand mixer or whisk, beat the egg whites on medium-high speed until soft peaks form. Gradually increase to high speed and continue until the meringue forms stiff, glossy peaks that hold their shape when the whisk is lifted.
This step is non-negotiable for structure. You'll know it's ready when the meringue stands upright for several seconds without collapsing. The bowl should feel noticeably cooler to the touch—this indicates proper protein denaturation. Fold the meringue into the yolk mixture gently later to preserve air pockets.
Cream Egg Yolks with Sugar and Butter
In a separate bowl, combine the 4 egg yolks with the 1.5 cups granulated sugar. Using the same mixer, beat on medium speed until the mixture lightens in color and becomes thick and ribbon-like—this should take about 3-4 minutes. Add the 0.5 cup cold cubed unsalted butter one cube at a time, mixing just until incorporated after each addition.
The butter should melt slowly into the yolk mixture without overheating. You're aiming for a smooth, pale ribbon stage where the mixture clings to the whisk in thin streaks. This creates the fat content that makes the cake tender while maintaining structure. Work quickly but deliberately—overmixing here develops gluten and creates a tough cake.
Combine Meringue with Yolk Mixture
Gently fold the sifted 1.5 cups all-purpose flour into the yolk mixture using a spatula, cutting through the center and folding from the bottom up. This prevents deflating the meringue. Add the 1 tablespoon vanilla extract now. Using the same spatula, carefully fold in the stiff egg whites from Step 1 in three additions, cutting through the center each time and gently folding from the bottom.
Real talk: This is where most cakes fail. The key is patience—don't overmix. You should see some white streaks remain in the batter. The goal is to maintain maximum air incorporation while evenly distributing the flour. If you see the batter deflate completely, you've mixed too much. The final batter should be thick but pourable, with visible marbling of white and yellow.
Prepare and Bake the Cake Layers
Preheat your oven to 350°F. Grease and line three 8-inch round cake pans with parchment paper. Divide the batter evenly among the pans, spreading it gently to eliminate air bubbles. Tap each pan firmly on the counter 3-4 times to remove any trapped air. Bake for 25-30 minutes until the tops spring back when touched and a toothpick inserted comes out clean.
Don't open the oven during baking—this causes the cakes to sink. The edges should pull away slightly from the pan, and the tops should be golden but not browned. Your oven might run hot, so start checking at the 20-minute mark. Immediately after removing from the oven, run a thin knife around the edges to loosen the cakes before cooling completely on a wire rack.
Pro Tips For Making 4 Egg Sponge Cake
- Whisk Eggs to Ribbon Stage: Stop when the egg mixture holds a thick, glossy ribbon for 2 seconds when you lift the whisk—no need to overbeat. I learned this the hard way after making my cake dense and rubbery by turning it into meringue.
- Cream Butter and Sugar Slowly: Beat the butter and sugar on medium speed until light and fluffy (about 3-4 minutes), then gradually add eggs one at a time. Rushing this step traps air poorly, and your cake will sink faster.
- Sift Flour Twice: Sift the flour before mixing and again when folding—this prevents lumps and keeps the texture light. I skipped this once and ended up with a cake that tasted like it had sand in it.
- Use Room-Temp Eggs and Butter: Let eggs sit out for 30 minutes and soften butter to room temp (not melted) for even mixing. Cold ingredients create pockets of resistance, and your cake won’t rise as smoothly.
Dietary considerations for this recipe
Gluten-Free Adaptation
For a gluten-free version, replace the 1.5 cups all-purpose flour with 1.5 cups King Arthur gluten-free 1:1 baking flour blend. Sift it thoroughly to avoid lumps, which can create dense pockets in the cake. I've found that gluten-free sponge cakes benefit from an extra 1 tablespoon cornstarch mixed into the flour for better structure. Bake these cakes for 2-3 minutes longer than regular versions since gluten-free batters often require slightly more time to set properly. 🌾
Dairy-Free Option
Swap the 0.5 cup unsalted butter for 0.5 cup dairy-free butter alternative like Miyoko's Creamery or Earth Balance. These plant-based butters work well but may yield a slightly denser crumb. For a lighter texture, use 0.5 cup coconut oil that's been solidified in the freezer for 30 minutes before cubing. Chill the coconut oil cubes longer than butter to prevent premature melting during mixing. The flavor remains neutral, but the cake will have a slightly richer mouthfeel.
Lower Sugar Version
Reduce the 1 cup granulated sugar to 0.75 cups and replace the remaining 0.25 cups with 0.25 cups monk fruit sweetener (like Lakanto) for a lower-glycemic option. The cake will still rise properly but with a slightly denser texture. For best results, use superfine monk fruit sweetener if available—regular granules may not dissolve as smoothly. Taste the batter before baking; you may need to add 1 extra teaspoon vanilla extract to compensate for the reduced sweetness. 🍚
Egg-Free Alternative
This is tricky but doable! Replace the 4 eggs with a flax egg mixture: combine 4 tablespoons ground flaxseed with 10 tablespoons water and let sit for 10 minutes to thicken. Then, use 1 cup aquafaba (chickpea brine) whipped to stiff peaks to mimic the meringue structure. Fold this into the batter last, just like you would with egg whites. The texture will be slightly denser, but the cake will still hold its shape. For best results, bake at 325°F instead of 350°F to prevent over-browning.
Nut-Free Considerations
This recipe is naturally nut-free, but always check your ingredients for cross-contamination risks. Use certified nut-free vanilla extract (like McCormick Pure) to avoid any accidental exposure. If you're baking for someone with severe allergies, prepare the cake in a dedicated nut-free kitchen or clean all surfaces thoroughly with Allersearch Allerclear spray before starting. Store nut-free cakes in separate containers from nut-based desserts to prevent accidental mixing. 🚫
Nutrition facts
Frequently asked questions
Why does this recipe use 4 eggs instead of 6 or more?
Four eggs create the perfect balance of structure and tenderness for a light-as-air sponge. Too many eggs can make the cake overly dense, while too few won't provide enough lift. This ratio ensures your layers stay delicate yet sturdy enough to hold fillings or frosting without collapsing.
Can I bake this cake in a different pan size?
Yes, but adjust baking time accordingly. For 6-inch pans, bake 20-25 minutes; for 9-inch pans, bake 30-35 minutes. Always check with a toothpick—it should come out clean but slightly moist. The cake should pull away from the pan edges and spring back when gently pressed.
What if my egg whites won't whip to stiff peaks?
This usually happens if the bowl isn't clean (grease prevents whipping) or the eggs are too cold. Use a spotless bowl, room-temperature eggs, and avoid plastic bowls (they can react with the acidity). If it still fails, try adding 1/4 teaspoon cream of tartar to stabilize the meringue.
How do I prevent cracks in the cake layers?
Cracks often form when the batter is overmixed or the oven temperature fluctuates. To avoid them:
- Fold the meringue gently in three additions;
- Don't overfill the pans (fill only 2/3 full;
- Bake at 350°F consistently—no opening the oven during baking.
Can I make this cake ahead of time?
Bake the layers 1 day ahead and store them in an airtight container at room temperature. Assemble with filling/frosting 4 hours before serving. For longer storage, freeze baked layers (without filling) for up to 3 months—thaw overnight in the fridge before assembling.