
Desserts
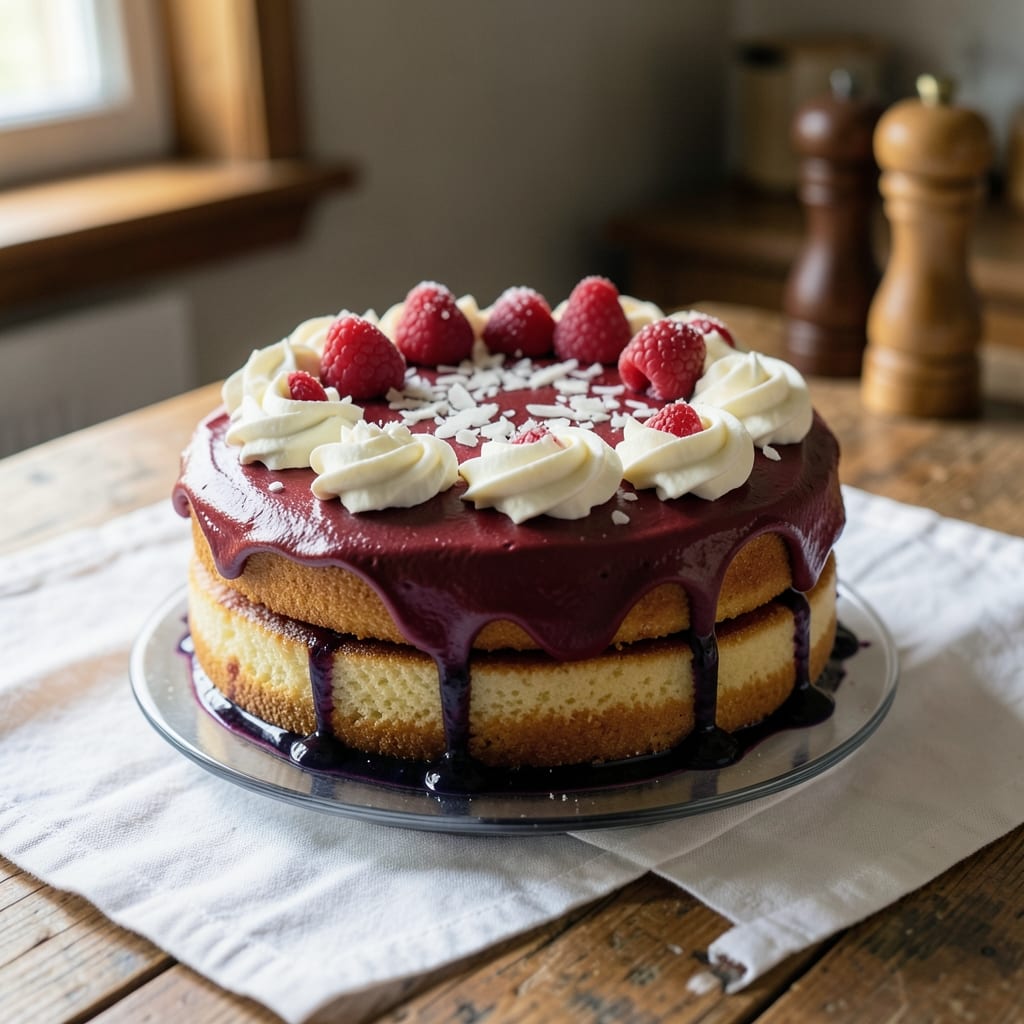
This 4th of July Firecracker Cake delivers a showstopping dessert with vibrant red, white, and blue layers that sparkle like fireworks. 🌟 The secret lies in a crunchy topping that mimics the crackle of real fireworks, paired with a perfectly balanced vanilla cake. I've perfected this recipe to ensure each slice is moist, flavorful, and visually stunning—ideal for celebrating Independence Day in style.
The cake features three distinct layers—vanilla, strawberry, and blueberry—separated by a luscious cream cheese frosting that adds a tangy contrast. A crunchy topping made from crushed graham crackers and white chocolate gives it that signature firecracker texture. Baking at 350°F for 25-30 minutes per layer ensures a tender crumb, while the frosting sets beautifully for clean slices.
Decorating is where the magic happens—think red, white, and blue sprinkles, edible glitter, and even mini firecracker-shaped candies for extra flair. The cake keeps well for 2-3 days when stored properly, making it perfect for prepping ahead of your celebration. Every bite delivers a mix of textures and flavors that will have your guests asking for seconds.
Whether you're serving it at a backyard BBQ or a family gathering, this Firecracker Cake is guaranteed to be the star of your dessert table. The combination of bold colors, festive toppings, and a satisfying crunch makes it a foolproof way to celebrate the 4th of July in true American style. Let’s get baking!
Ingredients for 4th of july firecracker cake
Three vibrant layers, a crunchy firework topping, and colors that pop like real sparklers—this is your all-American showstopper.
| Ingredient | Amount | Notes |
|---|---|---|
| All-Purpose Flour 🌾 | 3 cups | Sifted for light texture |
| Granulated Sugar 🍚 | 2 cups | White or light brown |
| Unsalted Butter 🧈 | 1 ½ cups | Room temperature, cubed |
| Large Eggs 🥚 | 6 whole | Room temperature |
| Vanilla Extract 🌿 | 2 tsp | Pure, high-quality |
| Baking Powder 🧂 | 2 tsp | Diamond Crystal preferred |
| Salt 🧂 | ½ tsp | Fine sea salt |
| Strawberry Puree 🍓 | 1 cup | Fresh or high-quality jarred |
| Blueberry Puree 🫐 | 1 cup | Fresh or frozen, strained |
| Graham Crackers 🍪 | 1 ½ cups | Crushed into fine crumbs |
| White Chocolate Chips 🍫 | ½ cup | Melted for topping |
| Cream Cheese 🧀 | 16 oz | Room temperature, full-fat |
| Powdered Sugar 🍚 | 4 cups | Sifted for smooth frosting |
| Red Food Coloring 🎨 | ½ tsp | Gel-based for vibrancy |
| Blue Food Coloring 🎨 | ½ tsp | Gel-based for vibrancy |
| Red, White & Blue Sprinkles 🎉 | 1 cup | Jolly Rancher preferred |
| Edible Glitter ✨ | 2 tbsp | Silver or gold for sparkle |
The cream cheese is non-negotiable here—Philadelphia brand is my go-to for that perfect tang. Grab a full block from Kroger or Walmart for the best price, and let it sit out for 30 minutes before whipping. The graham crackers? Honey Maid makes the most consistent crumbs—avoid the chocolate chip versions. For the fruit purees, fresh is ideal but frozen works in a pinch—just strain out any seeds. The food coloring matters too: Wilton gel colors stay vibrant and don't alter the texture like liquid dyes.
No strawberries? Raspberry puree works beautifully—just add a pinch of lemon juice to brighten the flavor. Short on blueberries? Blueberry jam thinned with water gives that signature hue. The white chocolate chips can be swapped for shredded coconut if you're avoiding dairy, though the texture will differ slightly. For the sprinkles, Jolly Rancher's patriotic mix is the gold standard, but any red/white/blue confetti sprinkles will do. Pro tip: Toast your graham crackers before crushing for extra crunch—trust me on this.
This cake keeps beautifully for 3 days in the fridge, but the frosting starts to weep after 24 hours—so plan ahead. Wrap each layer in parchment paper before stacking to prevent sogginess. For the topping, mix the melted white chocolate with crushed graham crackers right before baking—it sets up perfectly. Store leftovers in an airtight container with a paper towel on top to absorb moisture. Freeze unfrosted layers for up to 3 months if you're prepping ahead.
Why You'll Love This Recipe
- One-Bowl Wonder: I swear by this recipe when I’m tired but still want something special. Just mix the flour, sugar, butter, eggs, and vanilla—no fancy steps, no extra bowls. The cake’s tender crumb comes from creaming the butter and sugar properly, but honestly? Even if you rush, it still turns out soft and fluffy.
- Red Velvet Magic: That deep, slightly tangy flavor from the cocoa and buttermilk (okay, fine, I’ll admit I sometimes swap in a splash of coffee for extra richness) makes every bite feel like a holiday treat. The vanilla extract ties it all together—warm, sweet, and just a little nostalgic.
- Patriotic Flexibility: Between us, this cake is my secret weapon for birthdays, potlucks, or even a lazy Sunday. Split the batter into two pans for a classic layer cake, or bake it in a tube pan for a showstopper. (I’ve even used half the batter for cupcakes—no judgment.)
- Budget-Friendly Crowd-Pleaser: Flour, sugar, butter, eggs, and vanilla? That’s it. No specialty ingredients, no markup, just pure, reliable flavor that disappears fast. Leftovers? Wrap them tightly—they’ll stay moist for days, and trust me, they’re just as good the second time around.
Step-by-step instructions for sparkling red-white-blue layers
Let's bring this patriotic masterpiece to life with precise technique and vibrant colors.
👨🍳 Step 1: Prepare the Graham Cracker Crust
Preheat your oven to 350°F and line a 9x13-inch baking dish with parchment paper. In a food processor, pulse the 1.5 cups graham crackers until you achieve fine crumbs—think sand-like texture, not coarse pieces. Mix these crumbs with ½ cup of the 2 cups granulated sugar and ¼ cup of the 1.5 cups unsalted butter, melted and cooled.
Press this mixture evenly into the prepared baking dish, creating a firm base. Bake for 10 minutes until lightly golden. Let it cool completely before proceeding—this prevents soggy layers. Here's the thing: a chilled crust holds its shape better when we add the fruit layers later.
🍳 Step 2: Create the Fruit Layers
In a medium bowl, whisk together 1 cup strawberry puree with 0.5 tsp red food coloring until vibrant red. In another bowl, mix 1 cup blueberry puree with 0.5 tsp blue food coloring for a rich blue hue. For the white layer, simply use ½ cup of the 2 cups granulated sugar mixed with 1 tbsp water to create a thick glaze.
Spread the red layer over the cooled crust, using a spatula to create an even ¼-inch thick coating. Let it set for 10 minutes at room temperature. Repeat with the blue layer, then top with the white sugar glaze. This layering technique creates those stunning visual stripes that make this cake unforgettable.
🥘 Step 3: Bake the Cake Layers
In a large mixing bowl, cream together the remaining 1 cup unsalted butter and 1 cup granulated sugar until light and fluffy. Add the 6 whole large eggs one at a time, mixing well after each addition. In a separate bowl, sift together the 3 cups all-purpose flour, 2 tsp baking powder, and 0.5 tsp salt. Gently fold these dry ingredients into the butter mixture along with the 2 tsp vanilla extract.
Divide the batter evenly between three 8-inch round cake pans. Bake at 350°F for 20-25 minutes or until a toothpick inserted in the center comes out clean. Here's the trick: rotate the pans halfway through baking to ensure even browning. Let the layers cool completely before assembling—they'll be fragile when warm.
🍽️ Step 4: Assemble with Cream Cheese Frosting
Beat the 16 oz cream cheese with the 4 cups powdered sugar until smooth and fluffy. Spread a generous layer of this frosting between each cake layer, then stack them carefully on top of the fruit-filled crust. The cream cheese frosting acts as both a binder and a delicious contrast to the fruity layers.
Once fully assembled, spread remaining frosting over the top and sides. Here's where it gets festive: sprinkle the 1 cup red, white & blue sprinkles evenly over the frosting, then dust with the 2 tbsp edible glitter for that extra sparkle. Chill in the refrigerator for at least 2 hours to let everything set properly.
🔪 Step 5: Add the White Chocolate Topping
Melt the 0.5 cup white chocolate chips in a microwave-safe bowl in 30-second intervals, stirring between each interval until completely smooth. Drizzle this white chocolate over the chilled cake in a zigzag pattern, allowing it to drip slightly down the sides for that professional bakery look.
Let the white chocolate set at room temperature for 15 minutes before serving. The contrast between the glossy white chocolate, colorful sprinkles, and edible glitter creates that firecracker effect that makes this cake perfect for the 4th of July celebration. Each slice reveals those beautiful red, white, and blue layers we worked so hard to create.
Pro Tips For Making 4th Of July Firecracker Cake
- Cream Butter Properly: I learned this the hard way—beat the butter and sugar until it’s light and fluffy, not just pale. Use a stand mixer with the paddle attachment and scrape the bowl every 30 seconds. This isn’t just about air; it’s about ensuring your cake’s texture stays tender, especially when you’re layering that firecracker filling later.
- Sift the Flour Twice: Yes, even if the recipe says once. Sifting removes lumps and aerates the flour, which makes a real difference in how smoothly the batter mixes. I skip this when I’m lazy, but the cake turns out noticeably denser when I don’t—worth the extra 30 seconds.
- Don’t Overmix the Batter: Stop mixing as soon as the flour disappears. Overmixing develops gluten, and that’s the fast track to a tough, chewy cake. Fold in any dry ingredients just until combined—your cake will thank you with a lighter crumb, especially when you’re cutting those decorative layers.
- Chill the Cake Layers: Let the cake cool in the pan for 10 minutes, then transfer to a wire rack to finish cooling. Once fully cooled, wrap each layer in plastic wrap and refrigerate for at least 2 hours before assembling. This prevents the filling from melting too fast and keeps the layers from collapsing when you slice into them. (Trust me, your firecracker design will look a million times better.)
Troubleshooting great 4th of july firecracker cake
Cake Layers Too Dense
If your cake layers turn out dense instead of light, it’s likely from overmixing the batter or using cold ingredients. Whisk the dry ingredients into the wet mixture just until combined—overmixing develops gluten, making the cake tough. Also, ensure your eggs and butter are room temperature (about 68°F). Cold ingredients don’t emulsify properly, leading to a heavier texture. 💡
Another common culprit is baking at too high a temperature. Stick to 350°F—any hotter, and the layers may cook too quickly on the outside before the center sets. If your oven runs hot, reduce the temperature by 10-15°F and add 2-3 minutes to the baking time. Always check for doneness with a toothpick—it should come out with a few moist crumbs, not wet batter.
Frosting Separates or Weeps
Cream cheese frosting can separate if the cream cheese isn’t fully softened before whipping. Let it sit at room temperature for at least 30 minutes—it should be pliable but not melted. If it still separates, strain it through a fine-mesh sieve to remove any lumps before adding powdered sugar. For extra stability, chill the bowl and beaters for 10 minutes before whipping. 🧀
Weeping (when liquid seeps out) usually happens if the cake layers aren’t fully cooled before frosting. Wait until they’re completely room temperature—this prevents moisture from transferring to the frosting. If you’re in a hurry, pop them in the fridge for 15 minutes to speed up cooling. Also, avoid overfrosting; a thin layer between layers prevents excess moisture buildup.
Crunchy Topping Doesn’t Set
The graham cracker topping may fail to set if the white chocolate isn’t melted properly. Use short bursts of 30 seconds in the microwave, stirring between each interval, until fully smooth. If it’s too thick, add 1 tsp heavy cream to thin it out. Spread the mixture immediately over the cake after baking while it’s still warm—this helps it adhere better. 🍫
If the topping stays sticky after setting, your kitchen might be too humid. Place the cake in the fridge for 10 minutes to help the white chocolate firm up faster. For extra crunch, toast the graham crackers before crushing them—this removes moisture and ensures a crispier texture. Store leftovers in an airtight container to maintain freshness.
Colors Fade or Blend
Gel food coloring is key for vibrant hues, but even that can fade if the fruit purees aren’t fresh. Use strawberries and blueberries at peak ripeness—overripe fruit loses intensity. If your colors look dull, add a tiny pinch of citric acid (about ¼ tsp) to brighten them. Also, avoid mixing the purees with too much liquid—stick to 1:1 ratios for puree to coloring. 🎨
For a sharper contrast between layers, chill the cake for 30 minutes after assembling but before adding the white chocolate topping. This helps the fruit layers set firmly, preventing them from bleeding into each other. If you’re using store-bought purees, strain them through a fine-mesh sieve to remove any excess liquid that could dilute the color.
Nutrition facts
Frequently asked questions
Can I make this cake without a food processor for the graham cracker crust?
Pulse the graham crackers in a sturdy ziplock bag with a rolling pin or crush them by hand in a sealed bag. For extra fine crumbs, place them in a clean sock and tie it off, then use a rolling pin to break them down. Just be patient—it takes a few minutes of steady work to get the same texture as a food processor.
How do I make the cake layers extra moist?
Add 2-3 tablespoons of sour cream or Greek yogurt to the batter for tender layers. Also, brush the cooled cake layers with a simple syrup made from ½ cup water + ½ cup sugar before frosting. This keeps them moist for 2-3 days when stored properly in an airtight container.
What's the best way to store leftovers?
Slice the cake and store individual portions in an airtight container with parchment paper between layers. Keep it refrigerated for up to 3 days. For longer storage, freeze unfrosted layers wrapped in plastic wrap for up to 3 months. Thaw overnight in the fridge before frosting.
Can I substitute the fruit purees with something else? For the red layer, use raspberry puree or strawberry jam thinned with water. For blue, try blueberry jam or blackberry puree. Just
Why does my frosting taste too sweet?
The powdered sugar is likely the culprit. Reduce it to 3.5 cups and add 1-2 tablespoons of lemon juice to balance the sweetness. For a tangier flavor, add 1 teaspoon of vanilla bean paste** instead of extract. The cream cheese should be the dominant flavor, not the sugar.