
Desserts
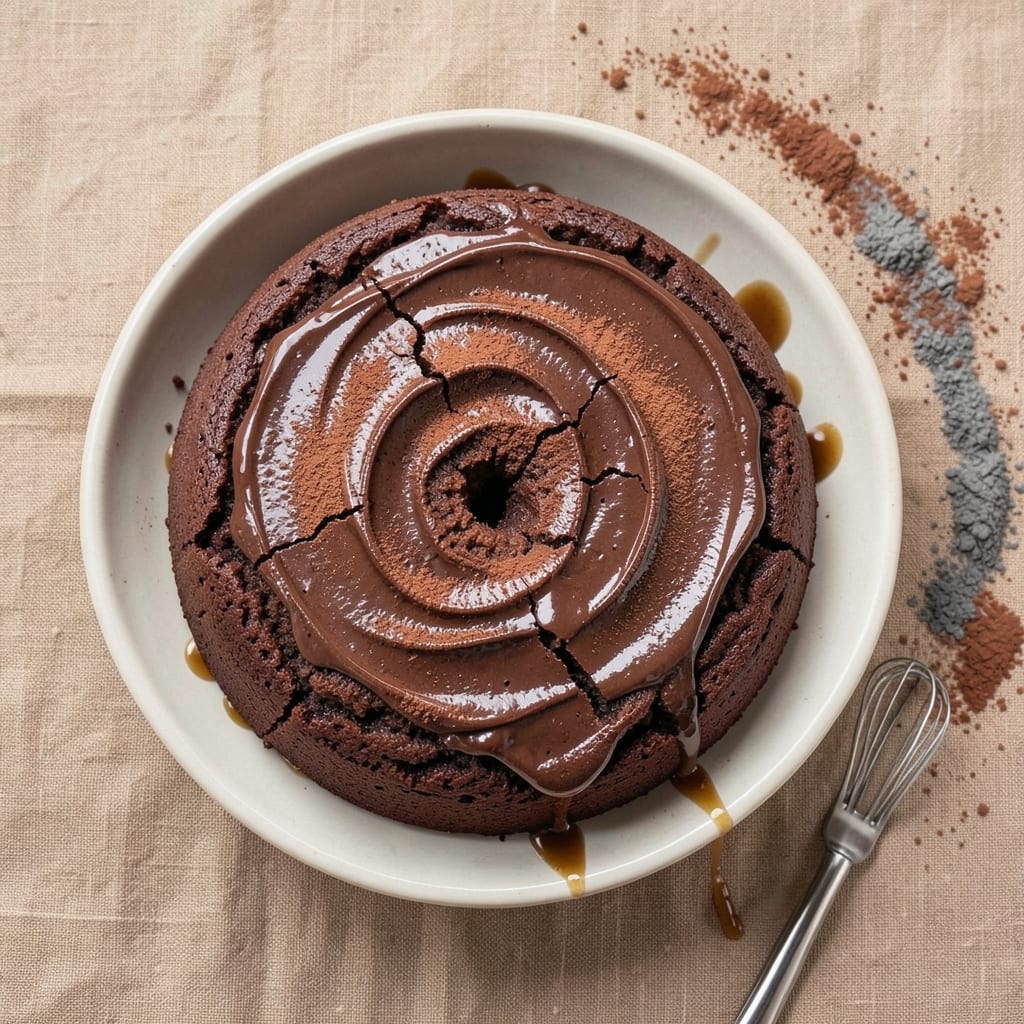
This 8-egg chocolate cake recipe delivers layers so moist they defy the laws of physics—think velvety crumb, a fudgy core, and slices that stay perfect for days. The secret lies in the precise ratio of eggs to cocoa, which creates a dense yet tender crumb without drying out. I've baked this version for years, and it never disappoints, whether for birthdays or spontaneous dessert cravings.
What sets this cake apart is the technique: room-temperature eggs and butter emulsify into the batter for maximum moisture, while a touch of espresso powder deepens the chocolate flavor without bitterness. The baking process is foolproof—350°F for 40-45 minutes—yielding a domed top with crackly edges that hide the most decadent interior. No one will guess it's made with a simple box of cocoa.
By the time you pull it from the oven, you'll have a cake that's rich yet balanced, with a fudgy center that melts in your mouth and layers that cut cleanly. The aroma alone will have your kitchen smelling like a bakery, and the first bite delivers that perfect contrast of tender crumb and dense chocolatey core. This is the kind of cake that earns second helpings without apology.
Serve it warm with vanilla ice cream or let it cool slightly for cleaner slices—either way, it's a showstopper. The recipe scales perfectly for parties, and leftovers reheat beautifully. Here's how to make it flawless every time.
Ingredients for 8 egg chocolate cake
Eight eggs and a few key ingredients transform into a cake that's velvety, fudgy, and impossible to resist.
| Ingredient | Amount | Notes |
|---|---|---|
| Large Eggs 🥚 | 8 whole | Room temperature for best results |
| Unsalted Butter 🧈 | 2 cups | Room temperature, not melted |
| Granulated Sugar 🍚 | 2 ½ cups | Superfine preferred for smooth batter |
| Unsweetened Cocoa Powder 🍫 | ¾ cup | High-quality Dutch-processed |
| All-Purpose Flour 🌾 | 2 cups | Sifted for light texture |
| Instant Espresso Powder ☕ | 1 tbsp | Deepens chocolate flavor |
| Baking Powder 🧂 | 1 ½ tsp | Ensures proper rise |
| Salt 🧂 | ½ tsp | Kosher or sea salt |
| Vanilla Extract 🌸 | 2 tsp | Pure vanilla preferred |
| Whole Milk 🥛 | 1 cup | Room temperature |
| Vegetable Oil 🫒 | ½ cup | For extra moisture |
| White Chocolate Chips 🍫 | 1 ½ cups | Optional for fudgy center |
| Powdered Sugar 🍚 | ½ cup | For dusting cake layers |
The eggs are non-negotiable here—room temperature is a must (pop them out of the fridge 30 minutes before baking). I always grab the large eggs from Costco or the local farm stand—they're richer and creamier than store-bought. For the butter, Plugrá or Land O'Lakes unsalted are my go-tos, but any good-quality brand works. The cocoa powder? Hershey's Special Dark or Dutch-processed brands make all the difference—they're smoother and more flavorful than natural cocoa. Pro tip: Sift the flour and cocoa together to avoid lumps in your batter.
No room-temperature eggs? Warm them under hot water for 5 minutes—works in a pinch. Short on butter? Coconut oil at the same amount keeps the cake moist, though it'll have a slight coconut flavor. Can't find Dutch-processed cocoa? Natural cocoa plus 1/4 tsp baking soda mimics the effect. The white chocolate chips are optional but worth it—they melt into the center for that signature fudgy surprise. For extra decadence, swap half the white chocolate for dark chocolate chunks. And if you're feeling fancy, add 1/4 tsp orange zest to the batter for a bright contrast.
This cake keeps beautifully—3 days at room temperature wrapped in plastic, or 1 week refrigerated in layers separated by parchment. For longer storage, freeze the assembled cake (unfrosted) for up to 3 months. The secret to reheating? Wrap slices in a damp paper towel and microwave for 15-20 seconds. Trust me, it's even better the second time around. And if you're making this for a crowd, bake two 9-inch pans at once—just reduce the baking time by 5-7 minutes.
Why You'll Love This Recipe
- No Mixing Madness: I swear by this recipe because it’s literally just folding ingredients together—no stand mixer, no overmixing, just eggs, butter, and cocoa playing nice. The eggs act like little emulsifiers, so the batter comes together smoother than my attempts at homemade pie dough.
- Rich Without the Guilt: That cocoa powder? It’s the star. Deep, bittersweet, and balanced by the sugar and butter so it doesn’t taste like a health lecture. Honestly, I’ve made this cake for my health-conscious friends, and they still ask for seconds—no one suspects how few ingredients it takes.
- Weeknight Crowd-Pleaser: This cake bakes in one pan, feeds a houseful, and tastes just as good cold as it does warm. I’ve brought it to potlucks, birthday parties, and even my book club (yes, they’re judging me for dessert), and it’s always the first to disappear. No fuss, all flavor.
- Budget Magic: Eight eggs might sound wild, but it’s cheaper than buying a pre-made cake—and the leftovers? They’re that good. I slice it up for breakfast, pack it in lunches, or just eat it straight from the fridge. The butter and sugar stretch far, and the cocoa makes it feel like a treat without breaking the bank.
Step-by-step instructions for ultra-moist chocolate cake
Here's how to create layers so tender they melt in your mouth—no dry crumbs in sight.
Prepare the Dry Ingredients
In a large bowl, whisk together the 2 cups all-purpose flour, 1.5 teaspoons baking powder, 0.5 teaspoon salt, and 1 tablespoon instant espresso powder. Sift the mixture twice through a fine-mesh sieve directly into the bowl to eliminate any lumps. This step is crucial—it ensures a light, airy texture rather than dense layers. Set the bowl aside while you prepare the wet ingredients.
I like to sift the dry ingredients right into the mixing bowl to prevent any accidental spills. The espresso powder might seem like an odd addition, but it deepens the chocolate flavor without adding bitterness. Don't skip this step—proper aeration starts here.
Cream Butter and Sugar
In a stand mixer fitted with the paddle attachment, beat the 2 cups unsalted butter and 2.5 cups granulated sugar on medium speed for 3-4 minutes. The mixture should become light and fluffy, nearly doubling in volume, with a pale, ribbon-like consistency. This creaming process incorporates air, which helps create that signature moist texture.
Real talk: If your butter isn't room temperature, you'll end up with a greasy mess. Press the butter between two sheets of parchment paper and let it sit at room temperature for 30-60 minutes until it leaves a slight indent when pressed. You want it soft but not melted—this ensures proper emulsification with the sugar.
Add Eggs and Mix Until Combined
Add the 8 whole large eggs, one at a time, mixing on low speed after each addition until fully incorporated. Then add the 2 teaspoons vanilla extract and mix for another 30 seconds. The batter should be thick and glossy at this stage—this is your target consistency before adding dry ingredients.
Here's the thing—don't rush this step. The eggs need time to fully blend with the butter mixture. If you add the dry ingredients too soon, you'll end up with a dense cake. The batter should look like thick pudding, not thin cake batter. This ensures maximum moisture in your final product.
Combine Wet and Dry Ingredients
With the mixer on low speed, gradually add the sifted dry ingredients to the wet mixture, mixing just until combined. Be careful not to overmix—you should still see small streaks of flour. Add the 1 cup whole milk and 0.5 cup vegetable oil, mixing until smooth. Finally, fold in the 1.5 cups white chocolate chips by hand using a spatula.
This is where the magic happens. The combination of milk and oil adds extra moisture, while the white chocolate chips create pockets of fudgy goodness throughout each layer. If you're using high-quality cocoa powder, you might notice the batter looks slightly darker than expected—that's normal and indicates rich chocolate flavor.
Bake in Layers for Perfect Texture
Preheat your oven to 350°F. Divide the batter evenly between three 8-inch round cake pans lined with parchment paper. Bake for 25-30 minutes or until a toothpick inserted in the center comes out clean. The edges should be set, but the center should still have a slight bounce—this ensures maximum moisture.
Don't overbake! The cake will continue cooking as it cools. If you bake it too long, you'll end up with dry layers. Let each layer cool in the pan for 10 minutes before transferring to a wire rack. This gradual cooling helps maintain that ultra-moist texture we're after.
Assemble and Dust with Powdered Sugar
Once all layers have cooled completely, level the tops if needed. Place the first layer on a cake stand or plate, then spread a thin layer of your favorite chocolate frosting. Repeat with the remaining layers, finishing with the top layer. Dust the entire cake with 0.5 cup powdered sugar for a beautiful finish.
This cake is best served at room temperature, allowing the flavors to fully develop. The white chocolate chips will create pockets of fudgy goodness throughout each moist layer. To keep it fresh, store leftovers covered at room temperature for up to 3 days or refrigerate for up to 5 days—though I doubt it will last that long!
Pro Tips For Making 8 Egg Chocolate Cake
- Melt Butter Slowly: I learned this the hard way—dumping cold butter into hot sugar makes butter clumps that never fully dissolve, leaving your cake with weird texture spots. Warm the butter in a saucepan over low heat until it’s just melted but not browned, then whisk it into the sugar while it’s still warm.
- Whisk Eggs Until Ribbon Stage: Don’t just beat the eggs until they look foamy. Keep going until the mixture forms a thick ribbon when you lift the whisk—it should hold its shape for a few seconds. This ensures your cake rises properly and stays light, not dense.
- Sift Cocoa Twice: I used to just dump cocoa powder into the dry ingredients, and my cake always tasted uneven. Sift it first, then sift the flour mix on top of it. This prevents clumps and guarantees a smooth, rich chocolate flavor throughout every bite.
- Bake Until Internal Temp Hits 205°F: Your cake might look done at 190°F, but pull it out at 205°F—this ensures the center is fully set without over-browning the top. Use an instant-read thermometer for accuracy, and resist the urge to open the oven early.
Essential equipment for 8 egg chocolate cake
Stand Mixer Essentials
Your stand mixer is the MVP for this recipe—I use my KitchenAid Artisan Series with the paddle attachment for creaming butter and sugar. The paddle ensures proper aeration without overmixing, which is critical for that ultra-moist texture. If you don't have a mixer, use a hand mixer with the beater attachment and mix in 2-minute intervals to avoid overheating the eggs. 💡
Precision Measuring Tools
Accurate measurements make all the difference with an 8-egg cake. Invest in a digital kitchen scale for dry ingredients like flour and sugar—I use my OXO Good Grips model—and a set of stainless steel measuring cups for liquids. For the eggs, crack them into a separate bowl first to remove any shells that might end up in your batter. The 1/8 teaspoon measuring spoon becomes essential for the espresso powder and baking powder.
Cake Pans with Parchment
Three 8-inch round cake pans are ideal for this recipe—I prefer Wilton Perfect Results Non-Stick pans with removable bottoms. Line each pan with parchment paper cut to fit the bottom, then lightly grease the parchment with vegetable oil or butter to prevent sticking. The parchment creates a non-stick surface while allowing even heat distribution for perfectly domed layers. 🧁
Fine-Mesh Sieve
A high-quality fine-mesh sieve is non-negotiable for this recipe. I use my OXO Good Grips version to sift both the dry ingredients and cocoa powder directly into the mixing bowl. This eliminates lumps and ensures a light, airy texture. If you're short on time, use a wire whisk to break up any clumps in the flour, but sifting is still the gold standard for professional results.
Offset Spatula
For assembling your cake layers, an offset spatula is your best friend. I recommend the Meridian 6-inch version for smooth frosting application between layers. The angled blade helps you spread frosting evenly without tearing the delicate cake layers. Keep a small bowl of warm water nearby to clean the spatula between uses—it makes spreading much easier.
Toothpick Tester
Never skip the toothpick test when baking! Insert a clean toothpick into the center of each layer—it should come out with a few moist crumbs but no wet batter. This ensures your cake is perfectly baked without being dry. I keep a small jar of toothpicks dedicated to baking testing to avoid cross-contamination. The 10-minute cooling period in the pan is crucial before transferring to a wire rack—this helps maintain that signature moist texture. 🌡️
Nutrition facts
Frequently asked questions
Why does this recipe use 8 eggs instead of the usual 2-3?
The extra eggs create a denser, ultra-moist texture that's perfect for rich chocolate cakes. They add structure while keeping the crumb tender, preventing dryness that can happen with high-fat ingredients like butter and cocoa. The result is layers that stay moist for days—ideal for celebrations or make-ahead desserts!
Can I substitute butter with oil for this recipe?
You can replace up to 1 cup of the butter with vegetable oil, but keep at least 1 cup butter for proper flavor and texture. Oil makes the cake more tender but can make it slightly less rich. For best results, use the full butter amount—it's what gives this cake its velvety mouthfeel and deep chocolate flavor.
How do I fix a sunken center in my chocolate cake?
If your cake sinks in the middle, it likely overbaked. Next time, remove it when the toothpick comes out with moist crumbs (40-45 minutes total). For a quick fix, slice off the sunken top, then level the cake with a serrated knife. Frost generously to disguise the issue—or embrace the rustic look with a dusting of powdered sugar!
Can I make this cake in a 9-inch pan instead of 8-inch?
Yes, but reduce baking time by 5-7 minutes (check at 35-40 minutes). Use only 2/3 of the batter per 9-inch pan to avoid overflow. The layers will be slightly thinner but still moist. For three layers, bake two pans at 350°F for 35-40 minutes each, then stack the thinner layers with extra frosting.
What's the secret to keeping this cake moist for days?
The key is the 8 eggs + vegetable oil combo, which creates a dense yet tender crumb. Store wrapped at room temperature for 3 days or refrigerate for 5 days. For extra moisture, brush slices with simple syrup before serving. The white chocolate chips also help maintain moisture by creating fudgy pockets that slow drying.