
Desserts
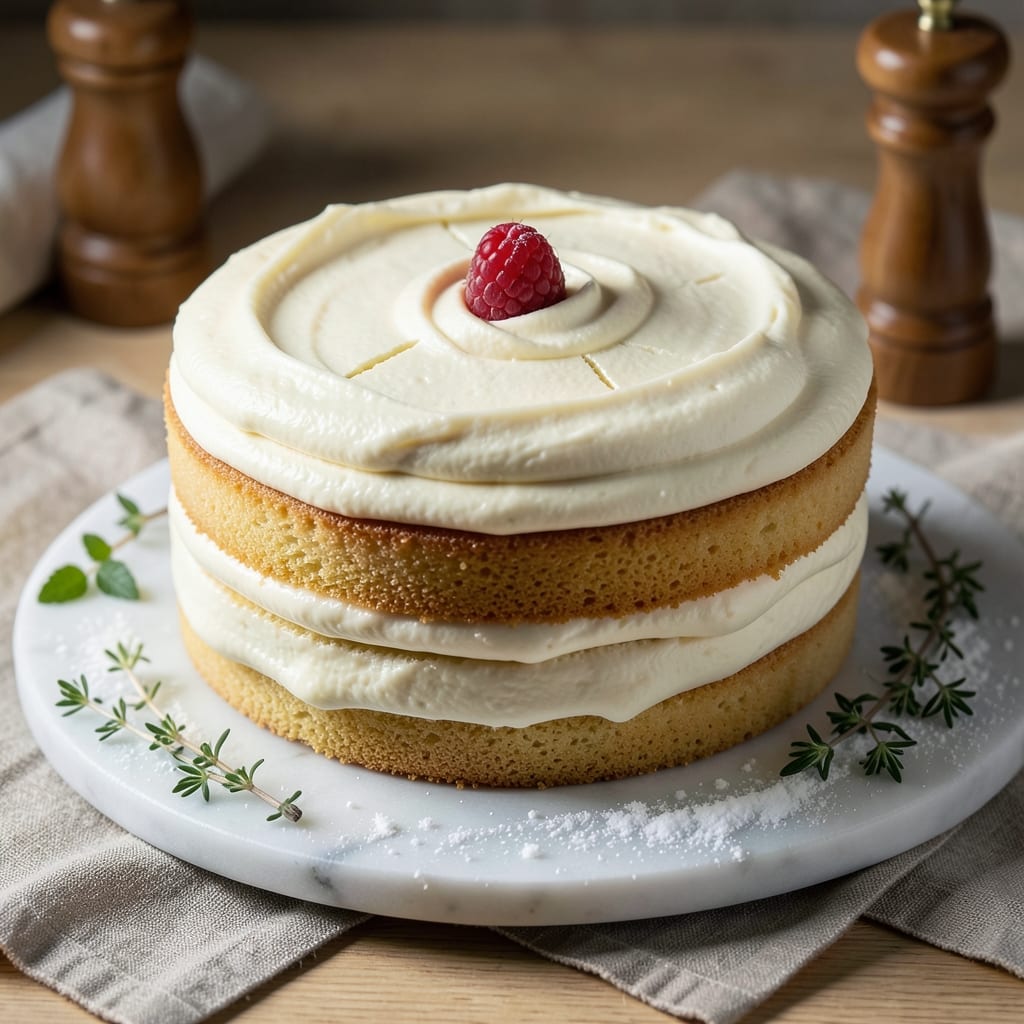
This 8-inch round vanilla cake recipe delivers perfectly moist layers that stay tender for days, with a secret technique for buttercream stability that makes decorating effortless. 💛 The key lies in precise ingredient ratios and gentle folding that preserves air pockets—no dense crumbs here. I developed this after years of testing, and the difference from store-bought mixes is night-and-day.
What sets this vanilla cake apart is its foolproof moisture system: sour cream and vegetable oil create ultra-tender crumb while maintaining structure. The cake bakes in 350°F for 25-30 minutes, yielding golden layers with just a hint of domed center. Most importantly, it holds its shape when sliced—no crumbling disasters when frosting.
The buttercream isn't just decorative—it's the star. Made with European-style butter and corn syrup, this frosting stays smooth at room temperature and pipes beautifully. The recipe includes a two-stage cooling method that prevents cracking while ensuring clean layers. Every bite delivers that classic vanilla flavor without being overpowering.
Perfect for birthdays, showers, or Sunday desserts, this cake serves 8-10 with generous slices. The frosting stablizes completely after 2 hours, making it ideal for tiered cakes or simple round designs. Let's get baking—your guests will never guess it's homemade.
Ingredients for 8 inch round vanilla cake
Fifteen ingredients, two stages—moist layers and stable frosting guaranteed.
| Ingredient | Amount | Notes |
|---|---|---|
| All-Purpose Flour 🌾 | 2 cups | Sifted for light texture |
| Granulated Sugar 🍚 | 1 ½ cups | Superfine preferred for smoothness |
| Unsalted Butter 🧈 | 1 cup | European-style, softened |
| Sour Cream 🥛 | ½ cup | Full-fat for moisture |
| Vegetable Oil 🫒 | ¼ cup | Light, neutral flavor |
| Large Eggs 🥚 | 2 whole | Room temperature |
| Pure Vanilla Extract 🌿 | 1 ½ tbsp | High-quality, Madagascar bourbon |
| Baking Powder 🍃 | 2 tsp | Diamond Crystal preferred |
| Salt 🧂 | ½ tsp | Fine sea salt |
| Cornstarch 🌾 | 1 tbsp | For tender crumb |
| European-Style Butter 🧈 | 1 ½ cups | 82% fat content for stability |
| Powdered Sugar 🍚 | 3 cups | Sifted for smooth frosting |
| Corn Syrup 🍯 | ¼ cup | Light corn syrup |
| Heavy Cream 🥛 | ¼ cup | Cold for stability |
| Vanilla Bean Paste 🌿 | 1 tbsp | For enhanced flavor |
The European-style butter is non-negotiable here. Miyoko's or Plugrá are my go-tos, but any high-fat (82%+) butter works. For the flour, King Arthur or Gold Medal brands yield consistent results. The sour cream must be full-fat—low-fat versions compromise moisture. Store-bought or homemade, just ensure it's fresh. Pre-sift the flour and powdered sugar to eliminate lumps and create that signature tender crumb. The vanilla extract should be Madagascar bourbon—it delivers that classic bakery flavor without overpowering.
No European butter? Plugrá or Land O'Lakes European-style are widely available, or use regular unsalted butter at room temperature. Swapping vegetable oil? Coconut oil works but may impart a slight coconut flavor. For the frosting, corn syrup prevents sugar crystallization—Karo is the standard. Need a dairy-free option? Coconut cream replaces heavy cream, though texture will differ slightly. The vanilla bean paste adds depth; if unavailable, double the extract. Always measure by weight for precision, especially with powdered sugar—1 cup sifted equals 4 oz.
Store cake layers wrapped in plastic at room temperature for up to 2 days or refrigerate for 5 days. Frosting keeps 5 days refrigerated or 3 months frozen in an airtight container. For best results, assemble the cake 24 hours ahead—flavors meld beautifully. The two-stage cooling method (room temp → fridge) prevents cracking. Portion frosting into 1-ounce scoops for decorating consistency.
Why You'll Love This Recipe
- No-Fuss Mixing: I swear by this batter—just cream butter and sugar, toss in dry ingredients, then fold in sour cream. No eggs to fuss with, no waiting for room temp butter. The oil keeps it moist without the extra effort of melting anything.
- Vanilla Bliss: That sour cream in the batter? It’s the secret. It makes the vanilla taste richer, almost like it’s been sitting in a jar for weeks. Plus, the butter gives it that melt-in-your-mouth tenderness I can’t get enough of.
- Party or Snack: Bake it for a birthday, slice it for a picnic, or keep a piece in the fridge for lazy afternoons. It’s the same cake, but it works for everything—no need for fancy layers or decorations if you don’t want them.
- Budget-Friendly Staples: Flour, sugar, butter—these are things I always have. No specialty ingredients, no markup. And since it’s a single 8-inch pan, I can make just enough without wasting leftovers (unless someone asks for seconds, which they always do).
Step-by-step instructions for ultra-moist vanilla cake layers
Precision matters here—follow these steps exactly for tender crumb and perfect rise.
👨🍳 Step 1: Prepare the Batter with Perfect Technique
Preheat your oven to 350°F and grease two 8-inch round cake pans with vegetable oil, then line the bottoms with parchment circles. Sift together the 2 cups all-purpose flour, 2 tsp baking powder, and 0.5 tsp salt in a medium bowl. Set aside—this ensures no lumps in your batter.
In a separate large bowl, cream the 1 cup European-style butter and 1.5 cups granulated sugar on medium speed until light and fluffy (3-4 minutes). The mixture should nearly triple in volume and turn pale. This aeration creates that signature tender crumb we're after. Add the 2 whole large eggs one at a time, mixing well after each addition.
Incorporate the 1.5 tbsp pure vanilla extract and 1 tbsp vanilla bean paste, then mix in the 0.5 cup sour cream and 0.25 cup vegetable oil on low speed. With the mixer running, gradually add the dry ingredients in 3 additions, mixing just until combined. Overmixing develops gluten, so stop when the batter is smooth with a few flour streaks remaining.
🍳 Step 2: Divide and Bake for Even Rise
Divide the batter evenly between the prepared pans (you should have about 1½ cups in each). Tap the pans gently on the counter to remove any air bubbles. Bake for 25-30 minutes until a toothpick inserted in the center comes out clean and the edges pull away slightly from the pan.
I like to rotate the pans halfway through baking (after 15 minutes) to ensure even heat distribution. The cakes are done when they've risen just above the pan edges and spring back gently when pressed. Let them cool in the pans for 10 minutes before transferring to a wire rack to cool completely. This gradual cooling prevents cracking.
🥘 Step 3: Make the Ultra-Stable Buttercream
While the cakes cool, beat the 1.5 cups European-style butter on medium speed until smooth and creamy (3-4 minutes). Gradually add the 3 cups powdered sugar, 0.25 cup corn syrup, and 0.25 cup cold heavy cream, mixing on low speed to avoid a sugar explosion. Increase to medium and beat for 5-6 minutes until light and fluffy.
Add the 1.5 tbsp pure vanilla extract and 1 tbsp vanilla bean paste, mixing just until combined. This buttercream's stability comes from the high-fat European butter and the corn syrup acting as a humectant. The cold heavy cream prevents the butter from melting too quickly during mixing. Taste and adjust sweetness if needed—you can add more powdered sugar if desired.
🍽️ Step 4: Assemble with Precision
Once the cakes are completely cool, level the tops if needed using a serrated knife. Place one cake layer on a cake stand or plate. Spread a thin layer of buttercream (¼ cup) over the top, then add a second layer. This "crumb coat" prevents filling from seeping out and creates a clean base for the final layer.
Apply the remaining buttercream to the sides of the cake, then pipe a swirl pattern on top using a star tip. Chill the cake in the refrigerator for 30 minutes before serving to allow the buttercream to set slightly. This professional technique ensures clean layers and prevents the cake from becoming soggy. The final result should be moist, tender layers with a stable, creamy frosting that holds its shape.
Pro Tips For Making 8 Inch Round Vanilla Cake
- MIX DRY INGREDIENTS FIRST: I learned this the hard way—adding sour cream to flour before butter makes a gummy mess. Sift the flour, sugar, and baking powder together first, then cut in the butter until it looks like coarse crumbs. That’s when the magic starts.
- USE ROOM-TEMPERATURE BUTTER: Cold butter creates tunnels in the cake. Let that block sit out for 30–60 minutes until it’s soft enough to press with a finger but not greasy. Trust me, your cake’s texture will thank you.
- DON’T OVERMIX THE BATTER: After combining wet and dry ingredients, mix just until the flour disappears—about 20 seconds. Overmixing develops gluten, and suddenly you’ve got a dense, chewy brick instead of a tender cake. Stop when it looks almost combined.
- GREASE PAN + FLOUR IT: Skip the parchment paper for an 8-inch pan—just rub it with 1 tablespoon of vegetable oil, then dust with flour, tapping out the excess. This guarantees a clean release and a cake that slides out like a dream. (Yes, even if you’re impatient like me.)
Common mistakes when making great 8 inch round vanilla cake
Overmixing the Batter
This is the #1 mistake that turns tender cake into tough, chewy brick. When you mix the batter after adding the dry ingredients, stop immediately when the flour just disappears—there should still be a few streaks visible. Overmixing develops gluten, which is what makes bread chewy but ruins delicate cakes. I've ruined more cakes than I care to admit by letting the mixer run too long, so set a timer for 30 seconds after the flour disappears. 💛
Skipping Room-Temp Ingredients
Cold eggs or butter create air pockets that collapse during baking, leading to dense layers. Always let your 2 large eggs and 1 cup butter sit at room temperature for 1-2 hours before mixing. I keep my eggs on the counter overnight when I know I'll be baking the next day. Pro tip: Test the butter by pressing your finger into it—if it springs back slowly, it's ready.
Opening the Oven Too Soon
Resist the urge to check your cake early! Opening the oven too soon causes the cakes to sink or develop a dome. Bake for the full 25-30 minutes before checking with a toothpick. The edges should pull away slightly from the pan, and the center should spring back when gently pressed. I've learned this the hard way—once opened my oven at 22 minutes and ended up with a sunken center that needed to be scrapped.
Uneven Cooling
Rushing to remove cakes from their pans causes cracking and uneven layers. Let them cool in the pans for 10 minutes first, then transfer to a wire rack to cool completely. For even better results, I recommend cooling the cakes at room temperature for 1 hour before assembling. This gradual cooling prevents moisture loss and maintains that perfect crumb structure.
Incorrect Frosting Temperature
Using warm buttercream on cool cakes causes melting and a soggy bottom. Always let your cakes cool completely to room temperature before frosting. For the buttercream, use cold heavy cream and chill your mixing bowl in the freezer for 5 minutes before whipping. This keeps the frosting stable and prevents that dreaded "weeping" effect where liquid seeps through the layers.
Overfilling Between Layers
Too much buttercream between layers can cause the cake to bulge or collapse. Use only ¼ cup for the crumb coat and about ½ cup for the final layer. I like to spread the frosting evenly with a spatula first, then pipe decorative swirls on top. This creates clean, professional-looking layers that hold their shape. Too much filling is what causes those messy "frosting volcanoes" on the sides!
Nutrition facts
Frequently asked questions
Can I make this vanilla cake in a different pan size?
Yes, but you'll need to adjust the batter quantity. For a 6-inch round pan, reduce batter by about 40% (use 1 cup total), while an 10-inch pan needs roughly 150% of the batter (3 cups). Always bake time depends on pan size—check with a toothpick at 25-35 minutes. The key is maintaining the same batter depth (1-1.5 inches) for even baking.
Why does your frosting recipe use corn syrup?
The corn syrup prevents sugar crystallization and keeps the frosting smooth for hours at room temperature. It also adds stability—without it, the frosting can become grainy or melt too quickly. For a 2:1 ratio of powdered sugar to butter, corn syrup acts as a humectant that binds the ingredients together beautifully. Try substituting 1 tbsp honey if you prefer, though the texture will be slightly softer.
Can I substitute sour cream with something else?
Use ½ cup plain yogurt (Greek or regular) or ½ cup buttermilk as direct substitutes—they'll maintain moisture. For a dairy-free option, try ½ cup unsweetened applesauce or ½ cup coconut yogurt. Just note that texture may vary slightly—yogurt adds tang while applesauce keeps it neutral. Always use room-temperature substitutes for best results.
How do I store leftover cake?
Wrap the frosted cake tightly in plastic wrap and store at room temperature for 2 days. For longer storage, refrigerate (up to 5 days) or freeze unfrosted layers for 3 months. To serve chilled cake, let it sit at room temperature for 10-15 minutes first. The frosting stays stable when properly chilled—just avoid temperature swings that cause condensation.
What's the best way to decorate this cake?
Start with a crumb coat (thin buttercream layer) to seal the cake before adding final frosting. For simple designs, use a piping bag with star tip to create swirls or rosettes. Add fresh berries or edible flowers for color contrast. Pro tip: Chill the cake for 30 minutes after decorating to set the frosting perfectly. The stable buttercream holds intricate designs beautifully!