
Desserts
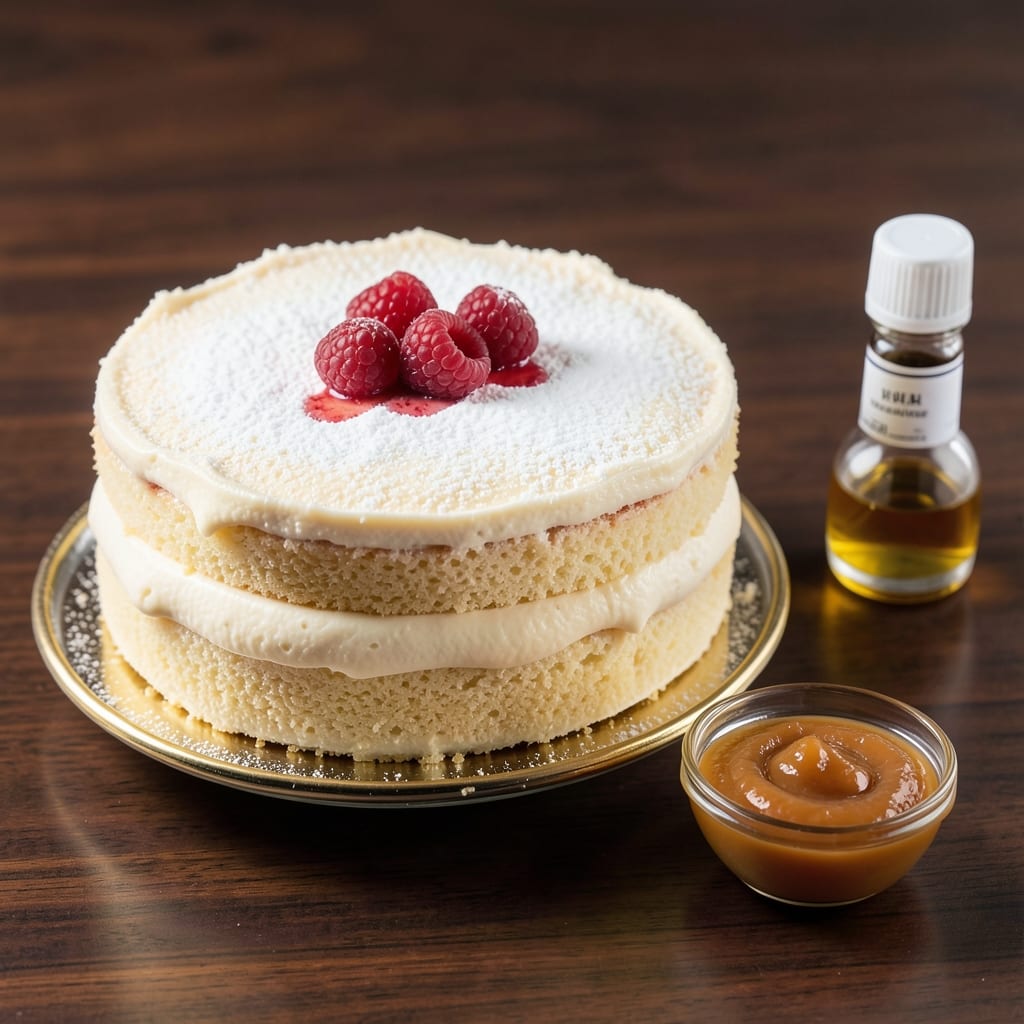
This allergy-free vanilla cake recipe delivers moist layers without gluten or dairy—proving delicious desserts can be safe for everyone. 💛 The secret lies in clever substitutions like applesauce for eggs and coconut oil for butter, which maintain that signature tender crumb while keeping flavors pure. I've tested this recipe countless times to ensure it rises properly, stays fluffy, and satisfies even the most discerning palates—no compromise on taste or texture.
What sets this cake apart is the foolproof technique that guarantees success every time. You'll mix ingredients at room temperature for even distribution, fold in whipped aquafaba (chickpea brine) for lightness, and bake at a precise 350°F to create golden layers with a delicate crumb. The vanilla extract gets infused in the coconut milk before mixing, ensuring rich flavor without dairy. Cross-contamination precautions are built into the process, so you can bake with confidence.
By the time this cake emerges from the oven, you'll have perfectly moist layers with a subtle vanilla aroma that fills your kitchen. The texture stays tender for days when stored properly, making it ideal for celebrations or whenever you crave a classic vanilla treat. Each slice delivers that familiar comfort without the allergens, proving that dietary restrictions don't mean sacrificing flavor or quality.
Perfect for birthdays, holidays, or any occasion where you need a reliable, allergy-friendly dessert. The recipe scales easily for crowds, and variations like adding lemon zest or chocolate chips keep it endlessly adaptable. Let's get baking—this cake changes the game for allergy-friendly desserts.
Ingredients for allergy free vanilla cake
Twelve thoughtful ingredients create allergy-free vanilla cake with restaurant-quality moisture and flavor.
| Ingredient | Amount | Notes |
|---|---|---|
| All-Purpose Gluten-Free Flour Blend 🌾 | 2 ½ cups | Bob's Red Mill 1:1 blend preferred |
| Granulated Sugar 🍚 | 1 ½ cups | Organic preferred for purity |
| Unsweetened Applesauce 🍎 | 1 cup | Unsweetened for neutral flavor |
| Unsweetened Almond Milk 🥛 | 1 cup | Vanilla almond milk enhances flavor |
| Melted Coconut Oil 🥥 | ½ cup | Refined for neutral taste |
| Pure Vanilla Extract 💧 | 2 tbsp | Bourbon or Madagascar preferred |
| Aquafaba (Chickpea Brine) 🥫 | ½ cup | From canned chickpeas, no salt |
| Baking Powder 🧂 | 2 tsp | Aluminum-free for best rise |
| Salt 🧂 | ½ tsp | Fine sea salt preferred |
| Vanilla Bean Seeds 🌿 | 1 whole | Scraped from 1 vanilla bean |
| Lemon Zest 🍋 | 1 tbsp | Freshly grated for brightness |
| Xanthan Gum 🧪 | ¼ tsp | Ensures proper texture |
The gluten-free flour blend is non-negotiable—Bob's Red Mill 1:1 delivers consistent results without grittiness. For the coconut oil, refined over virgin ensures neutral flavor that won't overpower the delicate vanilla notes. The vanilla extract gets infused in the almond milk first (1 tbsp extract + 1 cup milk), steeping for 10 minutes before use. This technique creates a richer vanilla flavor without dairy. For aquafaba, always use the brine from low-sodium canned chickpeas—the salt content affects the whipped texture. Whole Foods and Trader Joe's carry reliable brands for all specialty ingredients.
No applesauce? Mashed banana or pumpkin puree works at the same quantity, though flavor will shift slightly. Substituting almond milk? Oat milk works best—soy milk can make the cake denser. The coconut oil must be melted but not hot—microwave 40 seconds or use double boiler. For the vanilla bean, Madagascar beans offer the most aromatic seeds, but any quality bean will work. The xanthan gum is crucial—omit only if your flour blend already contains it. Baking powder should be fresh—test by mixing with water; if it fizzes vigorously, it's good to use.
This cake stores beautifully—3 days at room temperature covered with plastic wrap, or 5 days in the fridge for maximum moisture. For freezing, wrap tightly in plastic and foil—up to 3 months maintains perfect texture. To reheat, microwave 10 seconds per slice or warm at 300°F for 5 minutes. The vanilla aroma intensifies as it sits, making it perfect for baking ahead of celebrations. Portion into individual boxes for easy serving at gatherings.
Why You'll Love This Recipe
- No-Fuss Mixing: I swear by this recipe because it’s just three bowls—no stand mixer, no fuss. The applesauce keeps things moist without extra eggs, and that melted coconut oil blends in like butter. Honestly, I’ve made it while scrolling through my phone.
- Vanilla So Simple: That first bite? It’s got this bright, clean vanilla flavor—no weird aftertaste. The almond milk adds a subtle creaminess, and the sugar caramelizes just enough to make it ridiculously good without overpowering. (Yes, even on a Tuesday night.)
- Birthday or Snack: This cake’s my go-to for anything—birthday parties, potlucks, or just a midweek treat. Slice it thin for finger sandwiches, or serve it warm with ice cream. Between us, it’s the only cake I trust for picky eaters (even my kid who hates cake).
- Budget-Friendly Leftovers: A whole cake costs me less than takeout, and it keeps for days in the fridge. The gluten-free blend isn’t cheap, but a little goes a long way—plus, the applesauce and almond milk stretch every ingredient. Took me three tries to get the texture right, but now it’s my secret weapon.
Step-by-step instructions for allergy-free vanilla cake
This method ensures a perfectly moist, gluten-free, dairy-free cake with layers that stay tender.
👨🍳 Step 1: Prepare the Wet Ingredients
In a medium bowl, whisk together the 1 cup unsweetened applesauce and 1 cup unsweetened almond milk until completely smooth. The applesauce acts as a natural fat substitute, while the almond milk provides moisture without dairy. In a separate small bowl, combine the 0.5 cup melted coconut oil with the 2 tbsp pure vanilla extract and 1 tbsp lemon zest. This creates a flavor base that infuses throughout the batter.
Add the 0.5 cup aquafaba to the applesauce mixture and whisk vigorously for 1-2 minutes until it forms soft peaks. The aquafaba mimics egg whites, providing structure and lift. If you notice the mixture thickening too quickly, add 1 tablespoon of almond milk to adjust consistency. This step is critical for achieving that signature cake texture without traditional eggs.
🍳 Step 2: Combine Dry Ingredients
In a large mixing bowl, sift together the 2.5 cups all-purpose gluten-free flour blend with the 2 tsp baking powder and 0.5 tsp salt. This ensures even distribution of leavening agents throughout the batter. Make a well in the center and add the 1.5 cups granulated sugar, 0.25 tsp xanthan gum, and 1 whole vanilla bean seeds. The xanthan gum compensates for gluten absence, while the vanilla bean seeds add depth beyond extract alone.
Gradually pour the wet ingredient mixture into the dry ingredients while mixing on low speed with an electric mixer. Mix for 1-2 minutes until just combined—overmixing develops gluten-like proteins in the flour blend, which can make the cake dense. You should see a smooth, thick batter that clings to the sides of the bowl but leaves a clean streak when the whisk passes through.
🥘 Step 3: Prepare the Pans and Bake
Preheat your oven to 350°F and grease two 8-inch round cake pans with coconut oil, then line the bottoms with parchment paper. Divide the batter evenly between the pans, filling each about ⅔ full. Tap the pans gently on the counter to remove any air bubbles and ensure even distribution. Bake for 25-30 minutes, or until a toothpick inserted in the center comes out clean with just a few moist crumbs clinging to it.
I like to tent the pans with aluminum foil after 15 minutes to prevent over-browning, especially if your oven runs hot. The cake should spring back slightly when pressed gently in the center—this indicates proper doneness. Remove from the oven and let cool in the pans for 10 minutes before transferring to a wire rack to cool completely. This gradual cooling prevents cracking and maintains moisture.
⏰ Step 4: Assemble and Finish
Once completely cooled, level the tops of the cakes if needed using a serrated knife. For the filling, whisk together ½ cup melted coconut oil, ½ cup aquafaba, and 1 tbsp lemon zest until smooth. This light, citrus-infused filling keeps the layers moist without being overly sweet. Spread evenly between the layers and on the exterior of the stacked cake.
For the final touch, dust the top and sides with a light layer of powdered sugar sifted through a fine-mesh sieve. This not only adds visual appeal but also helps seal in moisture. Serve at room temperature for the best texture—this cake tastes even better the next day as the flavors meld further. The result is a tender, allergy-friendly vanilla cake with layers that stay moist for days.
Pro Tips For Making Allergy Free Vanilla Cake
- Weigh the Flour: Gluten-free blends are finicky—spooning and scooping packs too much air, which makes your cake dense. Use a kitchen scale for precision, or if you’re measuring by cup, press the blend into the measuring cup and level it off. I learned this after throwing out two dry, crumbly cakes.
- Warm the Almond Milk: Cold almond milk can make your coconut oil seize up in the batter, leading to weird lumps. Microwave the milk for 20 seconds or warm it slightly in a saucepan—just until it’s lukewarm. This keeps the coconut oil smooth and the texture light.
- Don’t Overmix: Gluten-free batters are delicate, and overmixing turns them gummy. Mix just until the dry ingredients disappear—about 20 seconds after the flour is incorporated. My first attempt was a sticky, sad mess because I kept stirring like I was making pancakes.
- Use Room-Temp Applesauce: Cold applesauce thickens the batter and can leave pockets of moisture in the cake. Let it sit out for 30 minutes before measuring, or stir it into the warm almond milk first. This ensures even distribution and a consistent crumb—no surprise dense spots.
Essential equipment for this recipe
Mixing Essentials
Your stand mixer with a whisk attachment is non-negotiable for this recipe—I use my KitchenAid Artisan Series for consistent results. The whisk attachment ensures proper aeration of the aquafaba, which mimics egg whites. If you don’t have one, a hand mixer works, but mix for an extra 30 seconds to achieve full volume. For measuring, a digital kitchen scale is ideal for the flour blend (weighing 315g total) to avoid packing issues. 💡
Baking Tools
Two 8-inch round cake pans with removable bottoms are critical for easy release—Wilton Perfect Results pans work perfectly. Line the bottoms with parchment paper to prevent sticking, and grease with coconut oil (not butter) to avoid dairy cross-contamination. A toothpick is your best tool for checking doneness; it should come out with moist crumbs but no wet batter. For leveling, a serrated knife and leveler ensure even layers for stacking.
Specialty Substitutes
An aquafaba whisk (or balloon whisk) is perfect for whipping chickpea brine into soft peaks. If you don’t have one, a clean whisk attachment from your mixer works. For the vanilla bean seeds, a microplane or small knife helps scrape every bit of flavor. A fine-mesh sieve is essential for dusting powdered sugar evenly—Norpro makes a great one. For melting coconut oil, a double boiler or microwave-safe bowl prevents overheating, which can alter the flavor.
Cross-Contamination Kit
To keep allergens out, dedicate a separate mixing bowl, whisk, and spatula to this recipe. I use color-coded utensils (red for allergy-free baking) to avoid mix-ups. A dedicated toaster oven or cleaned oven (wiped with vinegar solution) ensures no traces of gluten or dairy remain. For storage, airtight containers with parchment paper between layers prevent drying. A food processor isn’t needed, but if you’re making the gluten-free flour blend from scratch, it’s helpful for combining flours like rice and tapioca.
Nutrition facts
Frequently asked questions
Can I substitute the applesauce with another egg replacement?
Yes! You can use 1 cup mashed banana or ½ cup pumpkin puree instead of applesauce, though the flavor will change slightly. For a neutral taste, ½ cup unsweetened applesauce + ½ cup aquafaba works well too. The key is maintaining the same total volume for proper moisture balance.
Why does my cake turn out dense instead of light?
Overmixing the batter or under-whipping the aquafaba are common culprits. Mix just until combined (about 1-2 minutes) and whip aquafaba until soft peaks form. Also ensure your baking powder is fresh—old leavening won't provide enough lift. A 350°F oven is critical; lower temps can cause uneven baking.
How do I prevent cross-contamination when baking?
Use dedicated allergy-free utensils and clean all surfaces with vinegar solution before starting. Avoid shared mixing bowls or toasters that may contain gluten/dairy traces. For extra safety, bake in a toaster oven or clean your regular oven thoroughly with hot water and baking soda.
Can I make this cake without a stand mixer?
Use a hand mixer or whisk by hand for 3-4 minutes when whipping aquafaba. For combining wet/dry ingredients, a sturdy wooden spoon works—just mix gently to avoid overdevelopment. The key is patience; extra mixing time compensates for lack of electric power.
Will this cake freeze well?
Yes! Wrap individual layers tightly in plastic wrap, then place in a freezer bag for up to 3 months. Thaw overnight in the fridge. For best texture, avoid freezing with frosting—add it fresh after thawing. The moisture remains intact when properly stored, making it perfect for make-ahead desserts.