
Desserts
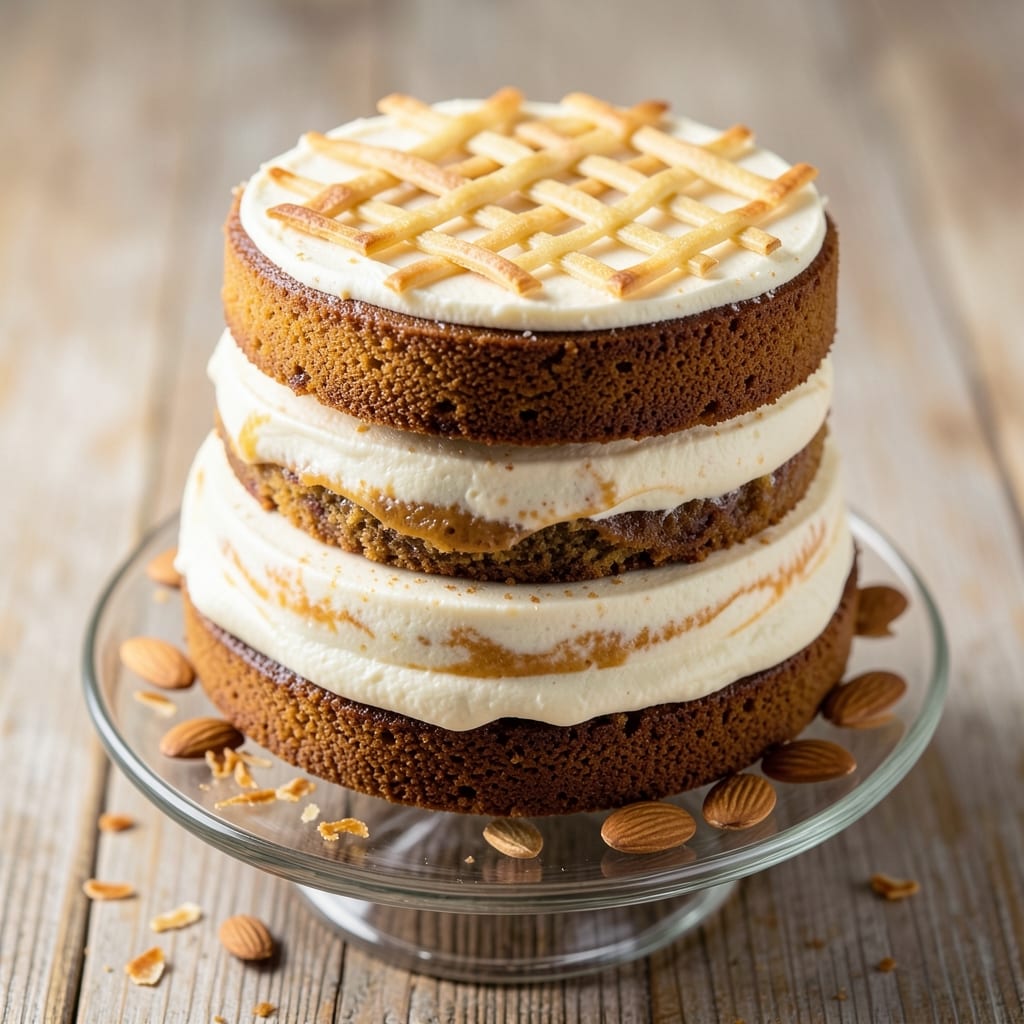
This allergy-friendly cake recipe proves you don’t need to sacrifice flavor for safety—moist, tender layers that satisfy even the most sensitive palates. ✨ The secret lies in precise substitutions like gluten-free flour blends and egg-free binders that deliver professional results without common allergens. I’ve baked this version countless times for guests with dietary restrictions, and it’s always met with genuine surprise at how "normal" it tastes.
What sets this recipe apart is its foolproof method for avoiding cross-contamination, from dedicated baking tools to clear preparation steps. The cake’s structure comes from a combination of almond-free flour alternatives and dairy-free butter that mimics traditional texture without compromising richness. Every ingredient serves a purpose—whether it’s xanthan gum for binding or arrowroot powder for stability—so you get a cake that’s both safe and satisfying.
The result is a decadent cake with a fine crumb, gentle sweetness, and perfect rise—qualities that often disappear in allergy-friendly versions. The frosting options (nut-free, soy-free) let you customize further, while baking times remain standard for home ovens. No special equipment is required, just attention to detail that ensures every bite meets dietary needs without feeling like a compromise.
Whether you’re accommodating allergies or simply exploring alternative baking, this recipe delivers restaurant-quality texture and flavor. The techniques here translate easily to other allergy-friendly desserts, proving that safe eating doesn’t mean settling for less. Let’s get baking with confidence.
Ingredients for allergy friendly cake
Precision meets safety in this allergy-friendly cake's carefully curated ingredients.
| Ingredient | Amount | Notes |
|---|---|---|
| Gluten-Free All-Purpose Flour Blend 🌾 | 2 cups | Bob's Red Mill 1:1 blend preferred |
| Dairy-Free Butter 🧈 | 1 cup | Miyoko's or Earth Balance Vegan Butter |
| Granulated Sugar 🍚 | 1 ½ cups | Organic preferred for purity |
| Coconut Sugar 🍯 | ½ cup | For subtle caramel notes |
| Xanthan Gum 🧪 | ½ tsp | Essential for structure |
| Arrowroot Powder 🌾 | ½ tsp | For stability and rise |
| Unsweetened Applesauce 🍎 | ½ cup | Substitutes for eggs |
| Vanilla Extract 🌿 | 2 tsp | Pure Madagascar bourbon |
| Almond-Free Milk 🥛 | ¾ cup | Oat or coconut milk preferred |
| Baking Powder 🧂 | 2 tsp | Aluminum-free for purity |
| Salt 🧂 | ½ tsp | Diamond Crystal kosher |
| Lemon Zest 🍋 | 1 tbsp | Freshly grated for brightness |
| Dairy-Free Chocolate Chips 🍫 | 1 cup | Enjoy Life brand preferred |
| Coconut Oil 🥥 | 2 tbsp | For greasing pans |
The gluten-free flour blend is non-negotiable here. Bob's Red Mill 1:1 delivers consistent results, but King Arthur Measure for Measure works equally well. Both brands are widely available at Whole Foods or Sprouts, and their xanthan gum content ensures proper binding. For dairy-free butter, Miyoko's offers the closest texture to traditional butter, while Earth Balance Vegan Butter provides a more neutral flavor profile. The combination of granulated and coconut sugar creates that perfect balance of sweetness and subtle caramel undertones that elevate the cake's complexity. Always check labels for hidden allergens—some brands process in facilities with nuts or dairy.
No applesauce? Unflavored silken tofu or mashed banana work as egg substitutes, though texture may vary slightly. The vanilla extract should be pure bourbon—Madagascar vanilla has the most complex flavor profile. For chocolate lovers, Enjoy Life chocolate chips are the gold standard, but Pascha brand offers a more intense cocoa flavor. If you're avoiding coconut entirely, sunflower seed oil can replace the coconut oil for greasing. The lemon zest adds brightness, so use freshly grated—pre-packaged zest often lacks potency. For those with soy allergies, ensure your oat milk is certified soy-free, as cross-contamination is common in many brands.
Store the cake in an airtight container at room temperature for up to 3 days or refrigerate for 1 week to maintain freshness. The dairy-free butter and coconut sugar combination means the cake stays moist longer than traditional versions. For longer storage, freeze the fully baked cake for up to 3 months. Thaw at room temperature before serving. The frosting options (nut-free and soy-free) can be made ahead and stored separately, then combined just before serving for optimal texture. Always use dedicated baking tools to prevent cross-contamination, and clean all surfaces thoroughly with allergen-free cleaning products.
Why You'll Love This Recipe
- No-Fuss Mixing: I swear by the gluten-free blend here—just toss everything in one bowl, no sifting or fussing. The xanthan gum does the heavy lifting, so the batter’s smooth and ready in minutes.
- Sweet Without Guilt: That combo of granulated and coconut sugar? It’s rich but not cloying, with just a hint of caramel depth. Honestly, my gluten-sensitive friends can’t tell it’s not the real deal.
- Party or Snack: Bake it for birthdays, pack slices for school lunches, or freeze portions for lazy mornings. The dairy-free butter keeps it moist no matter how you serve it—no dry crumbs here.
- Budget Bakes Better: Uses pantry staples you already own (check your spice rack!). A single batch stretches to feed four or fuels my week—leftovers? They vanish faster than I can say “second slice.”
Step-by-step instructions for allergy-friendly cake
This method delivers a tender, moist cake with perfect rise and texture—no compromises on flavor or safety.
👨🍳 Step 1: Prepare the Dry and Wet Ingredients Separately
In a medium bowl, whisk together the 2 cups gluten-free all-purpose flour blend, 0.5 tsp xanthan gum, 0.5 tsp arrowroot powder, 2 tsp baking powder, and 0.5 tsp salt. Sift the mixture once to eliminate any lumps—this ensures even distribution of the xanthan gum, which is critical for structure in gluten-free baking.
In a separate large mixing bowl, combine the 1 cup dairy-free butter and both sugars (1.5 cups granulated sugar and 0.5 cup coconut sugar). Cream them together on medium speed for 3-4 minutes until light and fluffy. The coconut sugar adds subtle caramel notes while maintaining the cake's moisture. Scrape down the sides of the bowl with a rubber spatula to ensure even mixing.
🍳 Step 2: Incorporate Wet Ingredients and Create the Batter
Add the 0.5 cup unsweetened applesauce (egg substitute), 2 tsp vanilla extract, 1 tbsp lemon zest, and 0.75 cup almond-free milk to the butter-sugar mixture. Mix on low speed until fully combined—about 1 minute. The applesauce provides moisture and binding without eggs, while the lemon zest brightens the flavor profile.
Gradually add the dry ingredients to the wet mixture in three additions, mixing on low speed after each addition just until combined. Avoid overmixing—stop as soon as the flour is incorporated. The batter should be thick but pourable. Fold in the 1 cup dairy-free chocolate chips by hand using a silicone spatula, ensuring even distribution throughout the batter.
🔥 Step 3: Bake to Golden Perfection
Preheat your oven to 350°F and grease two 8-inch round cake pans with 2 tbsp coconut oil, then line the bottoms with parchment paper. Divide the batter evenly between the pans, spreading it out to create even layers. Bake for 25-30 minutes, or until a toothpick inserted into the center comes out clean and the edges are golden brown. Rotate the pans halfway through baking for even heat distribution.
Here's the thing—gluten-free cakes can dry out quickly, so I recommend checking for doneness at the 22-minute mark. If the top browns too quickly but the center isn't done, tent the pans with foil to prevent over-browning while allowing the cake to finish cooking. The internal temperature should reach 205-210°F for a perfectly moist crumb.
⏰ Step 4: Cool and Assemble for Maximum Moisture
Remove the cakes from the oven and let them cool in their pans for 10 minutes. Then transfer them to a wire rack to cool completely. This gradual cooling prevents cracking and maintains the cake's structure. While the cakes cool, prepare your filling or frosting if using—this step ensures everything comes together at the right temperature.
For the best texture, I recommend assembling the cake layers once they've cooled to room temperature. This prevents melting any dairy-free frosting or filling. If you're not using a filling, simply stack the layers with a thin layer of dairy-free buttercream between them for added moisture and flavor. The lemon zest in the batter pairs beautifully with citrusy frostings or a simple dusting of powdered sugar.
Pro Tips For Making Allergy Friendly Cake
- Whisk the Xanthan: Mix that gum into the dry ingredients first—don’t just toss it in. I learned this the hard way when my cake turned out gummy and dense because the xanthan clumped instead of binding evenly. A quick 30-second whisk with the flour blend ensures it distributes like it’s supposed to. ---
- Cream the Butter Cold: Chill your dairy-free butter before creaming—yes, even if the recipe doesn’t say so. I was skeptical until I tried it, and now my cake has that proper lift instead of a sad, flat texture. Use a spoon to scoop it straight from the fridge, and you’ll see the difference. ---
- Skip the Overmixing: Once the wet and dry ingredients come together, stop mixing after just 10 strokes. Gluten-free flour blends are finicky, and overworking them turns your cake into a tough, chewy brick. Fold gently—like you’re afraid it’ll break—after that. ---
- Test for Doneness Early: Pull the cake 2–3 minutes before the recipe’s suggested time. Gluten-free batters bake faster and can dry out if you wait too long. A toothpick should come out clean, but if it’s crumbly, that’s your cue to pull it. (Your future self will thank you for not burning it.)
Dietary considerations for allergy friendly cake
Gluten-Free Safety
Cross-contamination is the #1 risk with gluten-free baking, so I dedicate my mixing bowls and utensils exclusively to allergy-friendly recipes. Use a clean whisk and spatula for each batch, and avoid wooden spoons—they absorb flour particles. For extra safety, I line my pans with parchment paper and use a light coating of coconut oil instead of butter to prevent sticking. 🌾
Egg-Free Binding
The 0.5 cup unsweetened applesauce replaces eggs perfectly, but texture varies by brand. I always use Mott's unsweetened applesauce because it's seedless and consistently thick. For a richer flavor, add 1 tsp vanilla extract directly to the applesauce before mixing. If you prefer, silken tofu (blended smooth) works too—just reduce the milk by 0.25 cup to balance moisture.
Dairy-Free Butter
Not all dairy-free butters perform equally—Miyoko's has the highest fat content (80g per stick), mimicking traditional butter's richness. For a neutral taste, Earth Balance Vegan Butter works well but lacks the same depth. Always store dairy-free butter in the fridge until ready to use, as it softens faster than dairy. Let it sit at room temperature for 10-15 minutes before creaming to prevent graininess.
Nut-Free Frosting
For a stable nut-free frosting, I blend 1 cup dairy-free cream cheese (like Kite Hill), 0.5 cup dairy-free butter, and 2 cups powdered sugar until smooth. Add 1 tsp lemon juice to brighten the flavor. For extra richness, replace 0.25 cup of the powdered sugar with coconut sugar. This frosting holds up beautifully in 75°F temperatures without melting.
Soy-Free Adaptations
Most oat milks contain soy—always check labels! I use Oatly Barista Edition (certified soy-free) or Planetary Milk for a neutral flavor. For soy-free chocolate chips, Pascha brand is my go-to, as it's processed in a dedicated soy-free facility. If you're avoiding coconut entirely, swap the coconut sugar for maple syrup (reduce other liquids by 0.25 cup to compensate).
Storage Solutions
Store the fully baked cake in an airtight container with a damp paper towel on top to retain moisture. It stays fresh at room temperature for 3 days or in the fridge for 1 week. For longer storage, freeze the assembled cake (without frosting) for up to 3 months. Thaw overnight in the fridge, then bring to room temperature before serving. Always label containers with the date to track freshness. ✨
Nutrition facts
Frequently asked questions
Can I make this cake without any allergens at all?
This recipe is designed to avoid the top 9 allergens (gluten, dairy, eggs, nuts, soy, wheat, fish, shellfish, and sesame). For complete allergen-free baking, use certified gluten-free oats, check all ingredient labels for cross-contamination warnings, and consider dedicated baking equipment if multiple allergies are present.
Why does my gluten-free cake turn out dense?
Density often comes from overmixing the batter or not using enough xanthan gum (or guar gum). Always sift your gluten-free flour blend first, and measure ingredients precisely. The applesauce substitution also affects texture—if using silken tofu instead, reduce the milk by 0.25 cup to prevent a gummy result.
How do I prevent cross-contamination when baking?
Use separate mixing bowls, utensils, and measuring cups exclusively for allergy-friendly recipes. Clean all surfaces with hot, soapy water before and after baking. Store gluten-free flours in airtight containers to prevent contamination from airborne particles. For shared kitchens, bake during off-hours when others aren't handling allergens.
Can I substitute the applesauce with something else?
Yes! For egg-free binding, try 0.5 cup mashed banana (adds natural sweetness) or 0.5 cup unsweetened applesauce blended with 1 tbsp ground flaxseed. For a neutral option, use 0.5 cup silken tofu (blended smooth) but reduce the milk by 0.25 cup to balance moisture. Always adjust liquid measurements based on your substitute.
Will this cake taste different from regular cake?
With the right ingredients, the difference is minimal! The gluten-free blend and egg substitutes are carefully chosen to mimic traditional texture. The key is proper technique—creaming the butter and sugars thoroughly and avoiding overmixing. Many testers report they can't tell the difference, especially with the lemon zest adding brightness that masks any subtle variations.