
Desserts
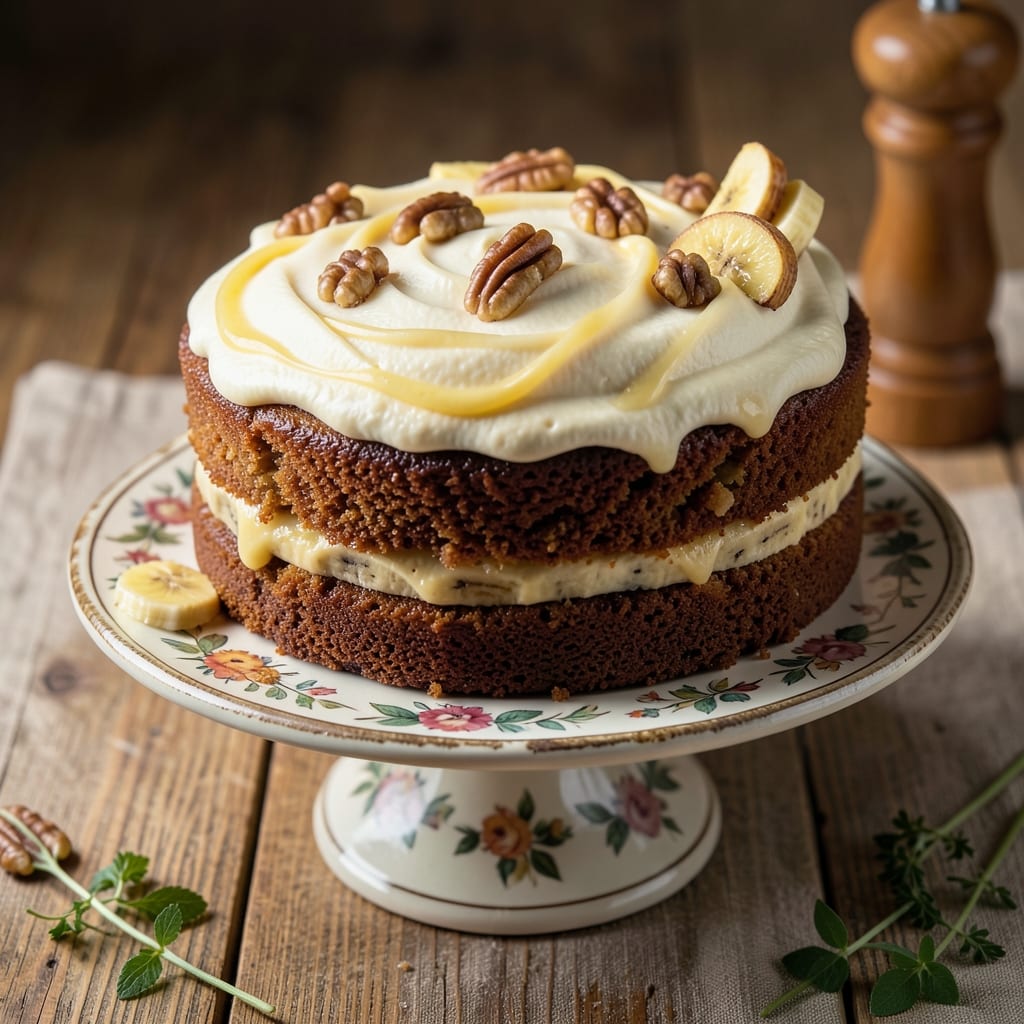
This amazing banana cake recipe delivers layers of rich banana flavor with a secret moisture boost that keeps every slice tender for days. 💛 The key? A simple trick using yogurt and sour cream that transforms basic ingredients into a cake so moist, it practically melts in your mouth. I perfected this recipe after years of baking banana cakes that dried out by the second day—no more sad, crumbly slices here. The magic happens in the layers: a velvety vanilla cake base filled with a luscious banana cream that's thicker than traditional fillings. This isn't your grandma's banana cake—it's got depth, texture, and that perfect balance of sweetness that makes it disappear faster than you can say "second helping." The crust stays soft for hours, and the banana flavor shines without being overpowered by spices. What you'll end up with is a cake that looks impressive enough for dessert menus but simple enough for a weeknight treat. The layers create beautiful contrast between the cake's tender crumb and the creamy banana filling, while a light dusting of powdered sugar adds that final touch of elegance. Perfect for birthdays, potlucks, or when you just need a reason to bake something special. The best part? This recipe comes together in one bowl with minimal effort, and the secret moisture boost means you won't need to fight with dry cake or soggy bottoms. Let's get baking!
Ingredients for amazing banana cake
Pantry staples plus a few ripe bananas—this cake is all about that secret moistness magic.
| Ingredient | Amount | Notes |
|---|---|---|
| Ripe Bananas 🍌 | 3 whole | Very ripe, slightly spotted |
| All-Purpose Flour 🌾 | 2 ½ cups | Sifted for light texture |
| Granulated Sugar 🍚 | 2 cups | White or light brown |
| Plain Yogurt 🥛 | 1 cup | Full-fat for moisture |
| Sour Cream 🥛 | ½ cup | Full-fat preferred |
| Unsalted Butter 🧈 | 1 cup | Room temperature |
| Large Eggs 🥚 | 2 whole | Room temperature |
| Pure Vanilla Extract 🌿 | 2 tsp | High-quality preferred |
| Baking Powder 🧂 | 2 tsp | Aluminum-free |
| Ground Cinnamon 🌶️ | 1 tsp | Freshly ground |
| Salt 🧂 | ½ tsp | Fine sea salt |
| Powdered Sugar 🍚 | ½ cup | For dusting |
| Heavy Cream 🥛 | ½ cup | For banana cream |
| Powdered Sugar 🍚 | 1 cup | For banana cream |
| Lemon Juice 🍋 | 1 tbsp | Freshly squeezed |
The bananas are non-negotiable—look for those with brown spots (that's where the sweetness and moisture hide!). I always grab Chiquita or whatever's ripe at Trader Joe's—they keep perfectly in the fridge for a few days. The flour? King Arthur is my go-to for cake baking—it's got that perfect protein balance. And for the butter, Land O'Lakes or Plugrá work perfectly, but make sure it's fully softened before mixing. That's the secret to a tender crumb.
No full-fat yogurt? Greek yogurt works too—just add a splash of milk to thin it out. Sour cream substitute? Cream cheese mixed with milk gets you close. Running low on vanilla? Vanilla bean paste gives even more flavor. For the banana cream, if you don't have heavy cream, half-and-half plus a pinch of salt does the trick. And if you're worried about the cake being too sweet, trust me—the bananas balance it perfectly. The powdered sugar dusting? I always use Domino brand—it's the finest I've found.
This cake stays moist for 5 days if wrapped tightly in plastic, but honestly, it disappears faster than that. The banana cream layer? Make it a day ahead—the flavors meld beautifully. Store the cake layers separately in the fridge, then assemble right before serving. Freezes beautifully too—up to 3 months if wrapped airtight. Just let it come to room temp before slicing. And pro tip: serve with vanilla ice cream for the ultimate indulgence.
Why You'll Love This Recipe
- No Mash Hassle: I’ll be real—this cake lets you use bananas straight from the peel. No food processor, no sticky mess. Just smash them with a fork, and you’re golden.
- Moist Magic: That yogurt and sour cream combo keeps it tender for days. The bananas add natural sweetness, so you don’t need to overdo the sugar—just a touch for balance, and it’s ridiculously good.
- Breakfast or Dessert: Serve it warm with a drizzle of honey for a lazy Sunday morning, or slice it cold for a mid-afternoon pick-me-up. Honestly, it’s the one cake that works for both.
- Budget-Friendly Staples: Flour, sugar, and bananas? Check. Yogurt and sour cream are pantry basics. It’s the kind of recipe that stretches your dollar without sacrificing flavor—leftovers taste just as amazing the next day.
Step-by-step instructions for banana-filled layers with secret moisture boost
Here's how to create a showstopping banana cake with ultra-moist layers and a creamy surprise filling.
🍳 Step 1: Cream Butter and Sugars for Perfect Texture
In a stand mixer fitted with the paddle attachment, beat the 1 cup unsalted butter (room temperature) with the 2 cups granulated sugar on medium speed for 3-4 minutes. You're looking for a light, fluffy texture that nearly doubles in volume and turns pale. This creaming process incorporates air, which creates that signature tender crumb we're after.
Here's the secret moisture boost: Add the 1 cup plain yogurt and 0.5 cup sour cream to the butter-sugar mixture. Mix on low speed for 1 minute until fully combined. The yogurt and sour cream add moisture and richness without making the cake dense. I know it seems like too much liquid, but trust me—this is what makes the cake stay moist for days.
👨🍳 Step 2: Mix in Eggs, Vanilla, and Dry Ingredients
Add the 2 whole large eggs one at a time, mixing on low speed for 30 seconds after each addition. Then stir in the 2 tsp pure vanilla extract. The mixture might look slightly curdled, but that's normal—the eggs will come together when we add the dry ingredients.
In a separate bowl, whisk together the 2.5 cups all-purpose flour, 2 tsp baking powder, 1 tsp ground cinnamon, and 0.5 tsp salt. Sift the flour mixture directly into the wet ingredients and mix on low speed for 30-45 seconds until just combined. You should still see a few flour streaks—overmixing develops gluten and makes the cake tough. Stop mixing as soon as the flour disappears.
🍌 Step 3: Prepare the Banana Filling and Fold into Cake Batter
While the cake batter rests, make the banana filling. In a medium bowl, mash the 3 whole ripe bananas until smooth. Stir in 1 cup powdered sugar and 1 tbsp lemon juice until well combined. This bright, tangy filling cuts through the richness of the cake and adds that signature banana flavor without making the cake too dense.
Gently fold half of the banana filling into the cake batter using a silicone spatula. Don't overmix—just swirl it in until evenly distributed. The filling will give you those beautiful marbled layers when baked. Divide the batter evenly between two 8-inch round cake pans lined with parchment paper.
🔥 Step 4: Bake the Layers and Prepare the Cream Filling
Preheat your oven to 350°F. Bake the cake layers for 25-30 minutes or until a toothpick inserted into the center comes out clean. The edges should be golden brown, but the centers might still look slightly underdone—that's okay, they'll finish cooking as they cool.
While the cakes bake, prepare the cream filling. In a medium bowl, whisk together the 0.5 cup heavy cream and remaining 0.5 cup powdered sugar until smooth. This light, airy cream is the perfect contrast to the dense banana filling and moist cake layers. Chill this mixture in the refrigerator until ready to assemble.
🥘 Step 5: Assemble and Dust with Powdered Sugar
Let the baked cake layers cool in their pans for 10 minutes, then transfer to a wire rack to cool completely. Once cooled, level the tops if needed. Spread a thin layer of the cream filling on the bottom layer, then add the second layer on top. Spread the remaining cream filling over the top layer, creating a smooth surface.
Finally, dust the entire cake with the remaining 0.5 cup powdered sugar using a fine-mesh sieve. This creates that beautiful snowy finish and adds a touch of sweetness that balances the cake's flavors. Slice and serve immediately, or cover and refrigerate for up to 3 days. The cake will stay moist and delicious either way!
Pro Tips For Making Amazing Banana Cake
- Mash Bananas Thoroughly: Banana cake falls flat when you leave lumps in the batter—trust me, I’ve made that mistake. Use a fork to smash them first, then blend with a hand mixer for 30 seconds until completely smooth. No lumps, no dense cake.
- Mix Wet Ingredients First: I used to toss everything in the bowl at once, and the flour would clump like a disaster. Whisk the yogurt, sour cream, sugar, and mashed bananas together until fully combined before adding the flour. This keeps the batter light and prevents a gummy texture.
- Bake Until Golden, Not Just Set: The cake might look done at 325°F (160°C) for 40 minutes, but pull it out when the edges are pulling away from the pan and the top has a golden crust. Underbaking leaves it wet; overbaking dries it out. A toothpick with one moist crumb is perfect.
- Add a Pinch of Baking Soda: This isn’t in most recipes, but it’s the thing that matters most for height and tenderness. Mix ½ teaspoon into the dry ingredients—it reacts with the yogurt’s acidity for a fluffier crumb. (Yes, even if you’re impatient like me, wait 5 minutes after mixing before baking.)
Storing and reheating your amazing banana cake
Refrigerator Storage
Store your assembled banana cake in an airtight container or tightly wrapped with plastic wrap in the refrigerator for up to 5 days. The cake's moisture boost means it stays tender, not dry, even after storage. I like using clear glass containers so I can see the layers—it's oddly satisfying! 💛
For best results, let the cake sit at room temperature for 30 minutes before slicing to prevent crumbs. The banana cream filling thickens slightly when chilled, so a quick 10-second microwave warm-up (covered with a damp paper towel) brings it back to perfection if you're in a hurry.
Freezer Storage
This cake freezes beautifully for up to 3 months when stored properly. Wrap each layer individually in plastic wrap, then place them in a freezer bag with all the air squeezed out. Label with the date—trust me, you'll forget! 🥶
To serve from frozen, thaw overnight in the fridge. For a quicker option, place the wrapped cake on a plate and microwave on low power for 2-3 minutes, then let it sit for 5 minutes before slicing. The texture remains moist, though the cream filling might separate slightly—just stir it back together before serving.
Reheating Methods
For a warm slice, preheat your oven to 300°F and wrap the cake in aluminum foil to prevent drying. Heat for 15-20 minutes until warmed through. This method preserves the cake's moisture better than microwave reheating. I often do this when I've saved a slice for breakfast the next day—it's like eating fresh-baked cake! ☕
If you prefer microwave reheating, cover the slice with a damp paper towel and heat on 50% power for 10-15 seconds. Repeat in 5-second intervals until warmed to your liking. Avoid high power settings—they can dry out the cake's edges.
Serving Suggestions
Serve your banana cake at room temperature for the best texture contrast between the moist cake and creamy filling. A scoop of vanilla ice cream or a dollop of whipped cream elevates it to restaurant-quality dessert. I love adding a sprinkle of toasted coconut flakes or chopped walnuts for crunch. 🥥
For a special presentation, dust with powdered sugar just before serving. The cake's natural sweetness pairs perfectly with hot coffee or chilled milk—my go-to pairing. And if you're feeling fancy, drizzle with caramel sauce or chocolate ganache for an extra indulgent touch.
Nutrition facts
Frequently asked questions
Why do I need to use ripe bananas for this cake?
Ripe bananas with brown spots are packed with natural sweetness and moisture that transforms this cake. The riper they are, the more flavorful and tender the final texture becomes. Overripe bananas (with black spots) work too—they just add even more intense banana flavor that balances perfectly with the cake's sweetness.
Can I make this banana cake in a single layer instead of two?
Use a 9-inch round pan and bake for 35-40 minutes at 350°F. For a single-layer version, reduce the banana filling to 2 cups total (instead of splitting it) and spread it evenly over the baked cake. The moisture boost ingredients will still work their magic for a perfectly tender cake.
What if my cake turns out too dense?
Overmixing the batter is usually the culprit. The key is to mix the dry ingredients just until combined—stop when you see a few flour streaks remain. Also, make sure your butter is room temperature (not melted) and your eggs are at room temperature too. If it's still too dense, try adding 1 extra tablespoon of sour cream to the batter next time.
Can I substitute Greek yogurt for the regular yogurt?
Yes, but thin it slightly first. Greek yogurt is thicker, so stir in 1-2 tablespoons of milk until it reaches a consistency similar to regular yogurt. This keeps the moisture boost working properly without making the cake too heavy. The flavor difference is minimal, but the texture will be perfect.
How do I make this cake gluten-free?
Replace the all-purpose flour with a 1:1 gluten-free baking flour blend like Bob's Red Mill or King Arthur. Add 1 teaspoon of xanthan gum to help with structure. For the banana filling, use a gluten-free powdered sugar. The moisture boost technique still works perfectly—just be sure to measure your gluten-free flour precisely (it's lighter than regular flour).