
Desserts
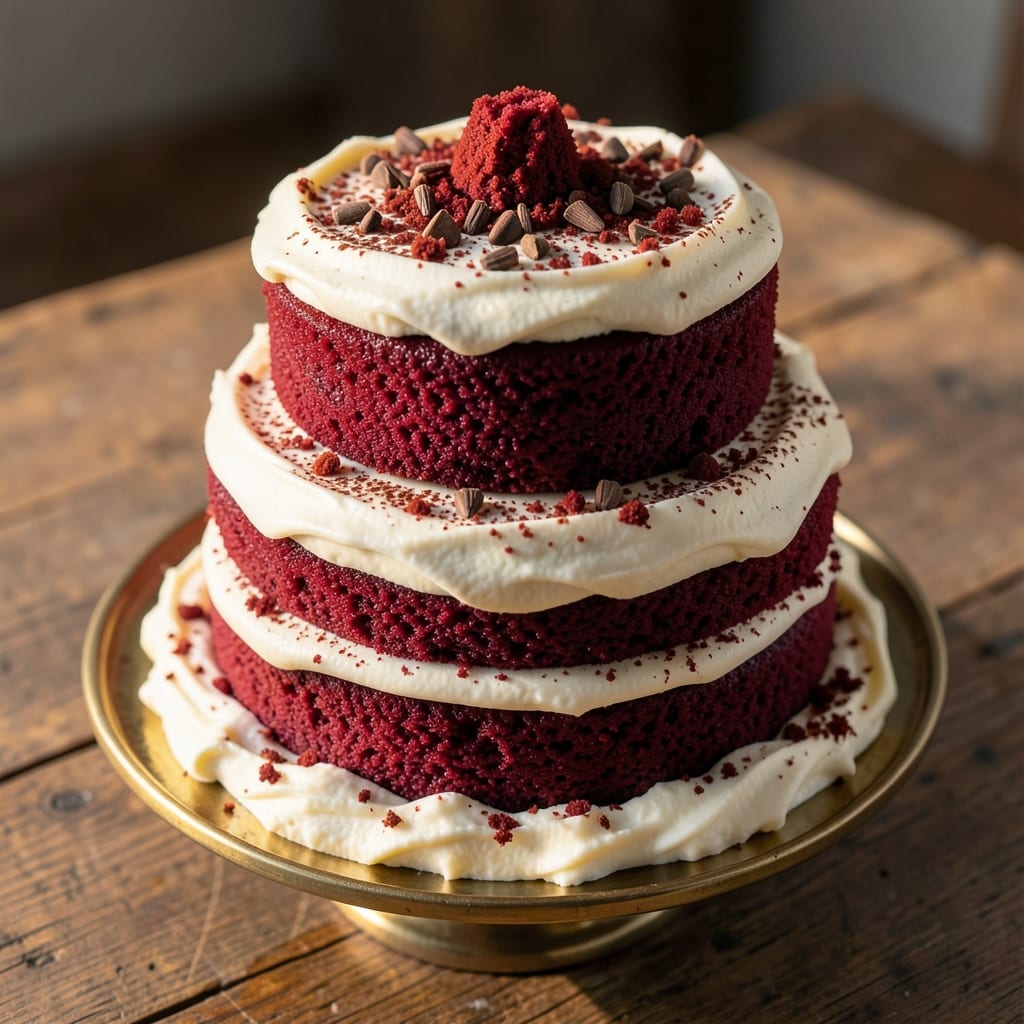
This amazing red velvet cake recipe delivers velvety moistness and that signature tangy-sweet flavor you crave—without a single dry bite. 💛 The secret? A buttermilk boost that keeps it tender while the cocoa and vinegar create that perfect balance of richness and brightness. I've baked this cake for birthdays, holidays, and just-because moments, and it never fails to impress.
The magic starts with the batter—creamy from both butter and oil, lightly colored with just enough red food coloring to achieve that classic look. What sets this apart is the hot water trick for the cocoa powder, which creates a smooth, lump-free mixture that bakes up perfectly every time. The cake rises just enough to be fluffy but stays dense enough to hold up to cream cheese frosting.
By the time it comes out of the oven, you'll have layers of moist, velvety cake with a tender crumb that practically melts in your mouth. The buttermilk keeps it from drying out, while the brown sugar adds subtle caramel notes that make each slice taste even better the next day. This is the kind of cake that disappears quickly—guaranteed to be your new go-to recipe.
Pair it with classic cream cheese frosting or a lighter vanilla glaze, and you've got a dessert that's perfect for celebrations or satisfying cravings. The best part? It's easier than you think, with straightforward steps that even beginner bakers can master. Let's make this amazing red velvet cake!
Ingredients for amazing red velvet cake
Twelve ingredients, one showstopping cake—moist layers with that signature tang.
| Ingredient | Amount | Notes |
|---|---|---|
| All-Purpose Flour 🌾 | 2 ½ cups | Sifted for lightness and aeration |
| Unsalted Butter 🧈 | 1 cup | Room temperature, full-fat preferred |
| Granulated Sugar 🍚 | 1 ¾ cups | Superfine for smoother texture |
| Light Brown Sugar 🍚 | ½ cup | Packed, for moisture and depth |
| Buttermilk 🥛 | 1 cup | Room temperature, tangy brand preferred |
| Vegetable Oil 🫒 | ½ cup | Light, neutral flavor |
| Red Food Coloring 🎨 | ¼ tsp | Gel or liquid, vibrant red |
| Unsweetened Cocoa Powder 🍫 | ½ cup | Dutch-processed for smoothness |
| Vanilla Extract 🌿 | 2 tsp | Pure, high-quality extract |
| Baking Soda 🧂 | 1 tsp | Freshly opened for potency |
| Salt 🧂 | ½ tsp | Fine sea salt preferred |
| Hot Water 💧 | ½ cup | Freshly boiled, for dissolving cocoa |
| White Vinegar 🍶 | 1 tbsp | For enhancing buttermilk tang |
The buttermilk is non-negotiable here—it’s what gives this cake its signature tang and moisture. Store-bought buttermilk works, but for best results, mix 1 cup milk with 1 tbsp white vinegar and let it sit for 5 minutes. The cocoa powder should be Dutch-processed (alkalized) for a smoother flavor—avoid natural cocoa unless you want bitterness. I always grab my butter from Whole Foods or the bakery section at Kroger, where it’s fresh and full-fat. For the red food coloring, gel-based blends better than liquid and won’t bleed into the batter.
No buttermilk? Mix 1 cup milk with 1 tbsp vinegar or lemon juice—it’s the same science. Running out of Dutch-processed cocoa? Natural cocoa works in a pinch, but reduce it to 0.375 cups and add 1 extra tbsp sugar to balance the bitterness. The vinegar in the ingredients list might seem odd, but it’s just to boost that buttermilk tang—skip it if you’re using store-bought buttermilk with vinegar already. For the sugar, superfine sugar dissolves faster, but regular granulated works if you pulse it in a food processor first. And if you’re worried about the red food coloring, beet powder is a natural alternative (use 1.5 tbsp for the same effect).
This batter is best used fresh, but you can prep it a day ahead and refrigerate it overnight—just let it sit at room temperature for 30 minutes before baking. The cake keeps well at room temperature for 3 days in an airtight container, or you can freeze it for up to 3 months. I like to wrap individual layers in plastic wrap before freezing so I can pull out just what I need. For the frosting, wait until the cake is completely cool—at least 2 hours—or the frosting will melt right off.
Why You'll Love This Recipe
- No-Fuss Mixing: I swear by the creamy butter and buttermilk combo—it’s the secret to a cake that’s actually moist without being dense. No weird measurements or last-minute scrambling for substitutes; just mix, pour, and let the oven do the work.
- Velvet Magic: That perfect balance of cocoa and buttermilk? It’s not just red—it’s ridiculously good. The brown sugar adds this deep, caramel-like richness, while the butter keeps every bite tender. Honestly, I’ve tried store-bought mixes, but this tastes like a bakery’s.
- Double-Duty Cake: Slice it fresh or save half for later—it reheats like a dream. Between us, I’ve turned leftover slices into breakfast toast with whipped cream, and my kids still beg for more. (Yes, even on a Tuesday night.)
- Pantry Staple Power: You’re already using things you have: flour, sugar, butter. No specialty ingredients, no extra trips to the store. The buttermilk? If you don’t have it, just add a splash of vinegar to milk—boom, done. Budget-friendly and foolproof.
Step-by-step instructions for red velvet cake
Here's how to create a velvety, moist red velvet cake that's light yet rich—no dry crumbs in sight.
👨🍳 Step 1: Mix Dry Ingredients for Perfect Texture
In a large mixing bowl, whisk together the 2.5 cups all-purpose flour, 1 tsp baking soda, and 0.5 tsp salt. Sift the flour first for a lighter, airier texture—this prevents dense cake. In a separate small bowl, combine the 0.5 cup unsweetened cocoa powder and the 0.25 tsp red food coloring to create a vibrant base.
I like to use a whisk here to avoid developing gluten, which keeps the cake tender. The cocoa and food coloring blend forms the signature deep red hue that'll infuse every bite. Don't worry if the mixture looks uneven—it'll come together beautifully with the wet ingredients.
🍳 Step 2: Cream Butter and Sugars for Maximum Moisture
In a stand mixer fitted with the paddle attachment, beat the 1 cup unsalted butter (room temperature) with the 1.75 cups granulated sugar and 0.5 cup light brown sugar on medium speed for 3-4 minutes. You're looking for a light, fluffy texture that nearly doubles in volume. This creaming process incorporates air, which makes the cake rise beautifully.
Here's the thing—room temperature butter is crucial. If it's too cold, it won't cream properly, and if it's too soft, it'll make the cake greasy. Press the butter between two sheets of parchment and let it sit at room temperature for 30 minutes before starting. You'll know it's ready when it leaves a slight indent when pressed.
🥘 Step 3: Combine Wet Ingredients for the Buttermilk Boost
Add the 1 cup buttermilk, 0.5 cup vegetable oil, 2 tsp vanilla extract, and 1 tbsp white vinegar to the butter-sugar mixture. Mix on low speed for 1 minute until fully combined. The vinegar enhances the buttermilk's tang, which balances the sweetness and adds depth of flavor—this is your secret moisture boost.
Next, gradually add the dry ingredients to the wet mixture, mixing on low speed for 2 minutes until just combined. I always stop mixing as soon as the flour disappears—overmixing develops gluten, which makes the cake tough. The batter should be thick but smooth, with a vibrant red hue from the cocoa and food coloring.
🔥 Step 4: Dissolve Cocoa and Prepare the Batter
In a small saucepan, combine the 0.5 cup hot water with the cocoa and vinegar mixture from earlier. Heat over low heat for 1 minute, stirring constantly, until the cocoa dissolves completely. Let it cool for 5 minutes—this ensures the cocoa won't cook the eggs if you were adding them, though we're skipping eggs here for extra moisture.
Pour the cooled cocoa mixture into the batter and stir gently with a spatula until fully incorporated. The batter should be thick, vibrant, and smooth. Here's a pro tip: If the batter looks too thick, add 1-2 tablespoons of buttermilk to loosen it slightly. The batter should coat the back of a spoon but still hold its shape when dropped from a spoon.
⏰ Step 5: Bake to Golden Perfection
Preheat your oven to 350°F and grease two 9-inch round cake pans with butter or baking spray, then line the bottoms with parchment paper. Divide the batter evenly between the pans and smooth the tops with a spatula. Bake for 30-35 minutes or until a toothpick inserted into the center comes out clean.
I know it's tempting to open the oven early, but resist! The cake needs that full baking time to develop its structure and rise properly. The edges should be golden brown, and the top should spring back when gently pressed. Let the cakes cool in the pans for 10 minutes, then transfer them to a wire rack to cool completely before frosting. Patience here ensures clean slices and easy layering later.
Pro Tips For Making Amazing Red Velvet Cake
- Mix Dry Ingredients First: Don’t just toss everything in the bowl willy-nilly—sift the flour, cocoa powder, and salt together first. This cuts out lumps in the batter and guarantees even distribution of the cocoa, which is the thing that matters most for that signature deep red hue and smooth texture.
- Use Room-Temp Butter: Cold butter makes for a dense, greasy cake, and overly soft butter can cause the batter to separate. Let your unsalted butter sit out for 30-45 minutes until it’s pliable but not melted—press a finger into it, and it should leave a slight indent. (Yes, even if you’re impatient like me.)
- Don’t Overmix the Batter: Once you add the wet ingredients, mix just until combined—about 30 seconds past when the flour disappears. Overmixing develops gluten, which turns your tender cake into a tough brick. Stop when the batter looks shaggy but uniform, then fold in the buttermilk gently.
- Bake Until Cool to Touch: The cake’s done when the center springs back slightly when pressed and the internal temp hits 205-210°F. If you pull it out too soon, it’ll sink in the middle as it cools. Let it rest in the pan for 10 minutes, then transfer to a wire rack—this guarantees a stable crumb instead of a sad, collapsed center.
Serving suggestions for this recipe
Classic Cream Cheese Frosting
This cake shines with a 3-ingredient cream cheese frosting that balances sweetness perfectly. Beat 8 oz cream cheese (softened) with 1 cup unsalted butter and 4 cups powdered sugar until smooth. Add 1 tsp vanilla extract and a pinch of salt for depth. Spread between layers and on top—it pairs beautifully with the cake's tangy-sweet profile. 🎂
Fresh Berries Topping
Brighten your presentation with a strawberry-raspberry mix arranged in concentric circles on top. Use 1 cup sliced strawberries and ½ cup raspberries tossed in 1 tbsp powdered sugar for a light glaze. The berries' acidity cuts through the richness, while their vibrant colors make the cake visually stunning. Add fresh mint leaves for an elegant touch.
Chocolate Ganache Drizzle
For a decadent twist, drizzle dark chocolate ganache over the sides. Melt ½ cup dark chocolate chips with ½ cup heavy cream, then drizzle while warm. The chocolate enhances the cocoa notes in the cake while adding a luxurious finish. Use a squeeze bottle for clean, even lines. 🍫
Layered Presentation
Cut each layer into even 1-inch-thick slices for perfect portions. Stack layers with frosting between, then dust the top with powdered sugar for a bakery-style finish. For a rustic look, crumble ½ cup graham crackers around the base. Serve on a marble slab or wooden board for extra charm.
Wine Pairing
Pair with a sweet Moscato or Port wine to complement the cake's tangy-sweet balance. The effervescence of Moscato cleanses the palate, while Port's richness mirrors the frosting. For a non-alcoholic option, try sparkling peach tea—its floral notes harmonize beautifully. 🍷
Nutrition facts
Frequently asked questions
Why does red velvet cake have a tangy flavor?
The signature tang comes from the buttermilk and a touch of white vinegar in the batter. These ingredients create a subtle acidity that balances the sweetness and enhances the cocoa flavor. This is what makes the cake taste so distinctive compared to other chocolate cakes.
Can I make this cake without buttermilk?
Yes! Simply mix 1 cup milk with 1 tablespoon white vinegar or lemon juice and let it sit for 5 minutes to curdle. This homemade buttermilk works just as well and gives you control over the tanginess. The vinegar in the recipe is optional if you're using store-bought buttermilk.
How do I prevent my red velvet cake from being dry?
Moisture comes from the vegetable oil, room-temperature butter, and proper baking time. Don't overbake—remove the cake when a toothpick comes out clean (usually 30-35 minutes at 350°F). Also, let the cakes cool completely before frosting to prevent soggy layers. A 10-minute rest in the pan after baking helps too!
What's the best way to store leftover red velvet cake?
Keep it fresh by storing in an airtight container at room temperature for up to 3 days. For longer storage, wrap individual layers in plastic and freeze for up to 3 months. Thaw overnight in the fridge before serving. The frosting stays best when the cake is chilled—just re-whip it lightly if it softens.
Can I use natural cocoa powder instead of Dutch-processed?
You can, but reduce it to 0.375 cups and add 1 extra tablespoon of sugar to compensate for the bitterness. Dutch-processed cocoa dissolves more smoothly and gives a richer flavor. If you prefer natural cocoa, also consider adding ½ teaspoon baking powder for extra lift. The color will be slightly darker but still beautiful!