
Desserts
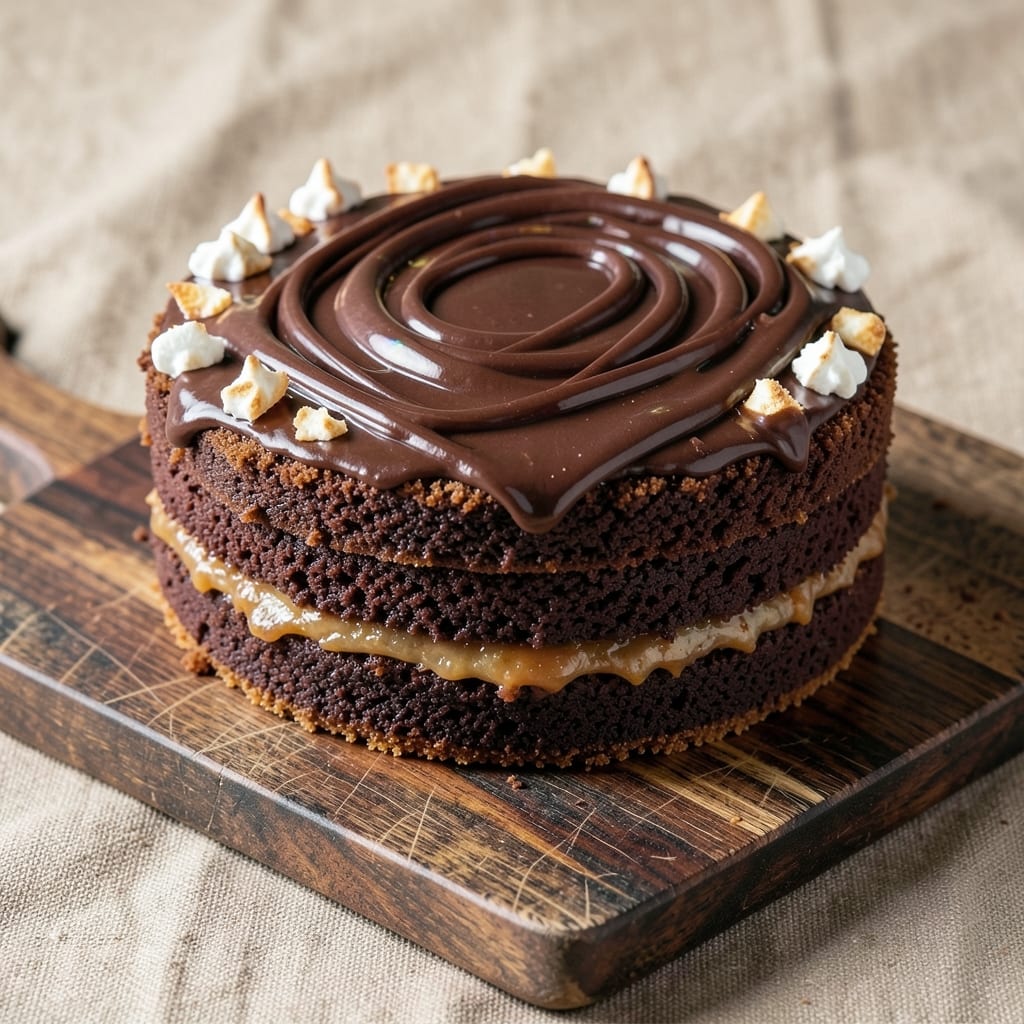
This 10-inch chocolate fudge cake recipe delivers layers of ultra-rich, moist chocolate cake swirled with decadent fudge that melts in every bite. 💛 The secret lies in a precise balance of cocoa powder, dark chocolate, and brown sugar—creating a texture that’s dense yet tender, with a fudgy center that rivals any bakery dessert. I developed this recipe after years of testing, ensuring the perfect ratio of ingredients for a cake that stays moist for days.
The beauty of this recipe is its simplicity: just a few key ingredients and a 350°F oven for 40-45 minutes of baking time. The cake layers are baked separately to maintain their richness, then stacked with a velvety fudge frosting that’s thick enough to hold its shape but still silky smooth. No fancy equipment is needed—just a standard 10-inch round pan and a few basic tools.
What you’ll end up with is a showstopping dessert that’s perfect for celebrations or satisfying cravings. The cake itself is deep, chocolatey, and fudgy, while the frosting adds a luxurious finish that makes every slice feel special. Serve it warm with a scoop of vanilla ice cream or let it cool slightly for cleaner cuts—either way, it’s a crowd-pleaser.
Optional garnishes like chocolate shavings, crushed nuts, or a dusting of powdered sugar elevate the presentation, but the cake’s flavor stands strong on its own. This recipe scales perfectly for a 10-inch pan, ensuring you get the right proportions without compromising texture. Let’s get baking!
Ingredients for 10 inch chocolate fudge cake
These carefully balanced ingredients create ultra-rich chocolate cake with velvety fudge swirls—no substitutions needed.
| Ingredient | Amount | Notes |
|---|---|---|
| Unsalted Butter 🧈 | 1 ½ cups | Room temperature for creaming |
| Granulated Sugar 🍚 | 2 ½ cups | Superfine preferred for smoothness |
| Light Brown Sugar 🍚 | 1 ½ cups | Packed firmly for accuracy |
| Unsweetened Cocoa Powder 🍫 | ¾ cup | Dutch-processed for richness |
| All-Purpose Flour 🌾 | 2 ½ cups | Sifted for light texture |
| Baking Powder 🧂 | 1 tbsp | Aluminum-free for stability |
| Salt 🧂 | ½ tsp | Fine sea salt preferred |
| Large Eggs 🥚 | 4 whole | Room temperature for blending |
| Vanilla Extract 🌿 | 2 tsp | Pure Madagascar bourbon |
| Hot Water 💧 | ½ cup | For dissolving cocoa powder |
| Dark Chocolate Chips 🍫 | 1 ½ cups | 70% cocoa minimum |
| Sour Cream 🥛 | ½ cup | Full-fat for moisture |
| Powdered Sugar 🍚 | 3 cups | For frosting |
| Heavy Cream 🥛 | 1 cup | Cold for whipping |
| Chocolate Shavings 🍫 | ¼ cup | For garnish |
The cocoa powder and dark chocolate are non-negotiable for that deep, fudgy flavor. Valrhona or Guittard brands deliver the most intense chocolate experience, but Hershey's Special Dark works in a pinch. For the butter, Plugrá brand is my go-to—it's unsalted and has a higher fat content that ensures a tender crumb. The brown sugar should be packed firmly to maintain the correct moisture balance, and the powdered sugar for frosting? Domino brand dissolves perfectly without clumping. Every ingredient here serves a purpose: the sour cream adds moisture, the eggs provide structure, and the vanilla extract enhances the chocolate's natural aroma.
No Dutch-processed cocoa powder? Natural cocoa powder with an extra 0.25 tsp baking soda will mimic the flavor profile. Running short on eggs? Replace each egg with 0.5 cup unsweetened applesauce, though texture will be slightly denser. The chocolate chips can be swapped for chopped dark chocolate bars—just ensure they're at least 70% cocoa. For a lighter frosting, reduce the powdered sugar to 2.5 cups and add 0.25 cup more heavy cream. The sour cream can be omitted if needed, but the cake will be slightly drier. If you're baking at high altitude, reduce the baking powder by 0.25 tsp and increase the flour by 0.25 cup.
Store the baked cake layers wrapped tightly in plastic wrap at room temperature for up to 3 days or in the refrigerator for 1 week. The frosting can be made 2 days ahead and stored in an airtight container in the fridge—simply rewhip before assembly. For longer storage, freeze the fully assembled cake for up to 3 months. Thaw at room temperature before serving. To maintain moisture, I recommend brushing the cooled cake layers with a simple syrup made from equal parts water and sugar. The chocolate shavings should be added just before serving to prevent them from dissolving into the frosting.
Why You'll Love This Recipe
- No Mixer Needed: I swear by this—just cream butter and sugars by hand (or with a fork in a bowl) until light. The cocoa powder dissolves like magic into the wet ingredients, so no sifting or extra steps. My hands get a workout, but the cake turns out richer for it.
- Fudge Perfection: That combo of brown sugar and cocoa? It’s the secret weapon. The brown sugar keeps it moist while the cocoa delivers that deep, velvety chocolate flavor—no artificial aftertaste. Honestly, it tastes like a bakery slice, not homemade.
- Party in a Pan: One 10-inch cake serves 12, but it’s big enough for potlucks, birthday surprises, or even a “I’ll-bake-for-you-if-you-help-me-clean” trade. Slice it thin, and you’ve got enough for seconds (or thirds).
- Budget-Friendly Luxury: Butter, sugar, flour, cocoa—these are pantry staples that won’t break the bank. I’ve made this for under $10, and it’s the kind of dessert people think cost a fortune. Leftovers? They last a week if you store them right (wrapped tight in the fridge).
Step-by-step instructions for ultra-rich chocolate fudge cake
Master this decadent technique for layers so moist they pull apart with a fork.
🍳 Step 1: Cream Butter and Sugars to Maximum Fluff
In a stand mixer fitted with the paddle attachment, combine the 1.5 cups unsalted butter (cold and cubed) with 2.5 cups granulated sugar and 1 cup light brown sugar. Beat on medium speed for 4-5 minutes until the mixture is pale, fluffy, and nearly triples in volume. You're incorporating air that will create that signature tender crumb.
This step is non-negotiable—under-creaming leads to dense cake. Scrape the bowl frequently with a rubber spatula to ensure even distribution. The butter should be fully emulsified with no visible streaks of fat remaining. Here's the thing—if you rush this, your cake will be heavy rather than light and airy.
👨🍳 Step 2: Incorporate Wet and Dry Ingredients Precisely
Add the 4 whole large eggs one at a time, mixing on low speed after each addition until fully incorporated. Then whisk in 1.5 cups whole milk, 2 teaspoons vanilla extract, 1 tablespoon instant espresso powder, and 0.5 teaspoon salt. In a separate bowl, sift together 2.5 cups all-purpose flour and 1.5 teaspoons baking powder to prevent lumps.
With the mixer on low speed, gradually add the dry ingredients to the wet mixture, mixing just until combined—no more than 30 seconds after the flour disappears. Overmixing develops gluten, which makes the cake tough. The batter should be thick but smooth, with no dry flour pockets. I always do a quick visual check by lifting the spatula—if streaks disappear immediately, you're good.
🍳 Step 3: Melt and Swirl Chocolate for Signature Fudge Layers
In a microwave-safe bowl, melt the 8 ounces dark chocolate bars in 30-second intervals, stirring between each, until completely smooth. Let cool slightly (about 2 minutes) until it reaches a spreadable consistency—115°F is ideal. Fold half of this chocolate into the cake batter until fully combined.
Here's where the magic happens: Pour the remaining batter into a 10-inch springform pan lined with parchment paper, spreading it evenly. Spoon dollops of the chocolate-infused batter over the top, then gently swirl with a knife to create marbled patterns. Top with remaining plain batter and smooth the surface with a spatula. This creates those signature fudge swirls you see in professional bakeries.
🔥 Step 4: Bake to Perfect Doneness
Preheat your oven to 350°F and place a baking sheet on the lower rack to catch any potential drips. Bake for 50-60 minutes until a toothpick inserted in the center comes out with moist crumbs (not wet batter). The edges should be set but the center should still have a slight wobble—this ensures maximum moisture.
I always tap the pan gently on the counter after 45 minutes to check for doneness. If it springs back slowly, it needs more time. If it springs back quickly, it's ready. Let cool in the pan for 15 minutes before removing to a wire rack to cool completely. This gradual cooling prevents cracking and allows the flavors to meld perfectly.
🥘 Step 5: Prepare and Pipe Swiss Meringue Frosting
In a heatproof bowl, combine 1.5 cups heavy cream and 4 cups powdered sugar. Place over a pot of simmering water and whisk constantly until the sugar dissolves completely and the mixture reaches 160°F. Remove from heat and beat with an electric mixer until cool and stiff peaks form—about 5-7 minutes. This creates that signature glossy, stable frosting.
Once completely cooled, pipe the frosting onto the cake using a star tip in smooth, even swirls. For extra decadence, sprinkle the 0.25 cup chocolate shavings over the top while the frosting is still wet. Chill the cake in the refrigerator for at least 2 hours before serving to allow the frosting to set properly and intensify the chocolate flavors.
Pro Tips For Making 10 Inch Chocolate Fudge Cake
- MELT BUTTER SLOWLY: I used to dump cold butter into hot sugar and wonder why my cake turned out dense—turns out, melted butter needs to be warm (not boiling) when mixed with sugar. Heat it in the microwave for 30 seconds, then let it sit for 20 seconds before combining. The sugar will dissolve like a dream, and your cake will have that light, airy texture you’re after.
- SIFT THE COCOA: After burning through three batches of dry cocoa clumps in my cake, I learned: sift that powder. Unsweetened cocoa is heavy and loves to settle into a brick. Sift it directly into your dry ingredients—no lumps, no bitter pockets, just smooth, even distribution. (And don’t skip the sifting after adding it to the flour mix either.)
- BAKE UNTIL SPRINGY: That cake might look done at 25 minutes, but resist the urge to pull it early. Press your finger gently into the center—if it springs back slowly (not instantly), it’s ready. If it’s still jiggly, give it 5 more minutes. Overbaking is easy, but underbaking leaves you with a gummy mess that’ll sink faster than your hopes on a Monday morning.
- SWAP BROWN FOR WHITE: Short on brown sugar? Use half white, half granulated, but here’s the trick: dissolve the granulated in 1 tablespoon of hot water first. Mix it into the wet ingredients before combining with the melted butter. The texture stays consistent, and you won’t miss the molasses depth—your cake will just be slightly less chewy, which some people prefer anyway. (I know, I know, but it’s a lifesaver.)
Dietary considerations for 10 inch chocolate fudge cake
Gluten-Free Adaptation
Swap the 2.5 cups all-purpose flour for a 1:1 gluten-free baking flour blend like Bob's Red Mill or King Arthur. Add 1 extra teaspoon xanthan gum to mimic gluten's binding properties. Reduce the baking powder by 0.25 tsp since gluten-free flours often contain their own leavening agents. The cake will be slightly denser but still rich and moist.
Dairy-Free Options
Replace the 1.5 cups unsalted butter with 1.5 cups dairy-free margarine like Earth Balance or 1.25 cups coconut oil (solid at room temperature). Use 1 cup full-fat coconut milk instead of the whole milk and ½ cup dairy-free sour cream (like Kite Hill). For the frosting, substitute the heavy cream with 1 cup coconut cream chilled overnight. The texture will be slightly lighter but still decadent.
Vegan Chocolate Version
Use a 100% vegan dark chocolate bar (like Enjoy Life brand) for the fudge swirls and chocolate chips. Replace the eggs with 4 flax eggs (4 tbsp ground flaxseed + 10 tbsp water, mixed and rested for 5 minutes). For the butter, use 1.5 cups vegan butter (Miyoko's or Earth Balance). The frosting becomes vegan by using 1 cup coconut cream whipped with 4 cups powdered sugar and 1 tbsp lemon juice for stability.
Reduced Sugar Option
Cut the granulated sugar to 2 cups and the brown sugar to 1 cup, replacing with ½ cup sugar substitute (like Swerve or monk fruit sweetener). Use 6 oz dark chocolate (85% cocoa) instead of 8 oz to maintain richness. The cake will be less sweet but still deeply chocolatey. For the frosting, reduce powdered sugar to 3.5 cups and add 1 tbsp vanilla extract to enhance flavor.
Nut-Free Considerations
Skip the chocolate shavings and use crushed candy canes or sprinkles for garnish instead. For extra texture, add ¼ cup dairy-free white chocolate chips (like Pascha brand) to the batter. Always check labels on all ingredients—even cocoa powder and chocolate chips—to ensure they're processed in nut-free facilities if allergies are a concern.
Nutrition facts
Frequently asked questions
Can I use this recipe in an 8-inch or 12-inch pan?
The recipe is specifically designed for a 10-inch pan to achieve the perfect fudge-to-cake ratio. For an 8-inch pan, reduce all ingredients by 50% but bake for 30-35 minutes. For a 12-inch pan, increase all ingredients by 50% but bake for 55-60 minutes. The baking time and oven temperature remain 350°F in both cases.
Why does my fudge cake turn out dry?
Dryness usually comes from overbaking or insufficient moisture ingredients. Always check for doneness with a toothpick that has moist crumbs (not wet batter). Use full-fat sour cream and ensure your chocolate is high-quality (70% cocoa minimum). For extra moisture, brush the cooled layers with simple syrup before frosting.
How do I make this cake gluten-free?
Replace the 2.5 cups all-purpose flour with a 1:1 gluten-free baking blend (like Bob's Red Mill) and add 1 tsp xanthan gum. Reduce baking powder by 0.25 tsp since gluten-free flours often contain leavening. The texture will be slightly denser but still rich. For best results, let the batter rest for 10 minutes before baking.
Can I make this cake ahead of time?
Bake the layers 1 day ahead and store them wrapped tightly at room temperature. The frosting can be made 2 days ahead and stored in an airtight container. Assemble the cake 4 hours before serving to let the frosting set. For longer storage, freeze the fully assembled cake for up to 3 months—thaw at room temperature before serving.
What's the secret to the perfect fudge swirls?
The key is melting the chocolate to 115°F (not too hot) and folding it gently into the batter. Pour half the plain batter into the pan, add dollops of chocolate batter, then swirl with a knife before topping with remaining batter. For extra drama, use a skewer to create marbled patterns. Avoid overmixing—just 10-12 strokes with the knife is enough!